Quickstart
Deploy a Foundry or Hardhat project to a Stagenet and inspect the deployed contracts in Workspaces.
You will:
- Create a Stagenet
- Push your smart contracts to your Stagenet
- Run your existing deployment scripts against your Stagenet
By the end, you will have:
- Your contracts deployed on a private EVM testnet that follows mainnet state
- Live dashboards to visualise their transactions, TVL, balances, storage, and data
You do not need to change your contracts. All you need is:
- A Hardhat or Foundry project
- A deployment script or command
Create a Stagenet
Start by creating a new contract.dev project. Each one includes its own Stagenet, a private testnet that replays a target EVM chain and comes with built-in development tools.
Choose the chain you want your Stagenet to replicate during project setup.
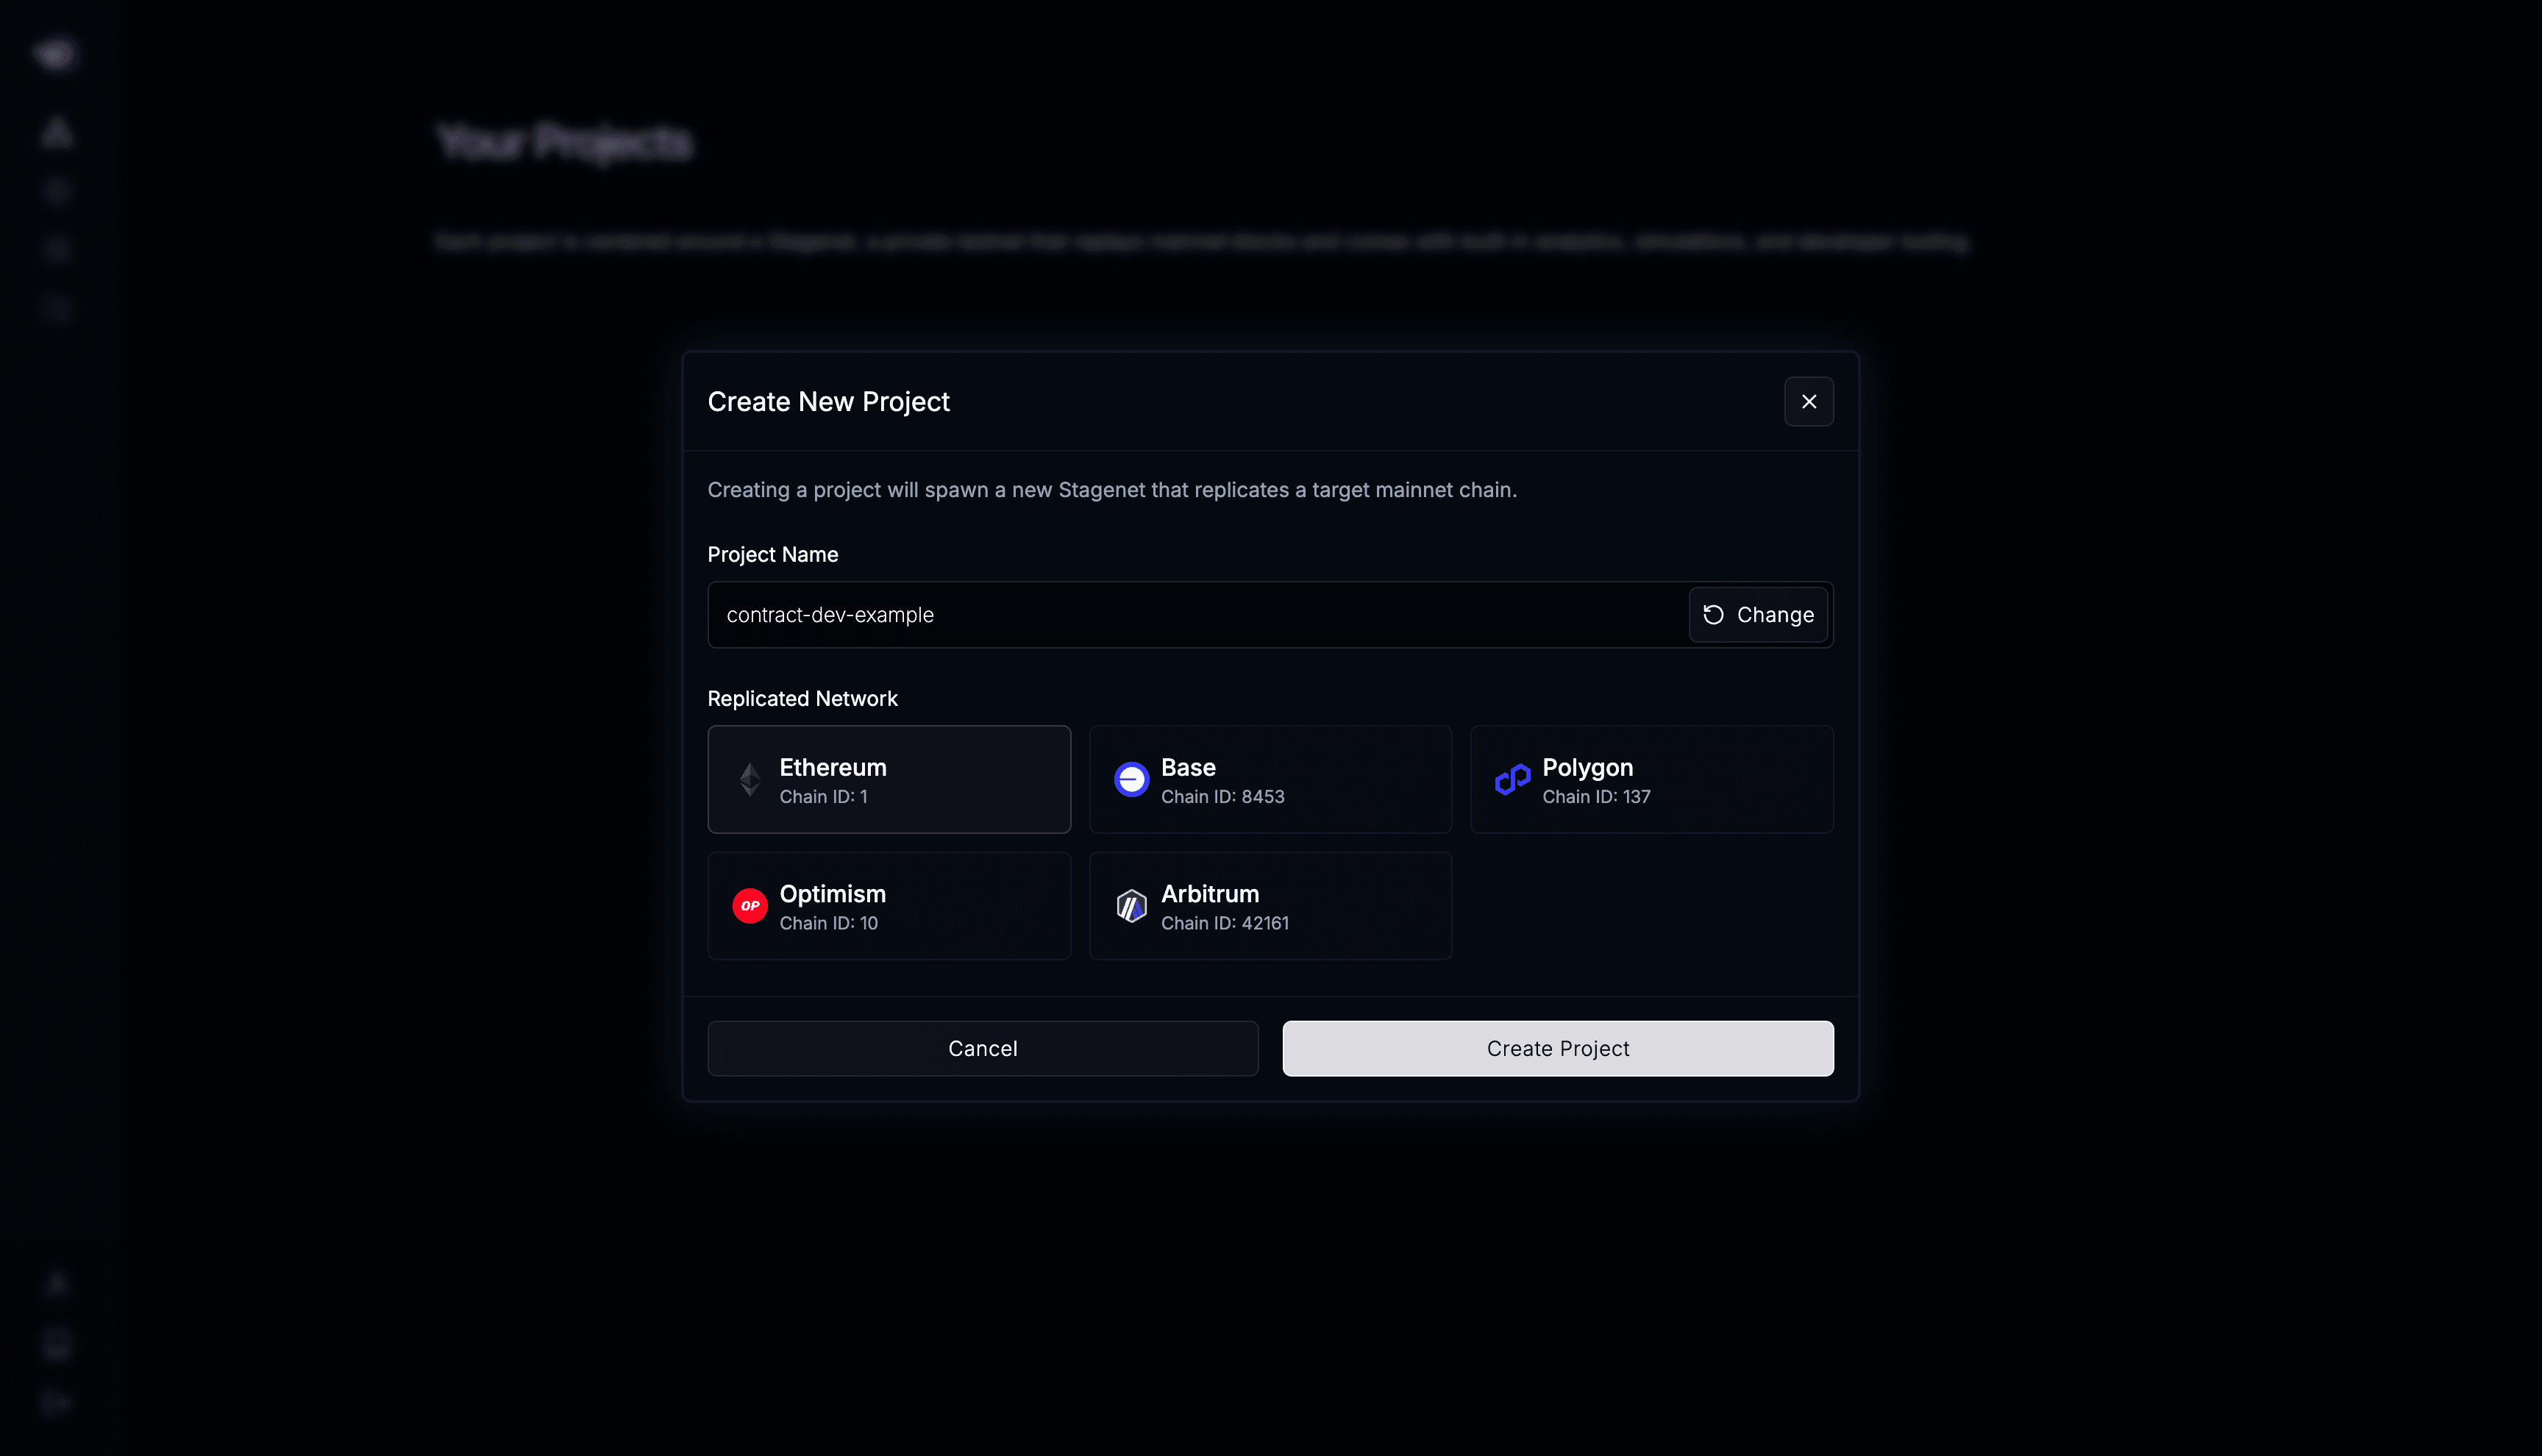
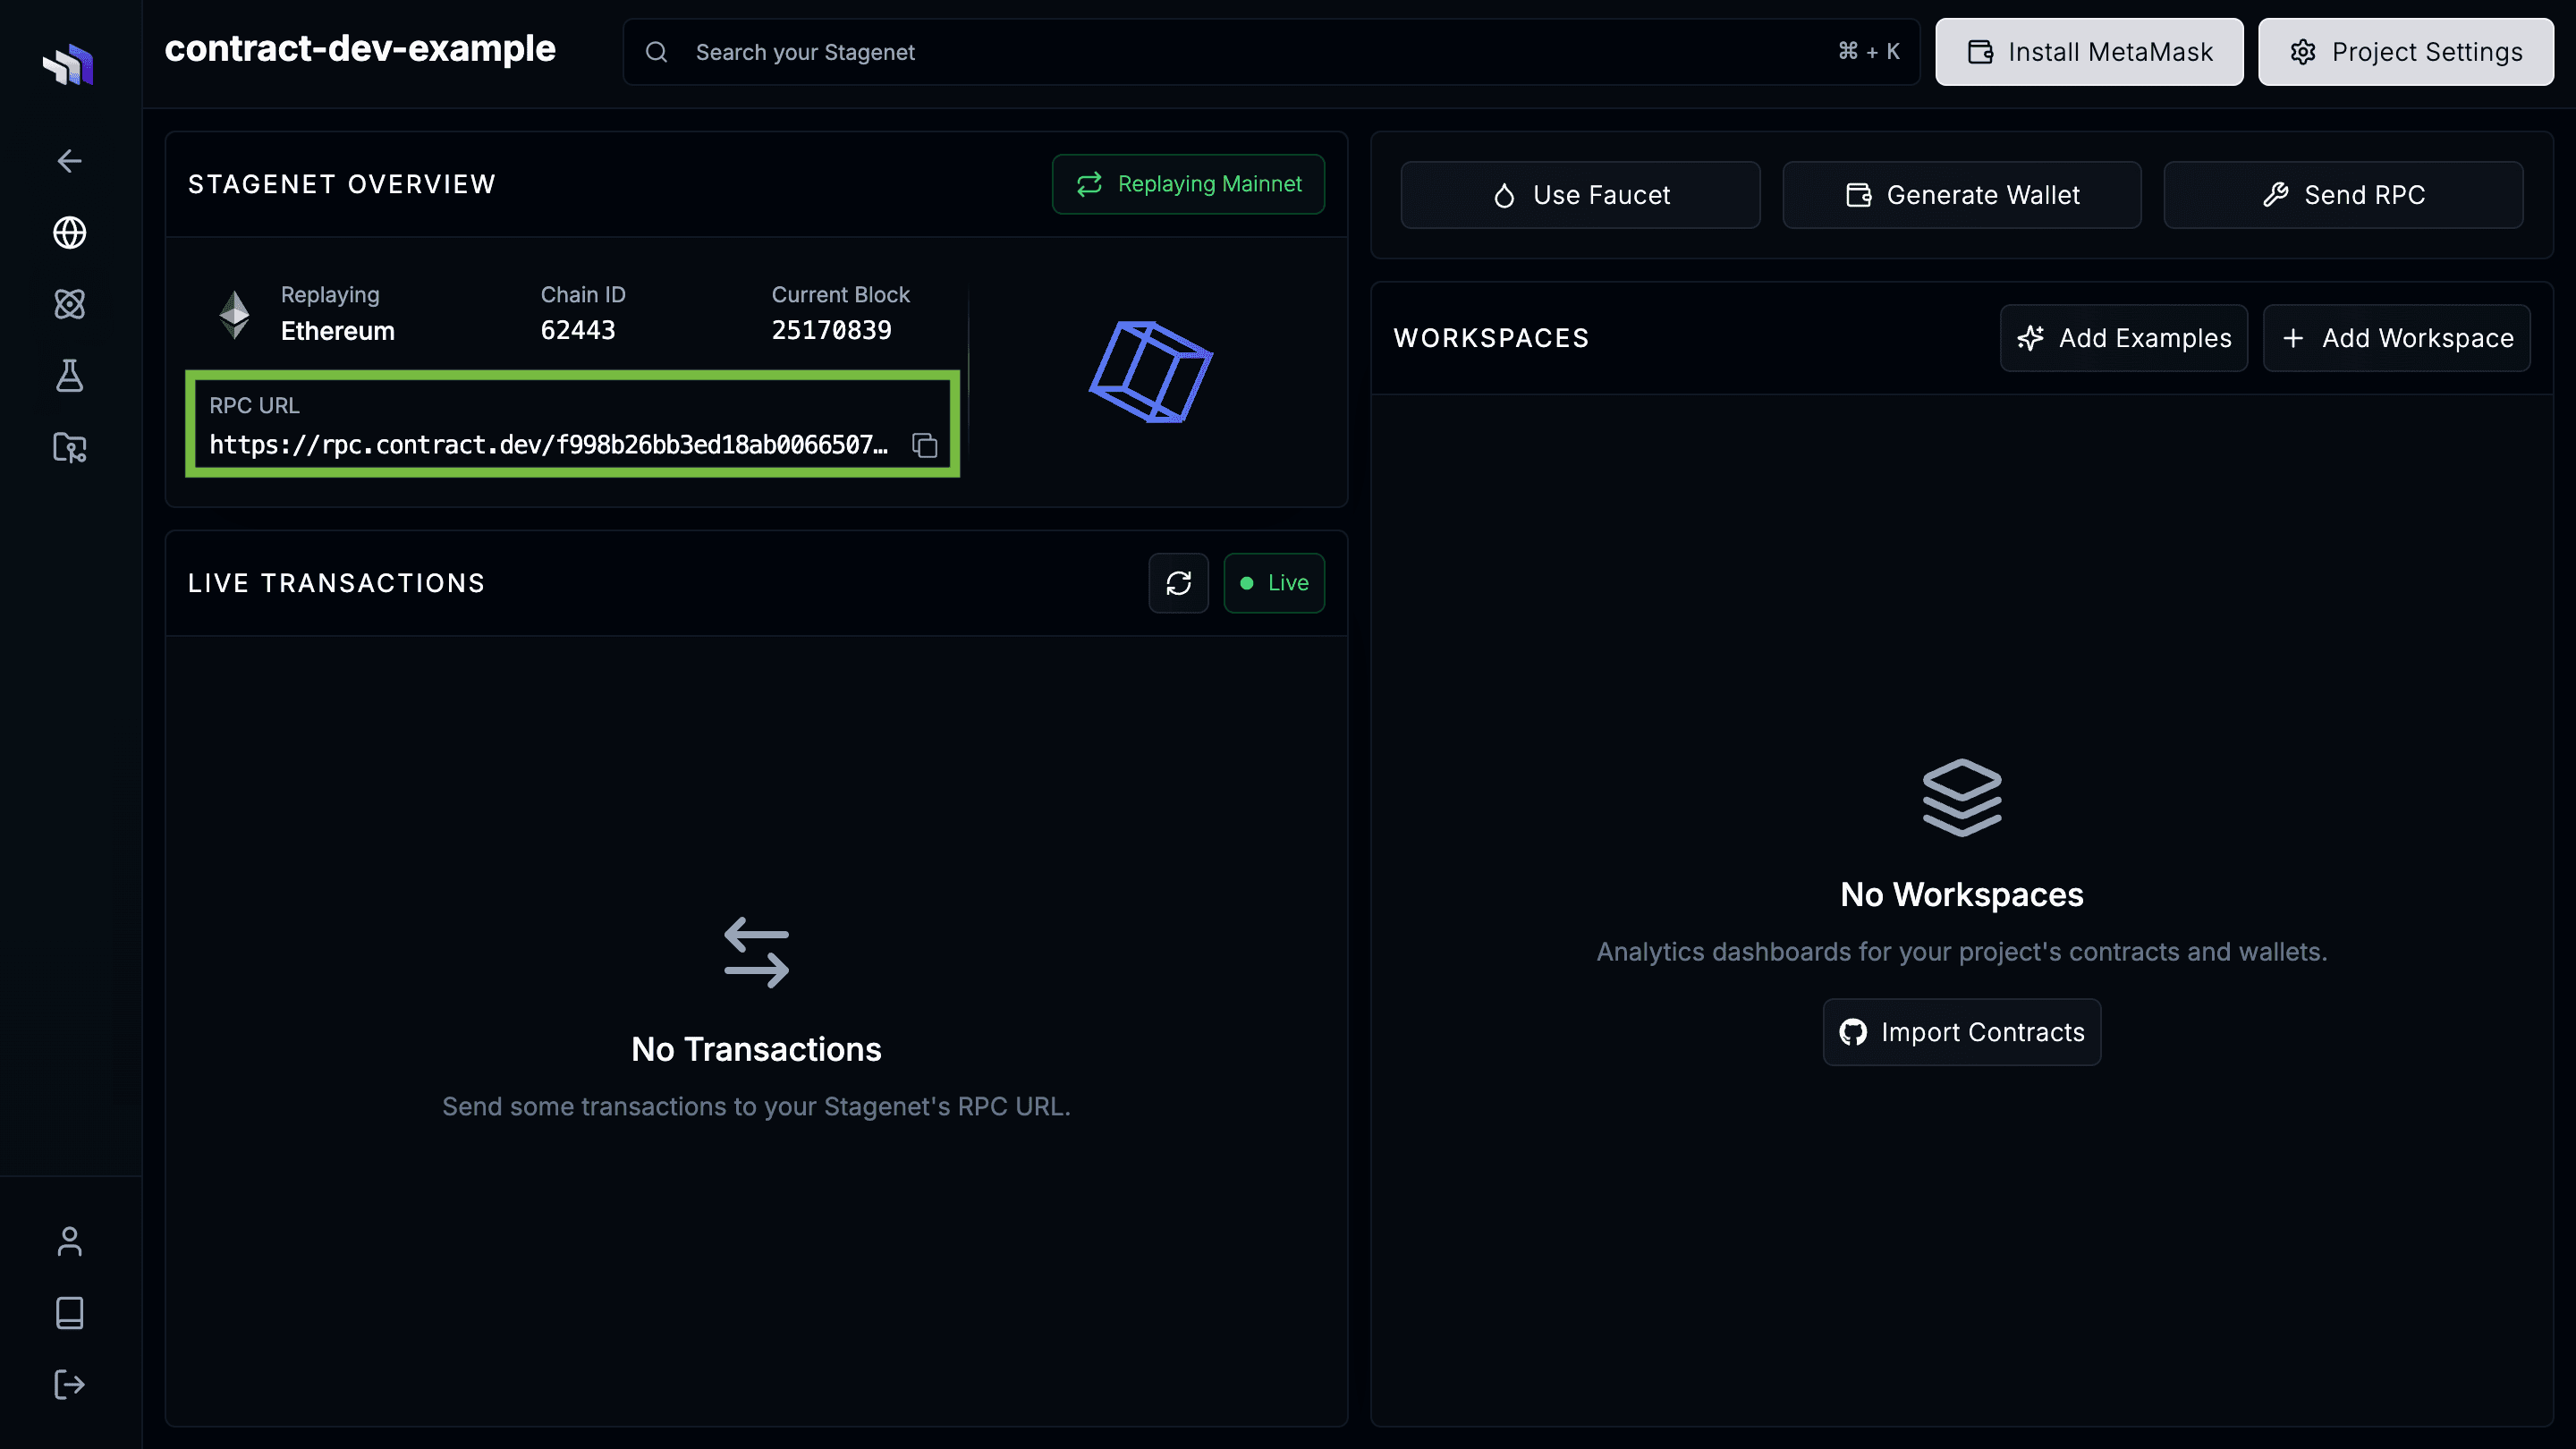
Once your Stagenet is created, copy its RPC URL from the dashboard. You’ll need it in the next step.
Install the CLI
From your Hardhat or Foundry project directory, install the contract.dev npm package:
npm install contract.devThen create a contract.dev.js config in your project root by passing your Stagenet’s RPC URL to:
npx contract.dev init --rpc-url=<YOUR_STAGENET_RPC_URL>This writes:
/** @type {import('contract.dev').Config} */
module.exports = {
  rpcUrl: "<YOUR_STAGENET_RPC_URL>",
};
The CLI finds this config from your project root or any subdirectory, and sends commands to the Stagenet at the configured rpcUrl.
Upload contracts to your Stagenet
Compile your contracts to generate ABIs and bytecode:
# Foundry
forge build

# Hardhat
npx hardhat compile
Before deploying, upload your compiled artifacts. This lets contract.dev recognise your contracts when they are deployed and create Workspaces automatically.
Then push them to your Stagenet:
npx contract.dev import-contractsYou’ll see something like:
Detected Hardhat project
Pushing 2 contract(s) to stagenet...

  Token  created
  Vault  created

Contracts: 2 created, 0 updated, 0 unchanged
Your contracts are now uploaded to your Stagenet. Each uploaded contract creates an inactive Workspace. When you deploy matching bytecode to the Stagenet, that Workspace activates automatically.

Deploy contracts to your Stagenet
Now deploy using your normal Foundry or Hardhat flow, pointed at your Stagenet RPC URL.
Generate a funded deployer wallet from the CLI:
npx contract.dev generate-walletYou’ll see something like:
Generated wallet
  Address:     0x742d35Cc6634C0532925a3b844Bc9e7595f0bEb1
  Private key: 0xa3f7c1d2e9b4f5a6c8d0e1f2a3b4c5d6e7f8091a2b3c4d5e6f7081920a1b2c3d

Save the private key now — it is not stored.

Funding wallet...
Funded with 1,000,000 ETH.
Choose the guide for your framework below and use the generated private key as the deployer key.
Foundry
Add your Stagenet’s RPC URL and your funded private key to your .env file:
STAGENET_RPC_URL=<YOUR_STAGENET_RPC_URL>
PRIVATE_KEY=<YOUR_FUNDED_PRIVATE_KEY>
You can now run Foundry commands against your Stagenet to deploy your contracts.
# Load the URL and the private key from your .env file
source .env

# Deploy your contracts onto your Stagenet
forge script script/Counter.s.sol:CounterScript --rpc-url $STAGENET_RPC_URL --private-key $PRIVATE_KEY --broadcast
Hardhat V2
Add your Stagenet’s RPC URL and your funded wallet under a custom stagenet network in hardhat.config:
module.exports = {
  solidity: "0.8.21",
  networks: {
    stagenet: {
      url: "<YOUR_STAGENET_RPC_URL>",
      accounts: [
        "<YOUR_FUNDED_PRIVATE_KEY>",
      ],
    },
  },
};
Deploy using the --network flag:
npx hardhat run scripts/my-deploy-script.js --network stagenetHardhat V3
Add your Stagenet’s RPC URL and your funded wallet under a custom layer one HTTP network in your hardhat.config:
export default defineConfig({
  networks: {
    stagenet: {
      type: "http",
      chainType: "l1",
      url: "<YOUR_STAGENET_RPC_URL>",
      accounts: [
        "<YOUR_FUNDED_PRIVATE_KEY>",
      ],
    },
  },
});
Deploy using the --network flag:
npx hardhat run scripts/my-script.js --network stagenetTo get auto-generated Workspaces while using Hardhat V3 Ignition, use the default build profile:
npx hardhat ignition deploy ignition/modules/MyModule.ts --network stagenet --build-profile defaultAnalyse your contracts
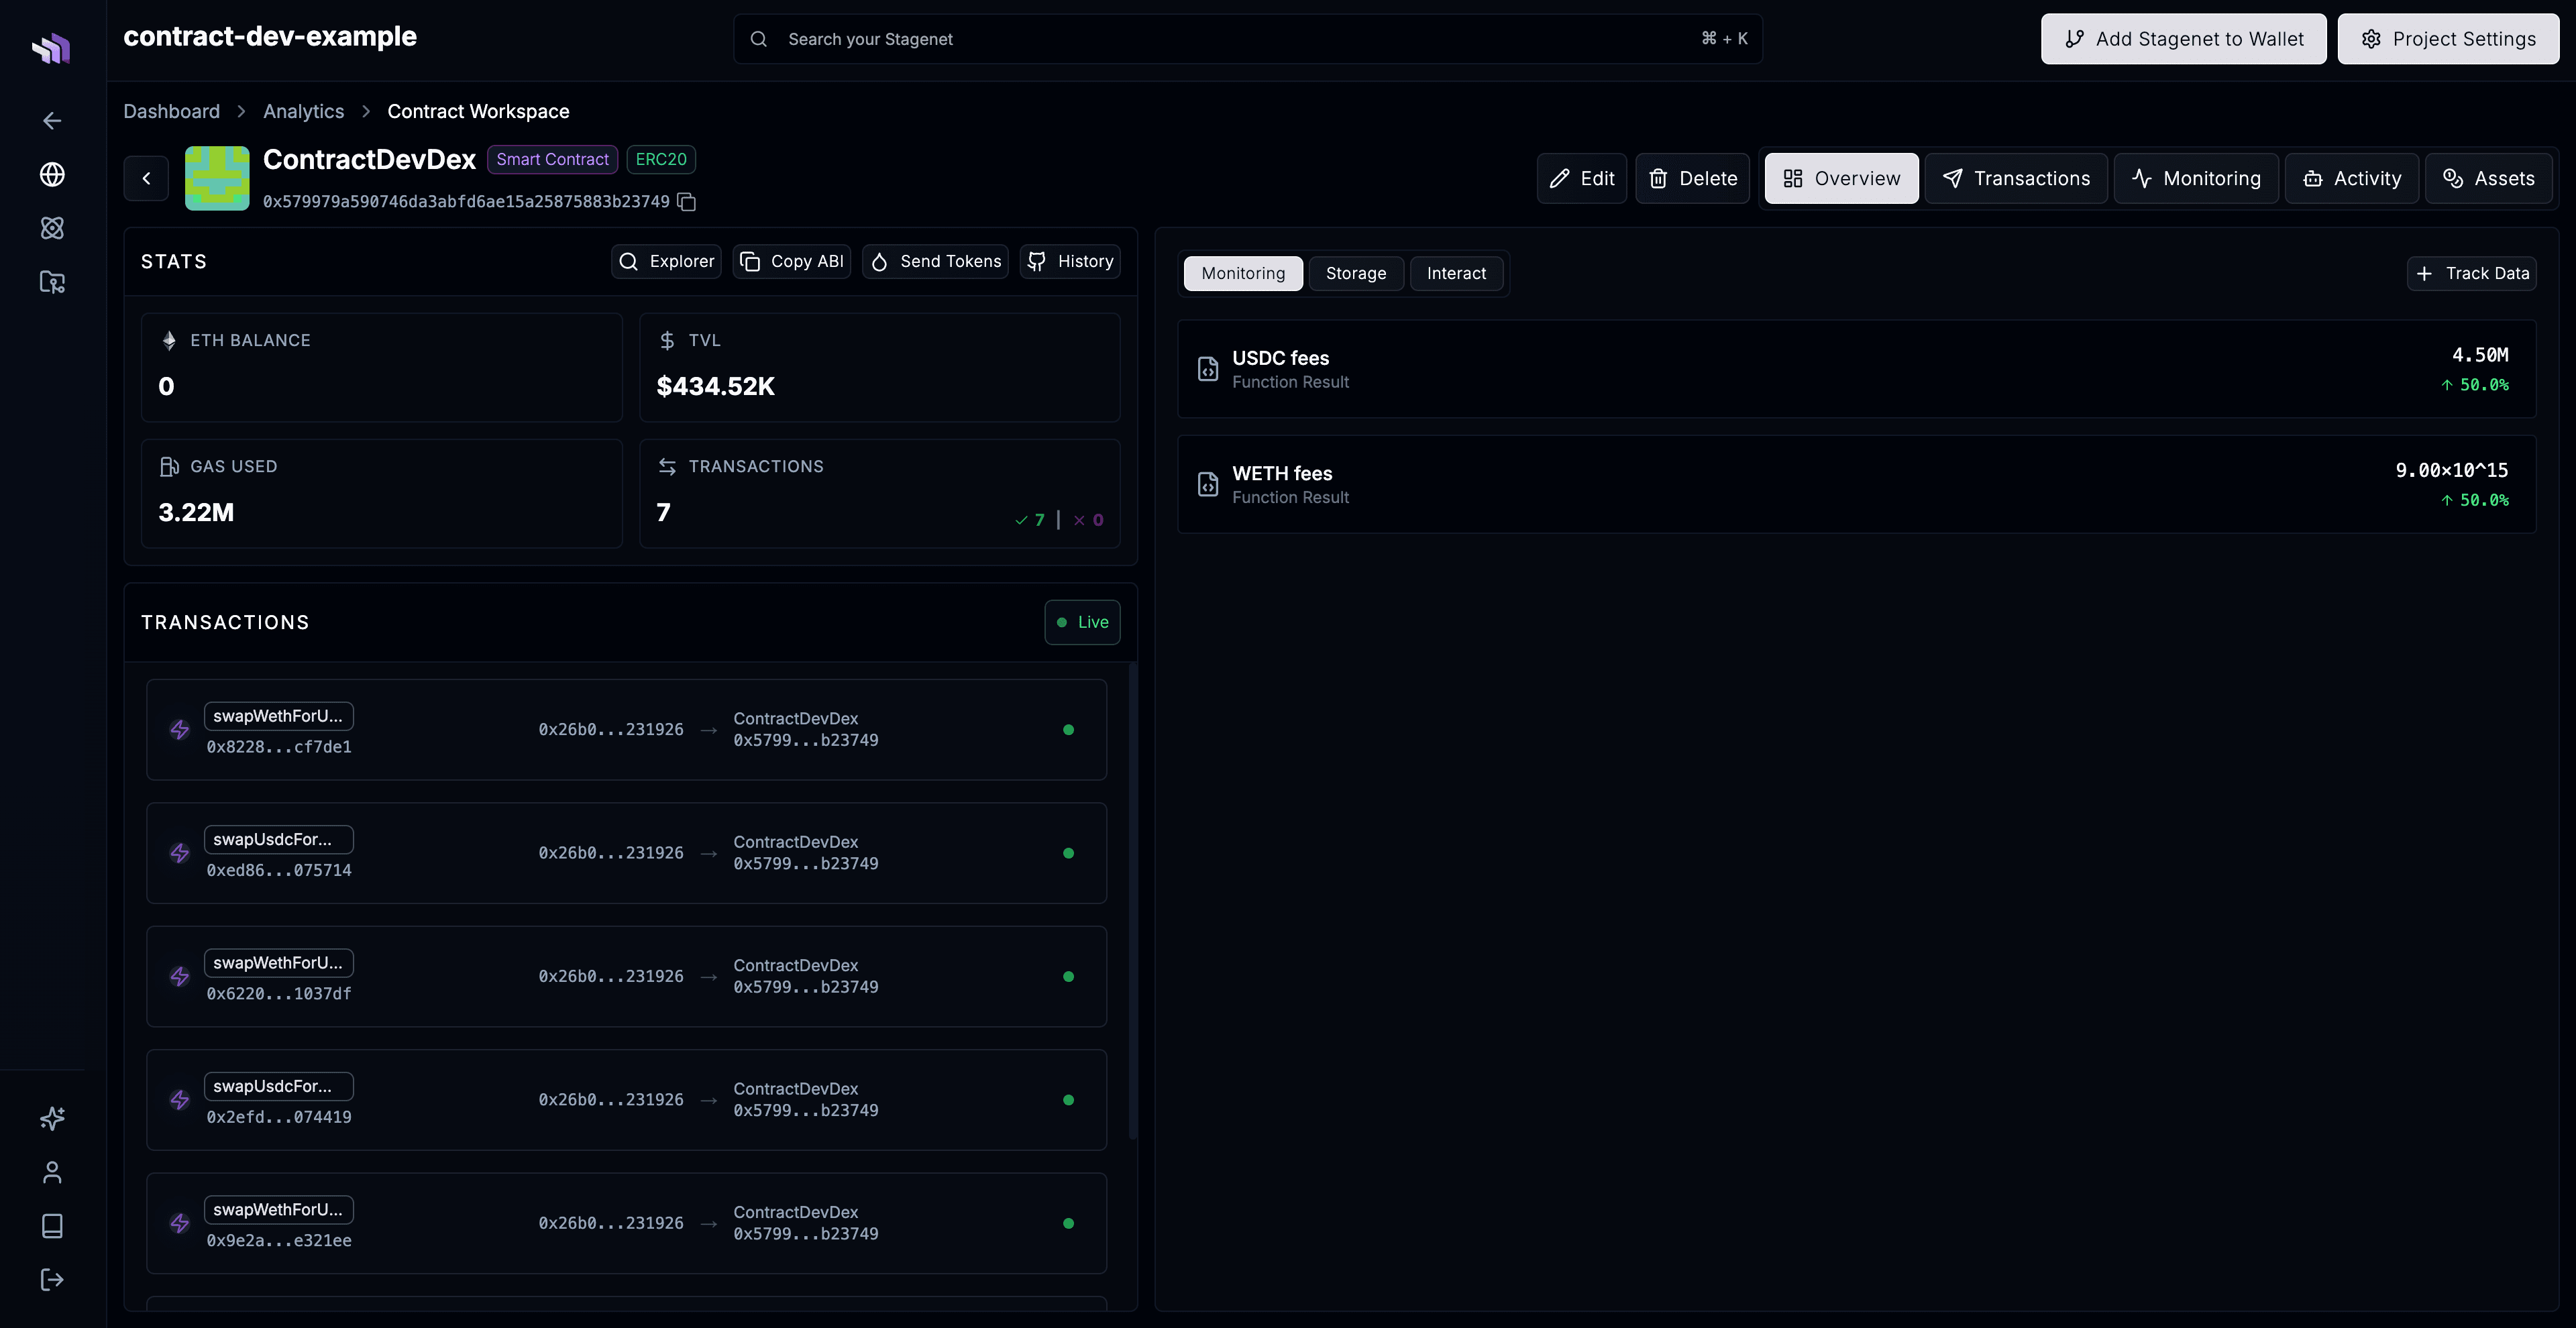
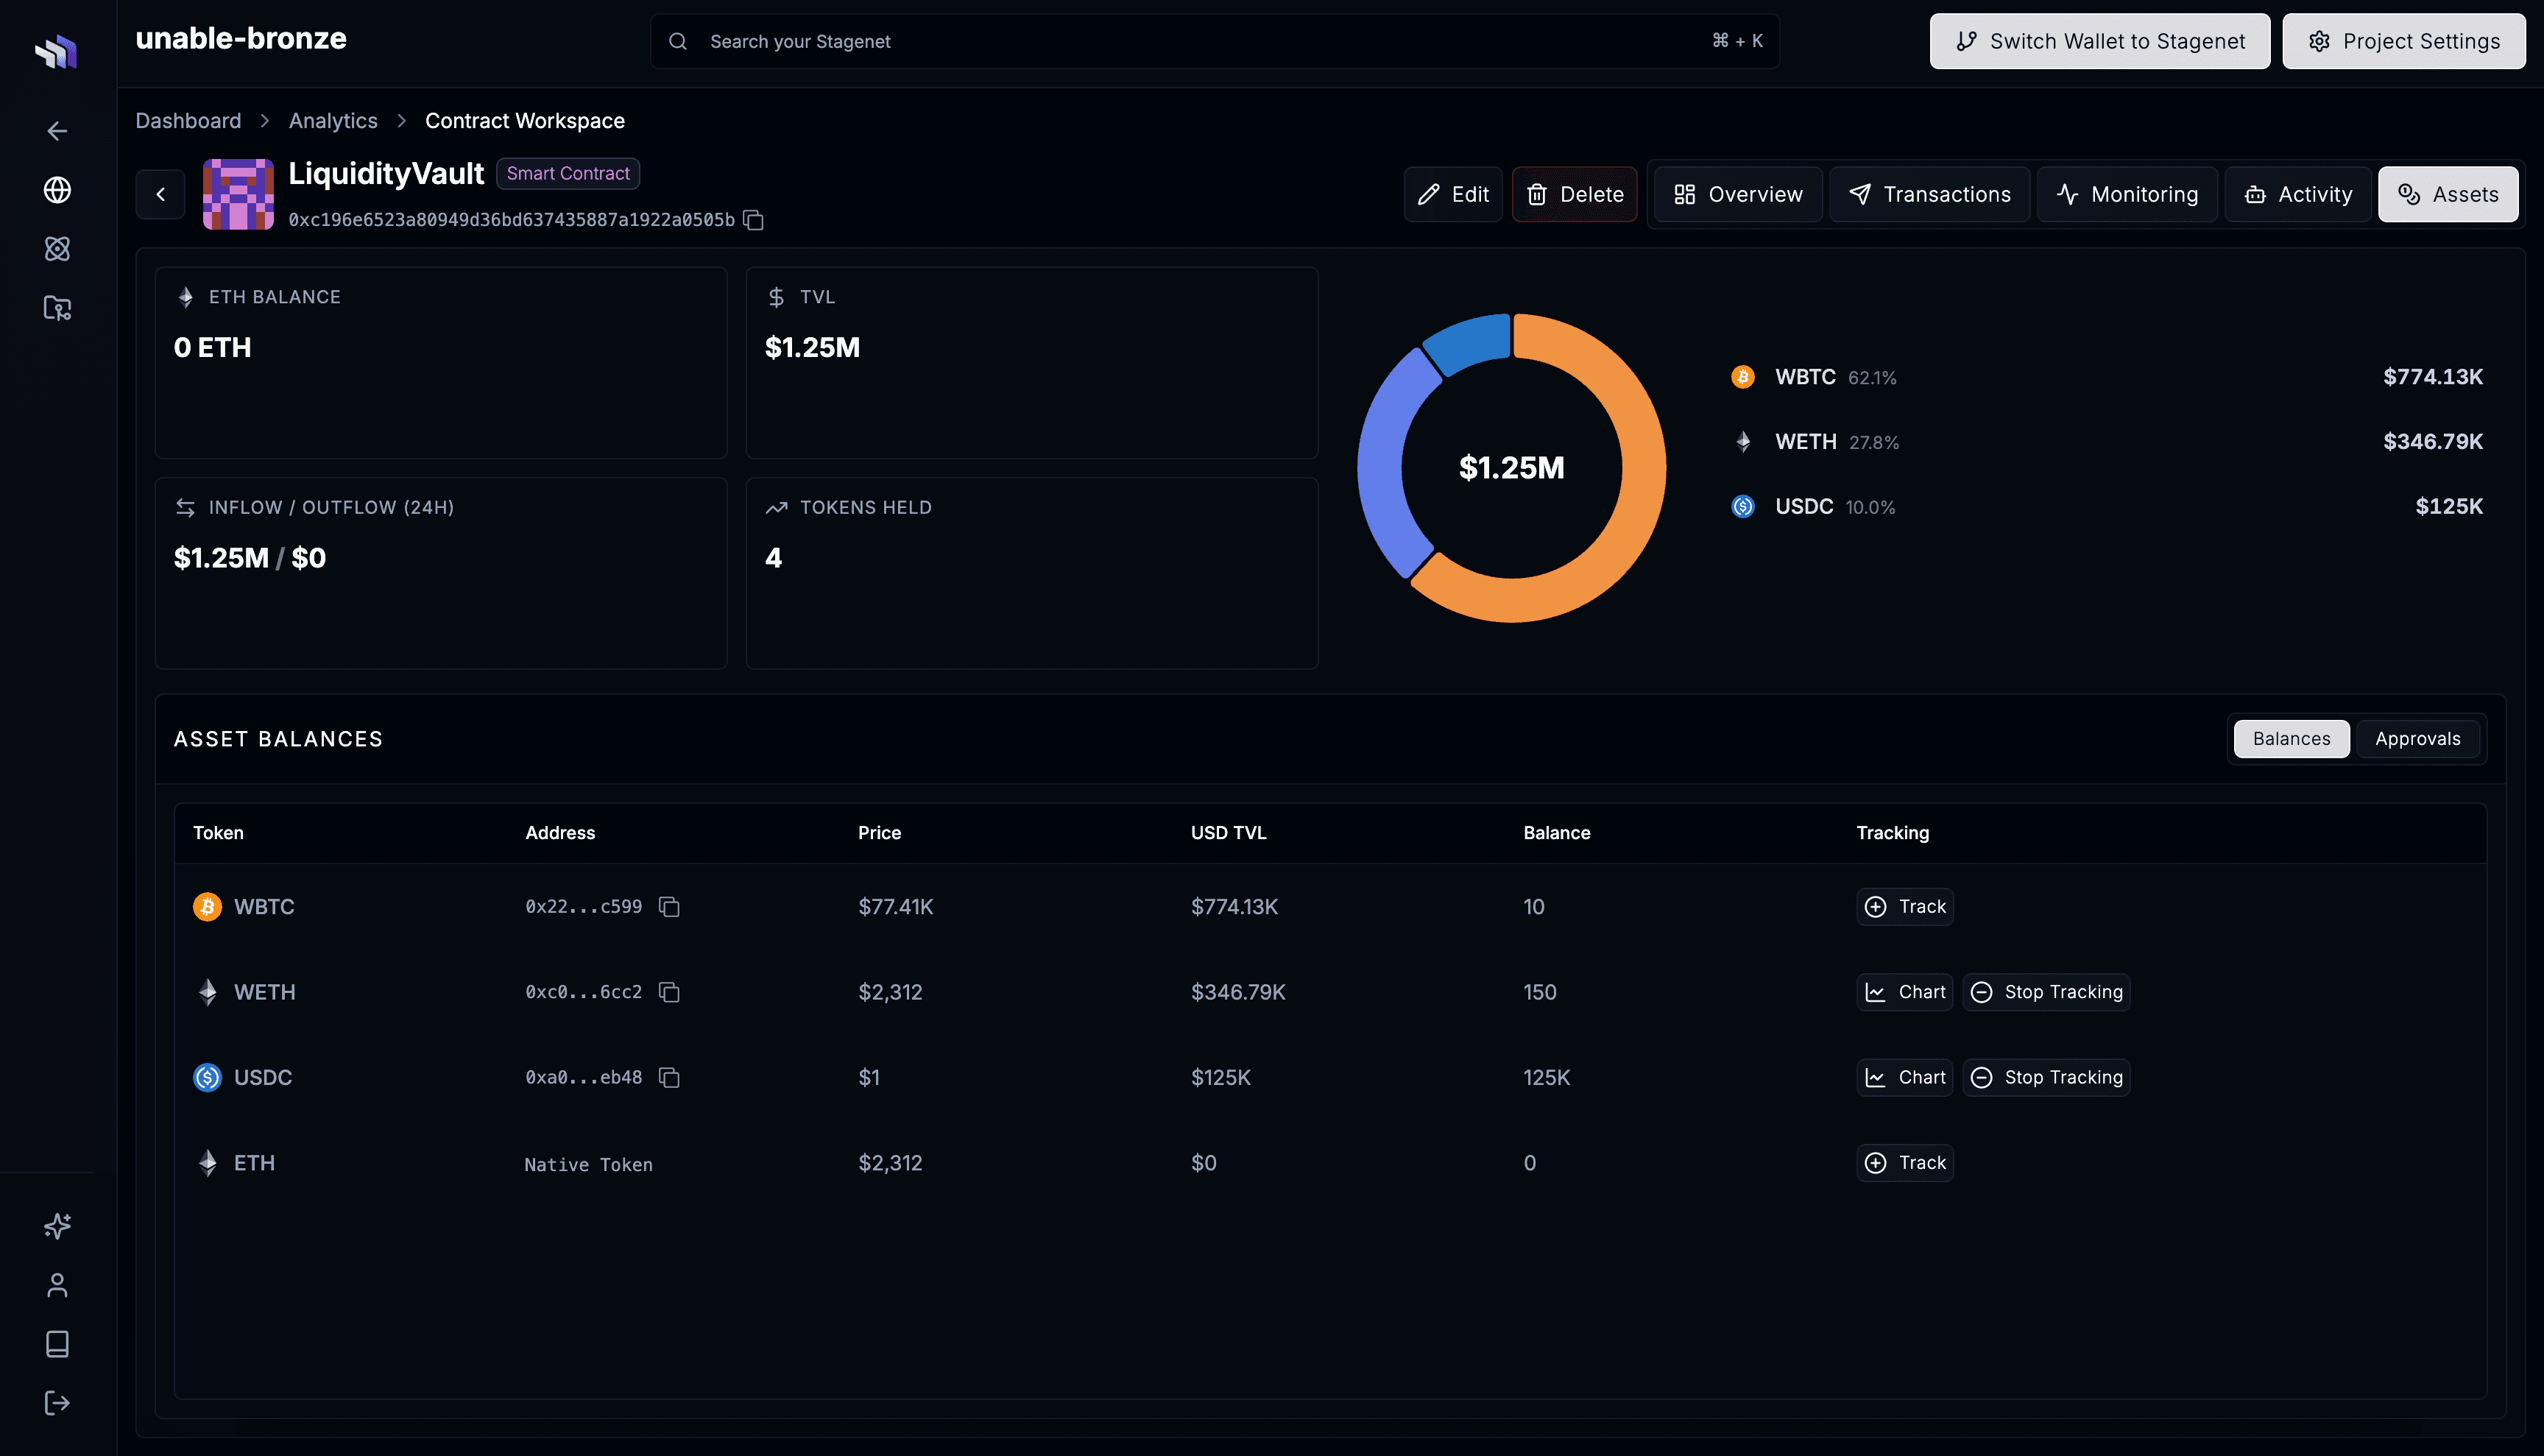
Once deployed, each contract receives its own Workspace — a dedicated dashboard for inspecting how that contract behaves on your Stagenet.
Use Workspaces to view contract activity, assets, state, and tracked metrics in one place.
View your Workspaces by navigating to your Stagenet’s Analytics dashboard via the sidebar.
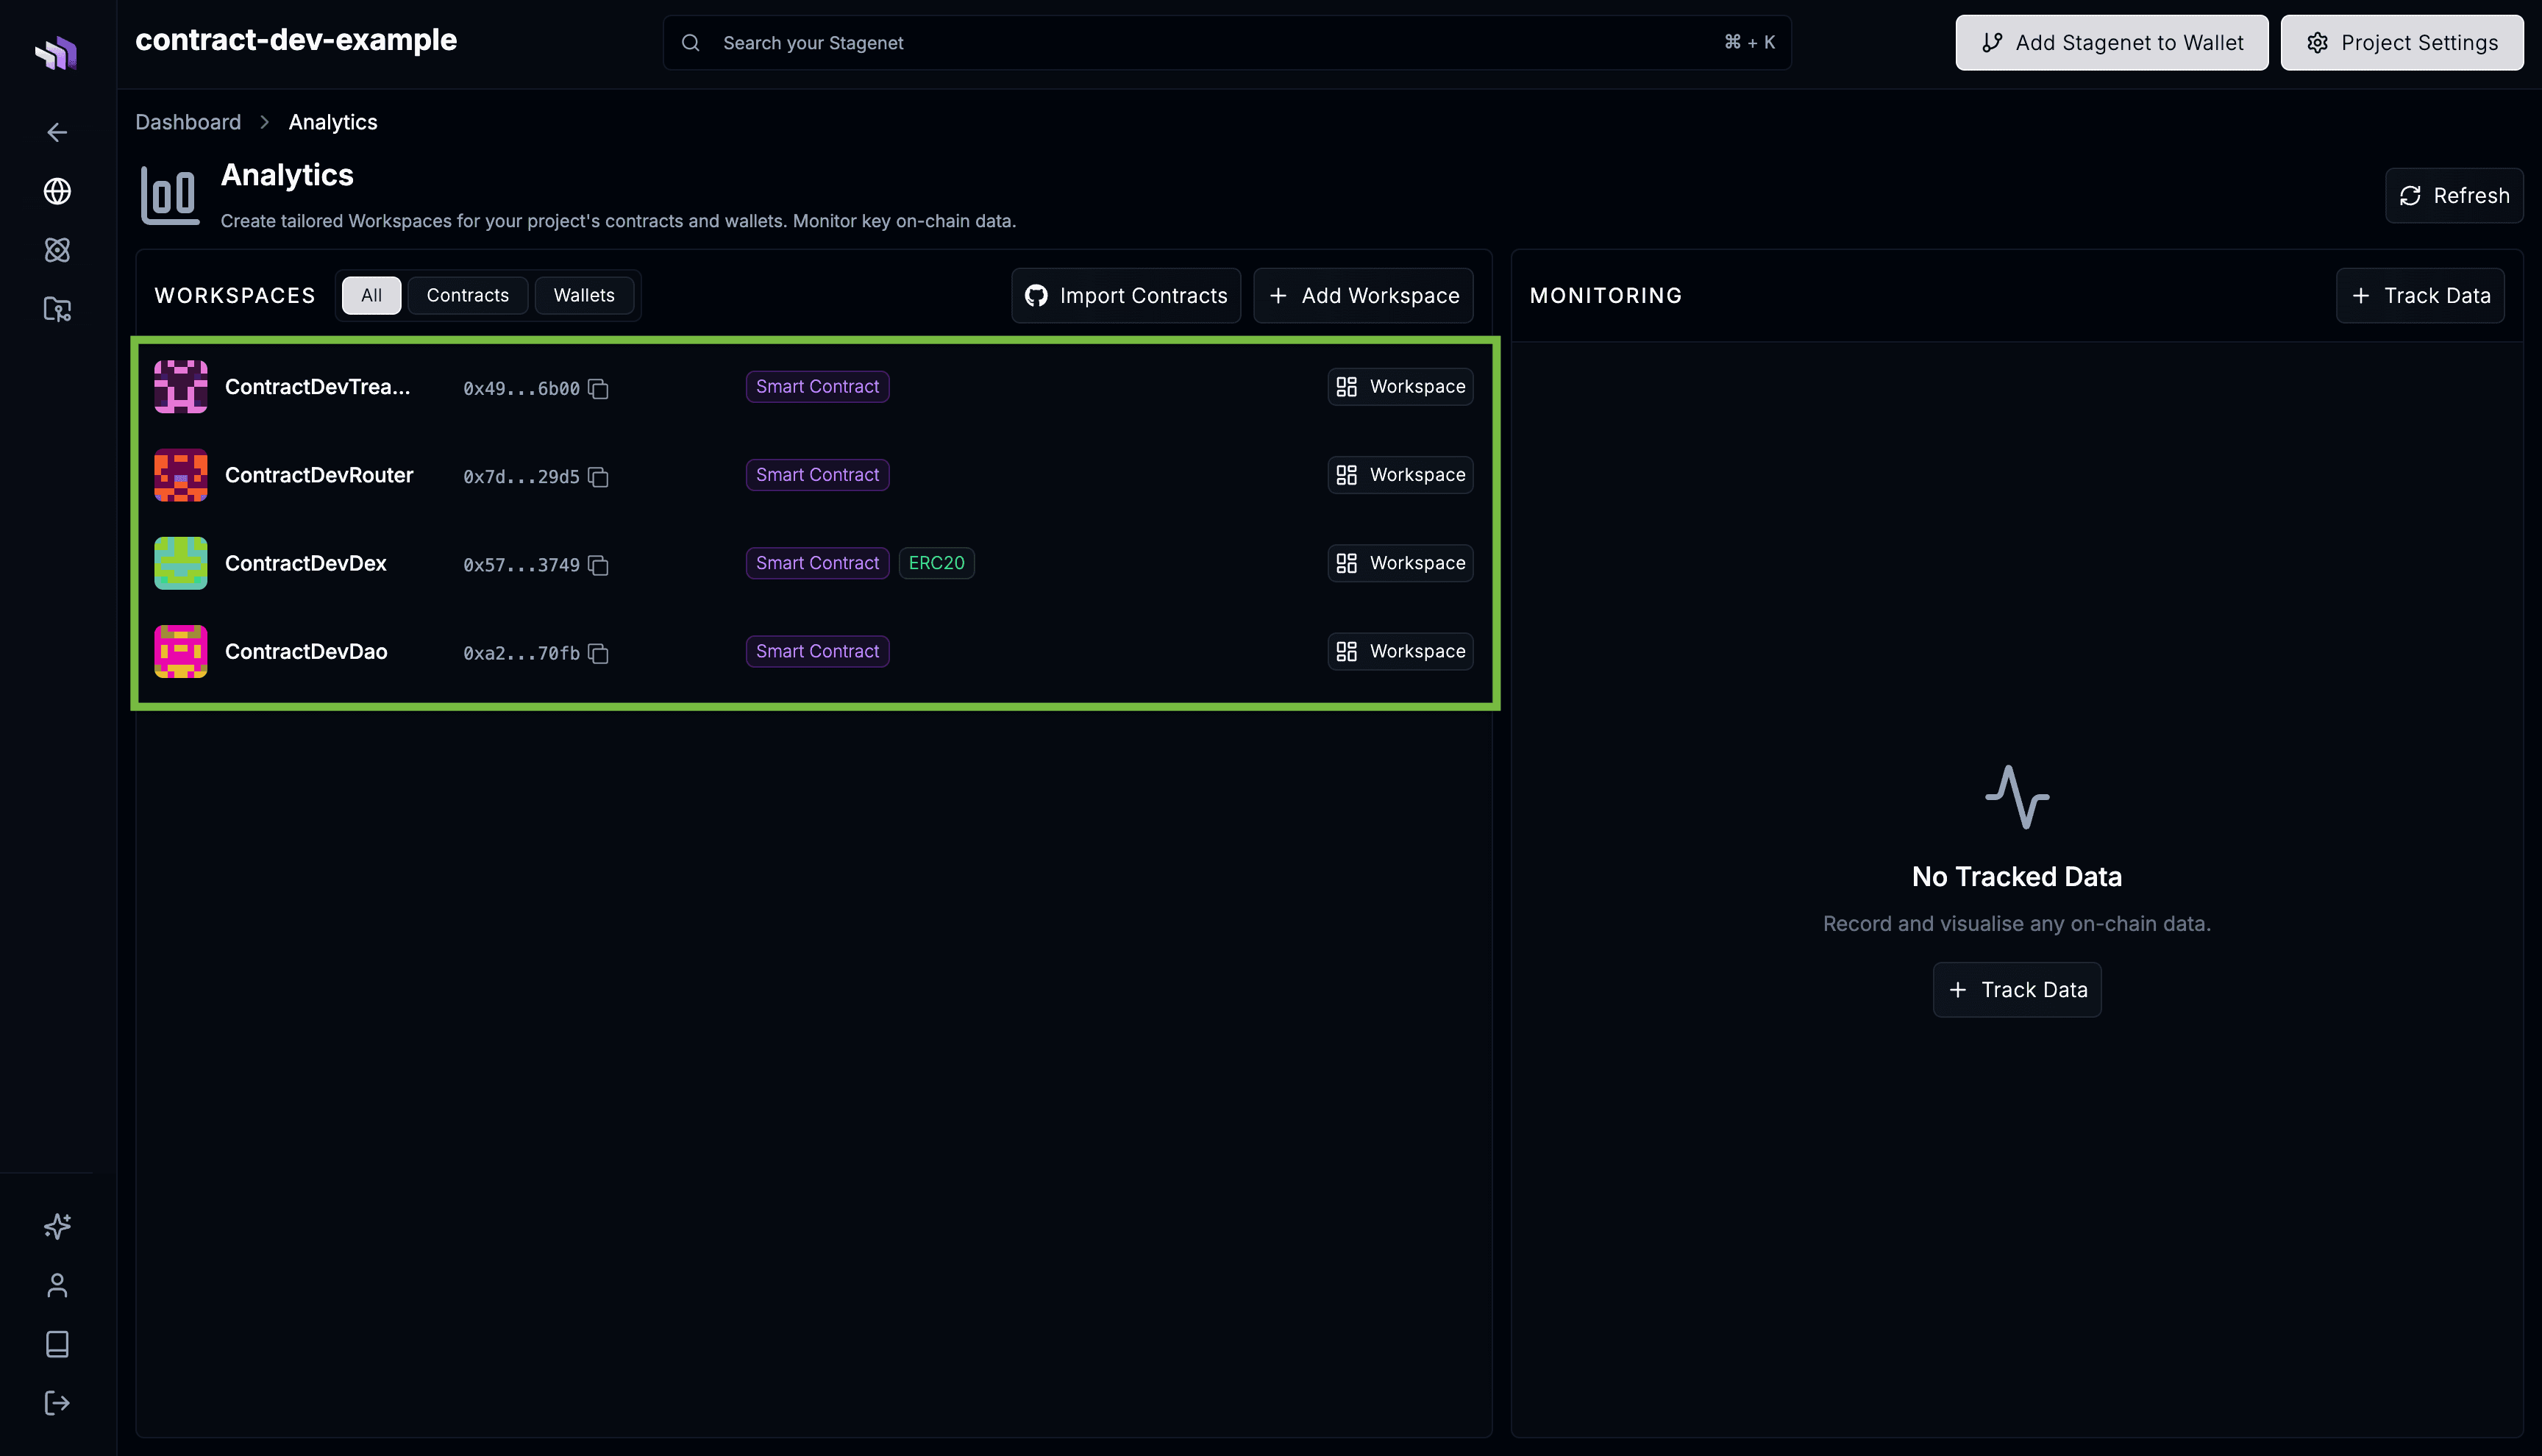
Within a Workspace, you can:
- Inspect token balances and TVL
- Explore transaction activity
- View live storage variables
- Track metrics such as yield, fees, balances, or function outputs over time
- Schedule recurring contract transactions to test ongoing activity
Next steps
Your contracts are now running on a Stagenet and visible in Workspaces. Here are the most useful things to try next:
- Set up GitHub CI/CD — import new and updated contracts automatically on every push.
- Track on-chain data — record and graph balances, storage variables, and function outputs as they evolve on your Stagenet.
- Use built-in tools — use your Stagenet’s token faucet, schedule recurring activity on it, and more.
- Explore the CLI and SDK — fund wallets, impersonate accounts, override state, and other Stagenet operations.