Foundry Quickstart
This guide walks you through integrating a Stagenet into your Foundry workflow. You’ll create a Stagenet, connect it to a GitHub repository, and generate a Contract Workspace for each contract.
Create a Stagenet
Start by creating a new project — each one comes with its own Stagenet.

Add Stagenet Endpoint and Private Key
To run Foundry commands against your Stagenet, you’ll need:
- Your Stagenet’s RPC URL
- A funded private key (generated via the Stagenet’s Wallet Generator)
Create a .env file in the root of your Foundry project to store both values (if you don’t already have one).
Add Stagenet RPC URL
Open your project’s dashboard and copy your Stagenet’s RPC URL.
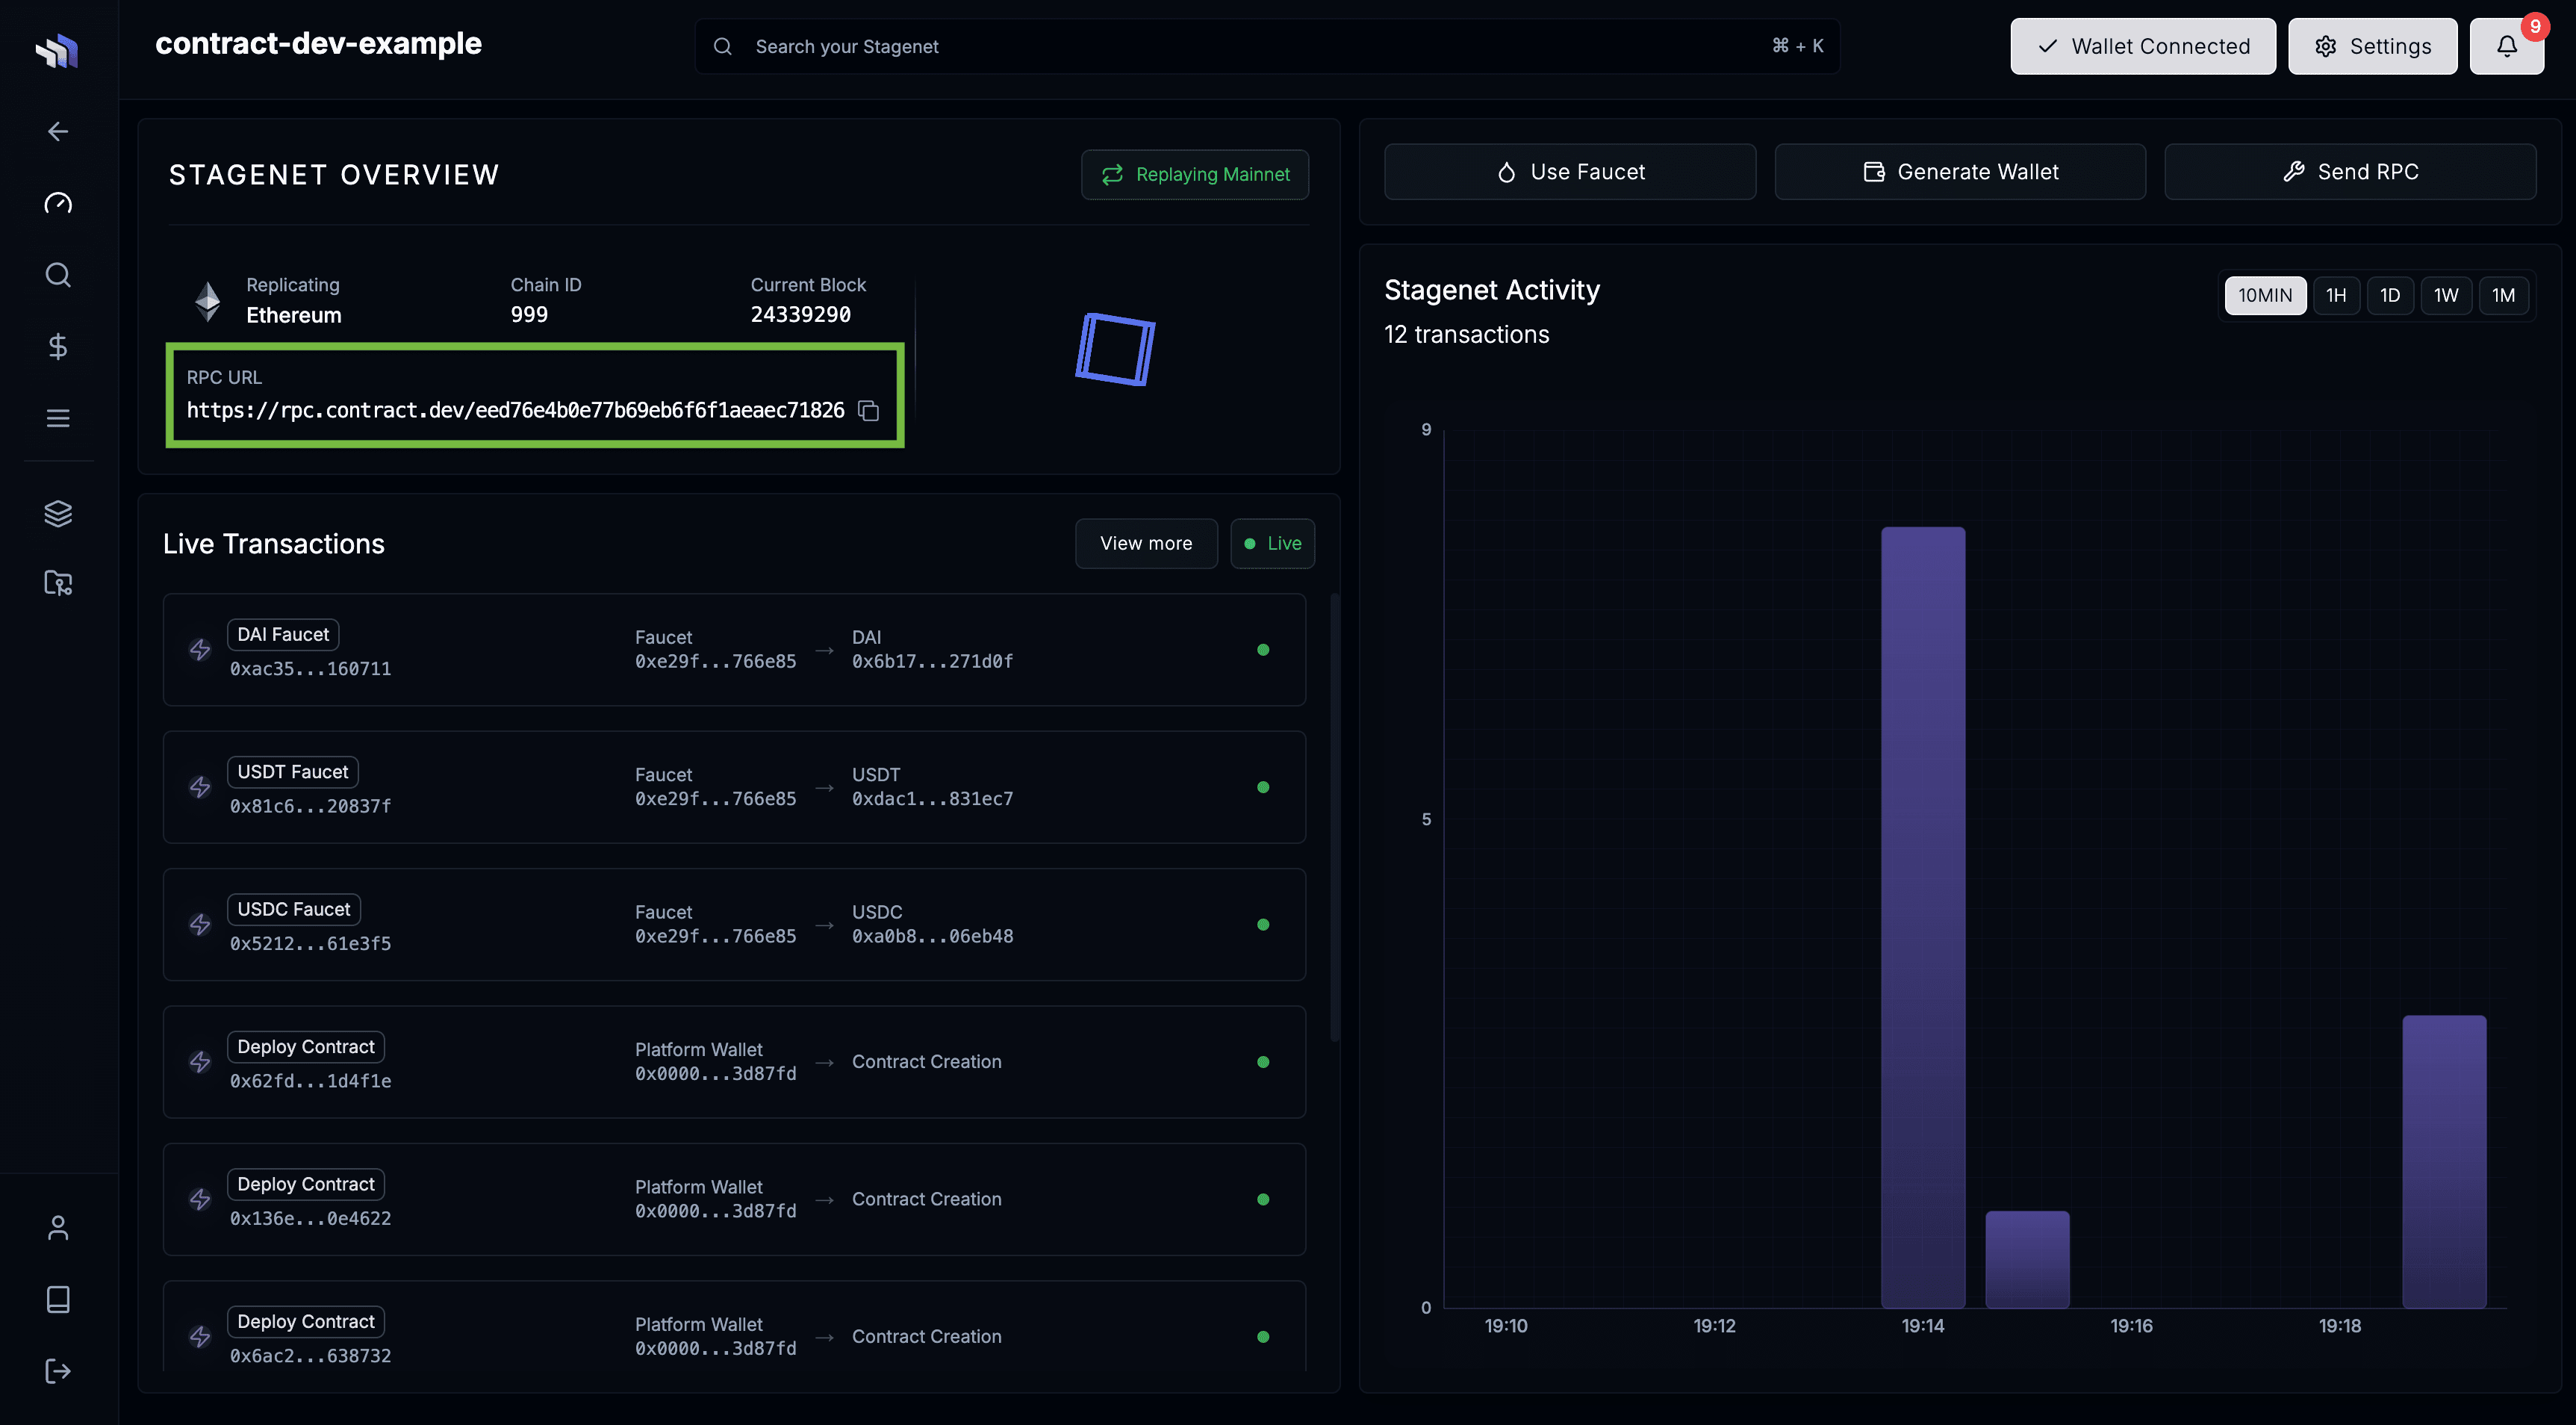
Add it to your .env file:
STAGENET_RPC_URL=https://rpc.contract.dev/3bf1bb611043d73921481c879e5d18faGet a Funded Stagenet Wallet
Open Tools → Wallet Generator in the sidebar.
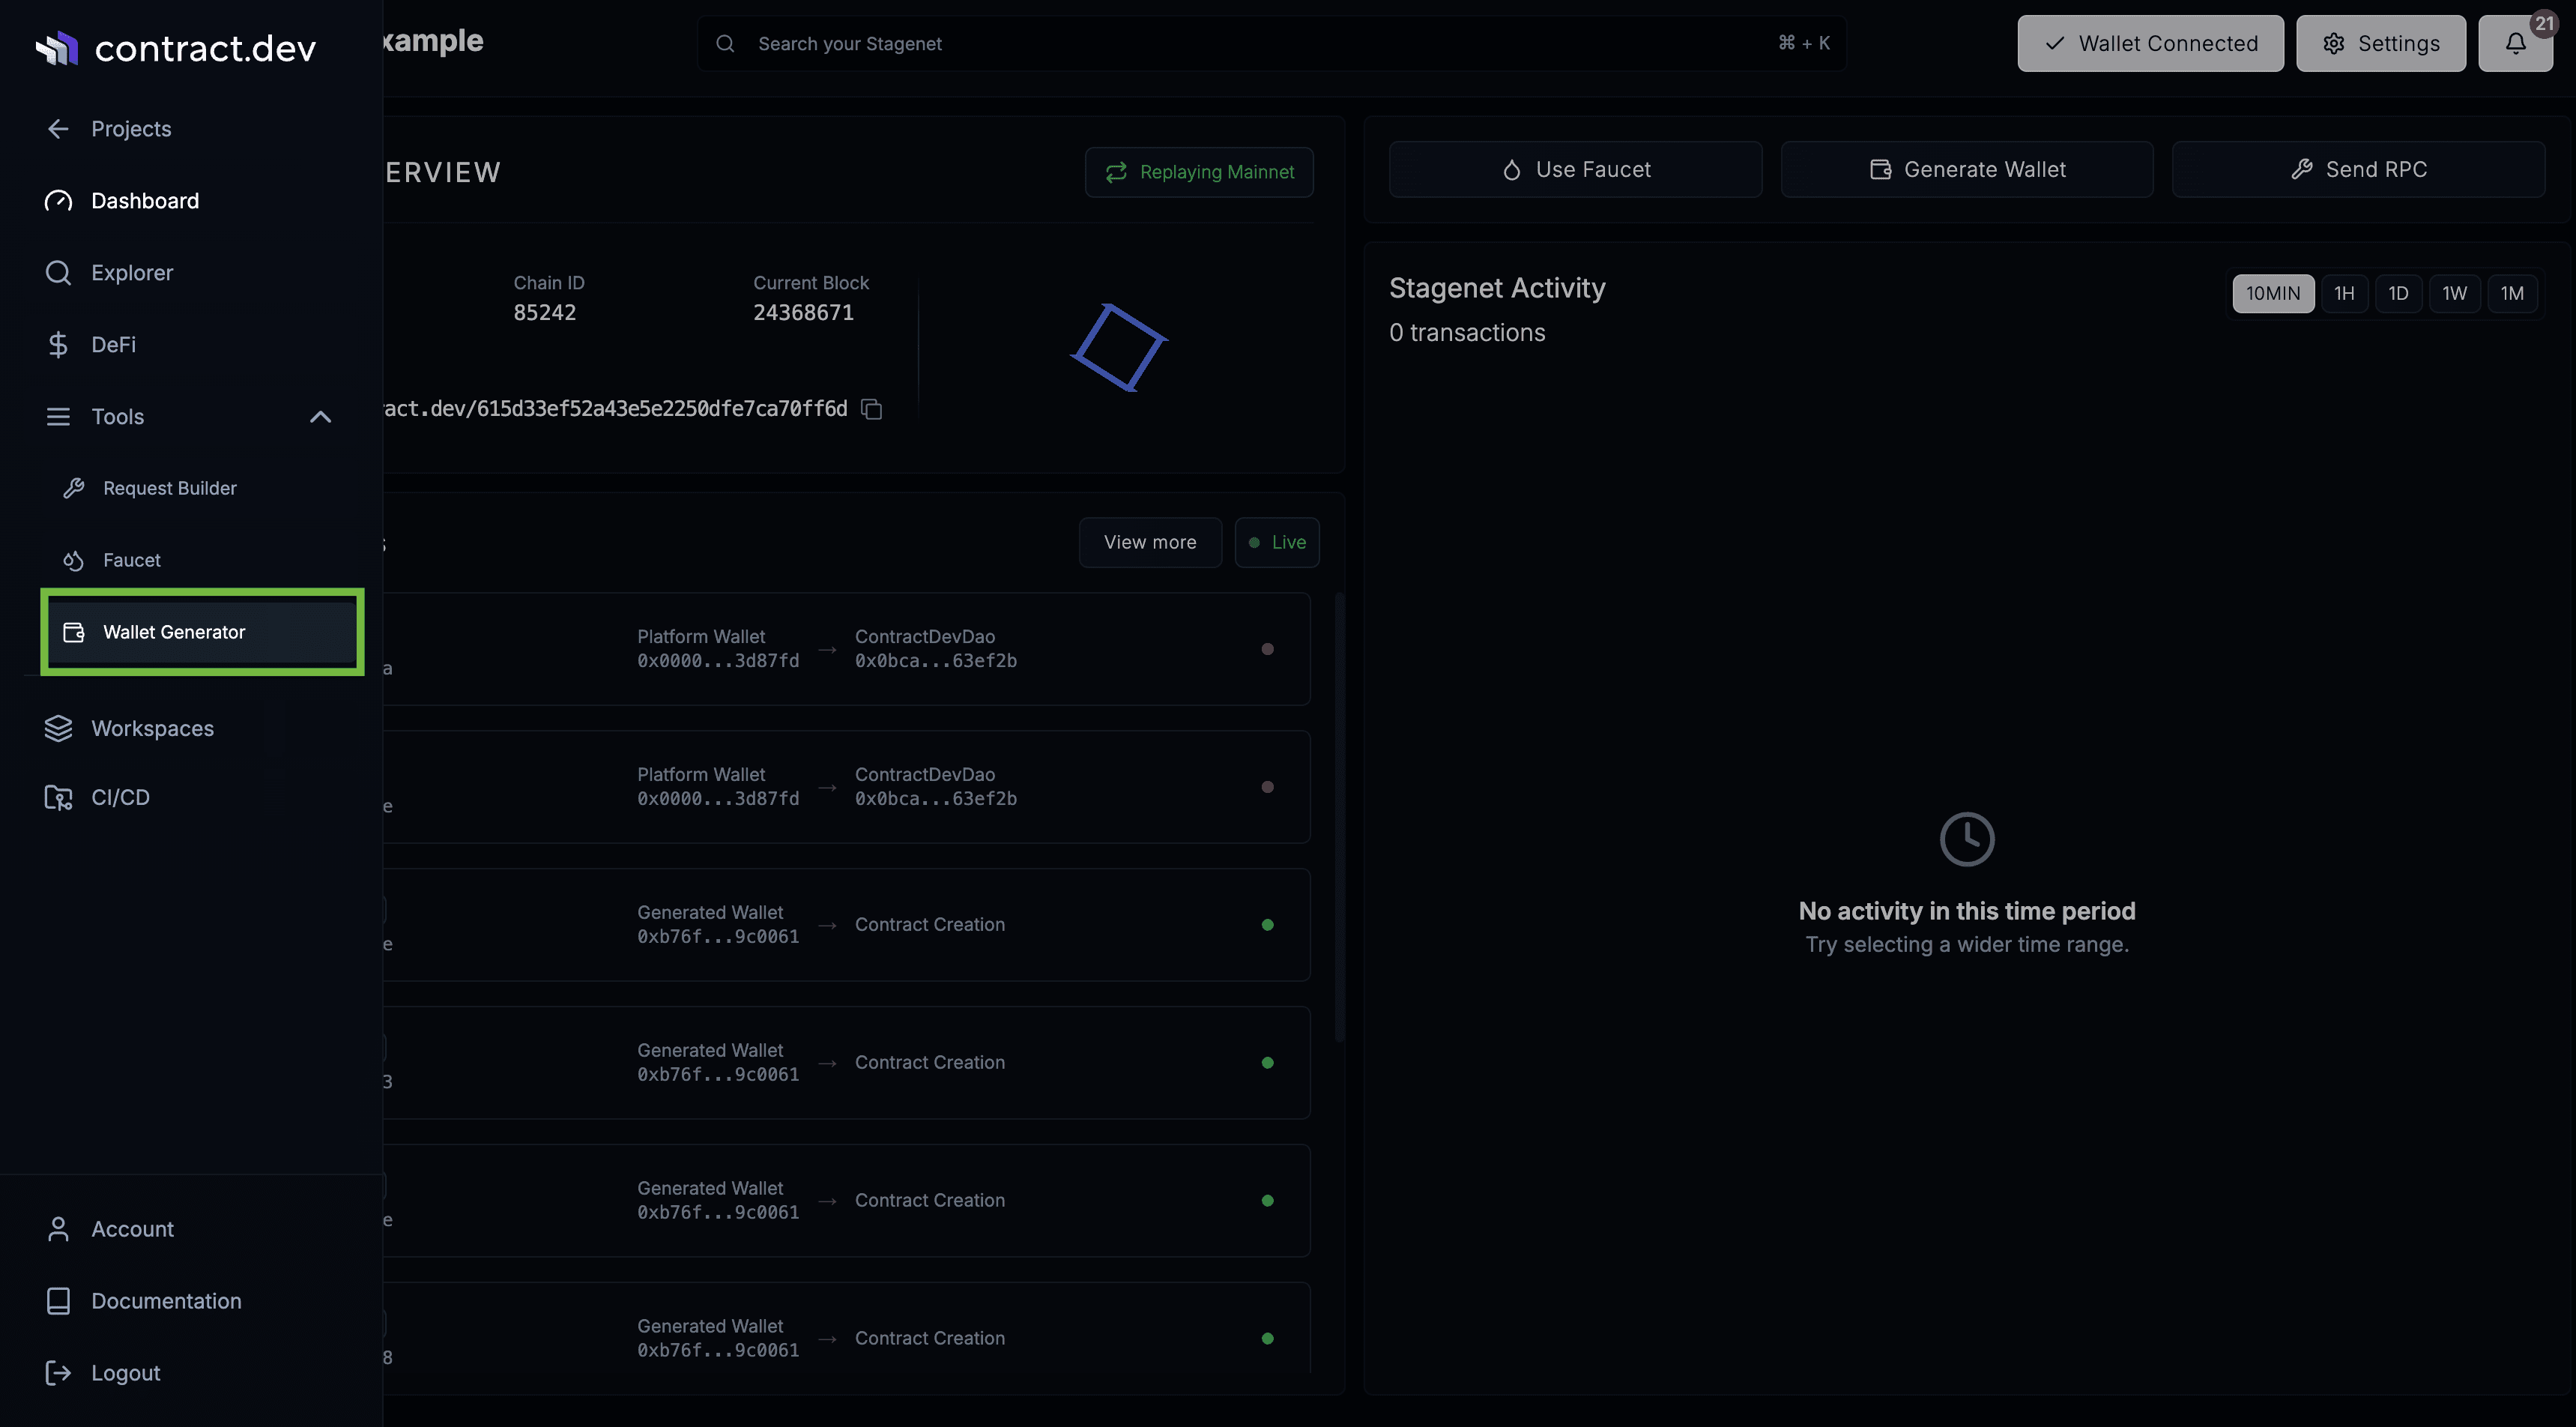
Copy the generated private key and click Fund Wallet.
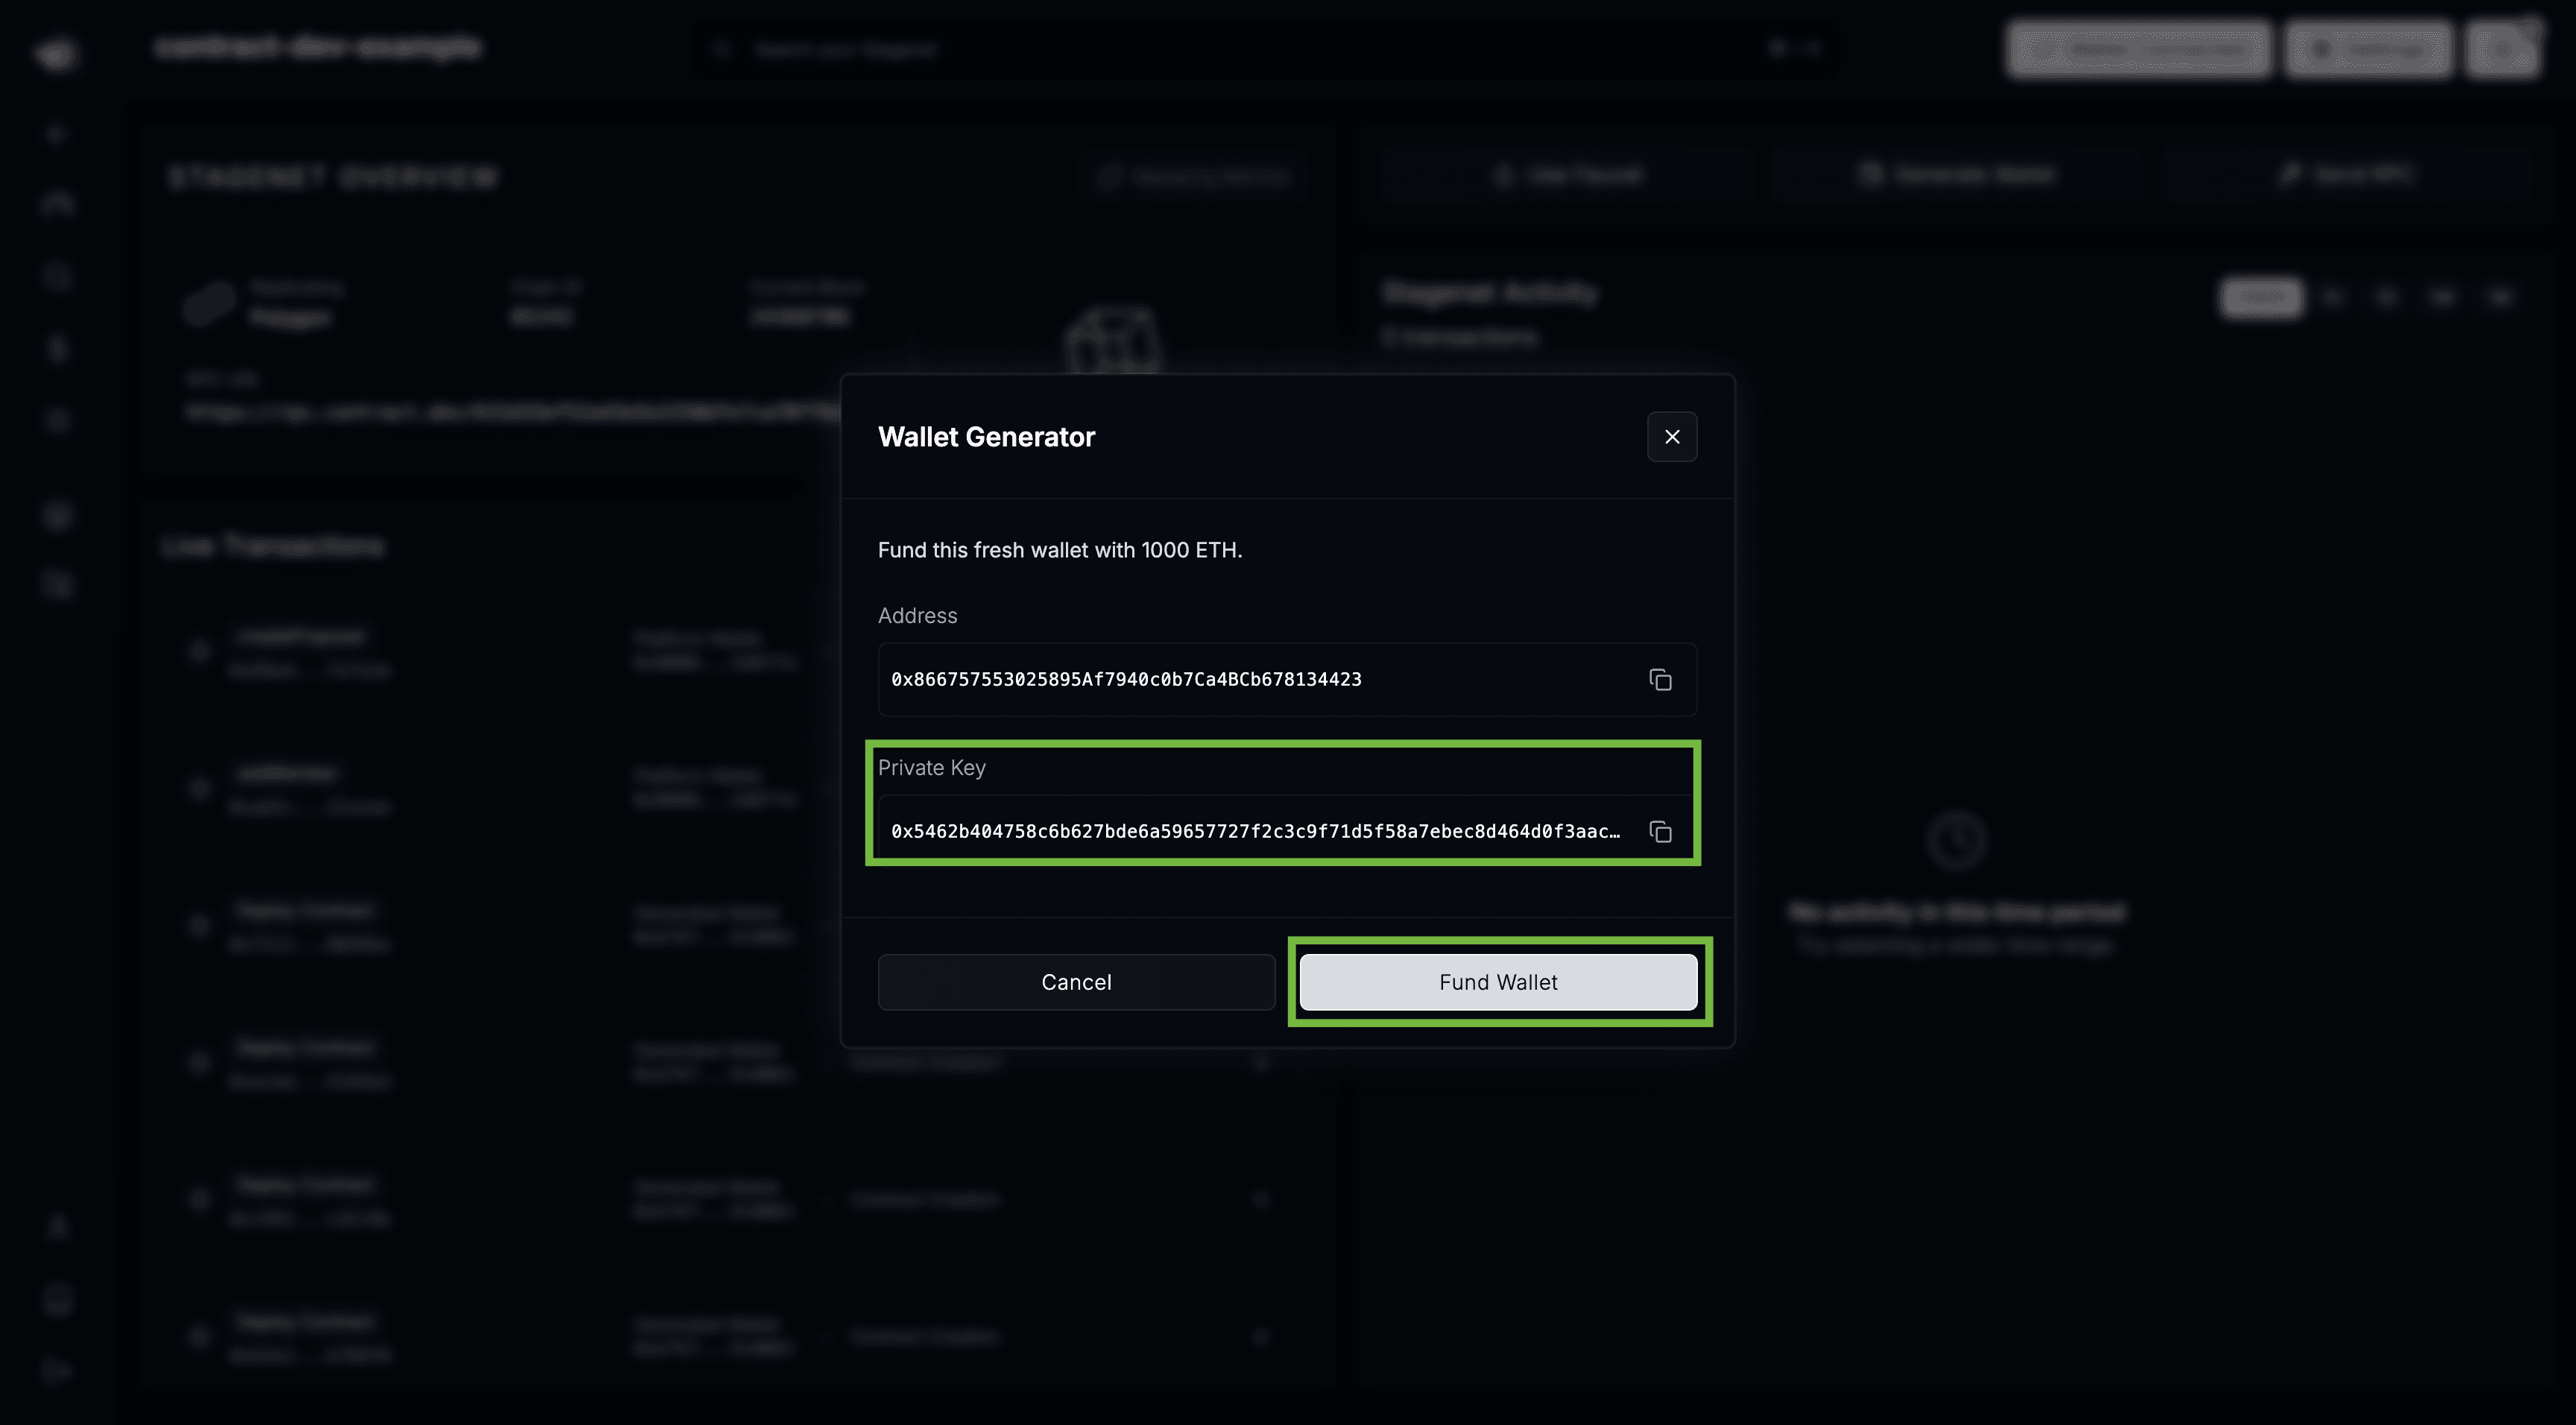
Add it to your .env:
STAGENET_PRIVATE_KEY=0x15340a8098a663d3965e0dbdef07606d200a416c9ff1218dc2b452af457ec6fcYou can now run Foundry commands directly against your Stagenet:
# To load the RPC URL and the private key from your .env file
source .env

# Run Foundry commands
forge create src/Counter.sol:Counter --rpc-url $STAGENET_RPC_URL --private-key $STAGENET_PRIVATE_KEY --broadcast
forge script script/Counter.s.sol:CounterScript --rpc-url $STAGENET_RPC_URL --private-key $STAGENET_PRIVATE_KEY --broadcast
Connect GitHub Repository
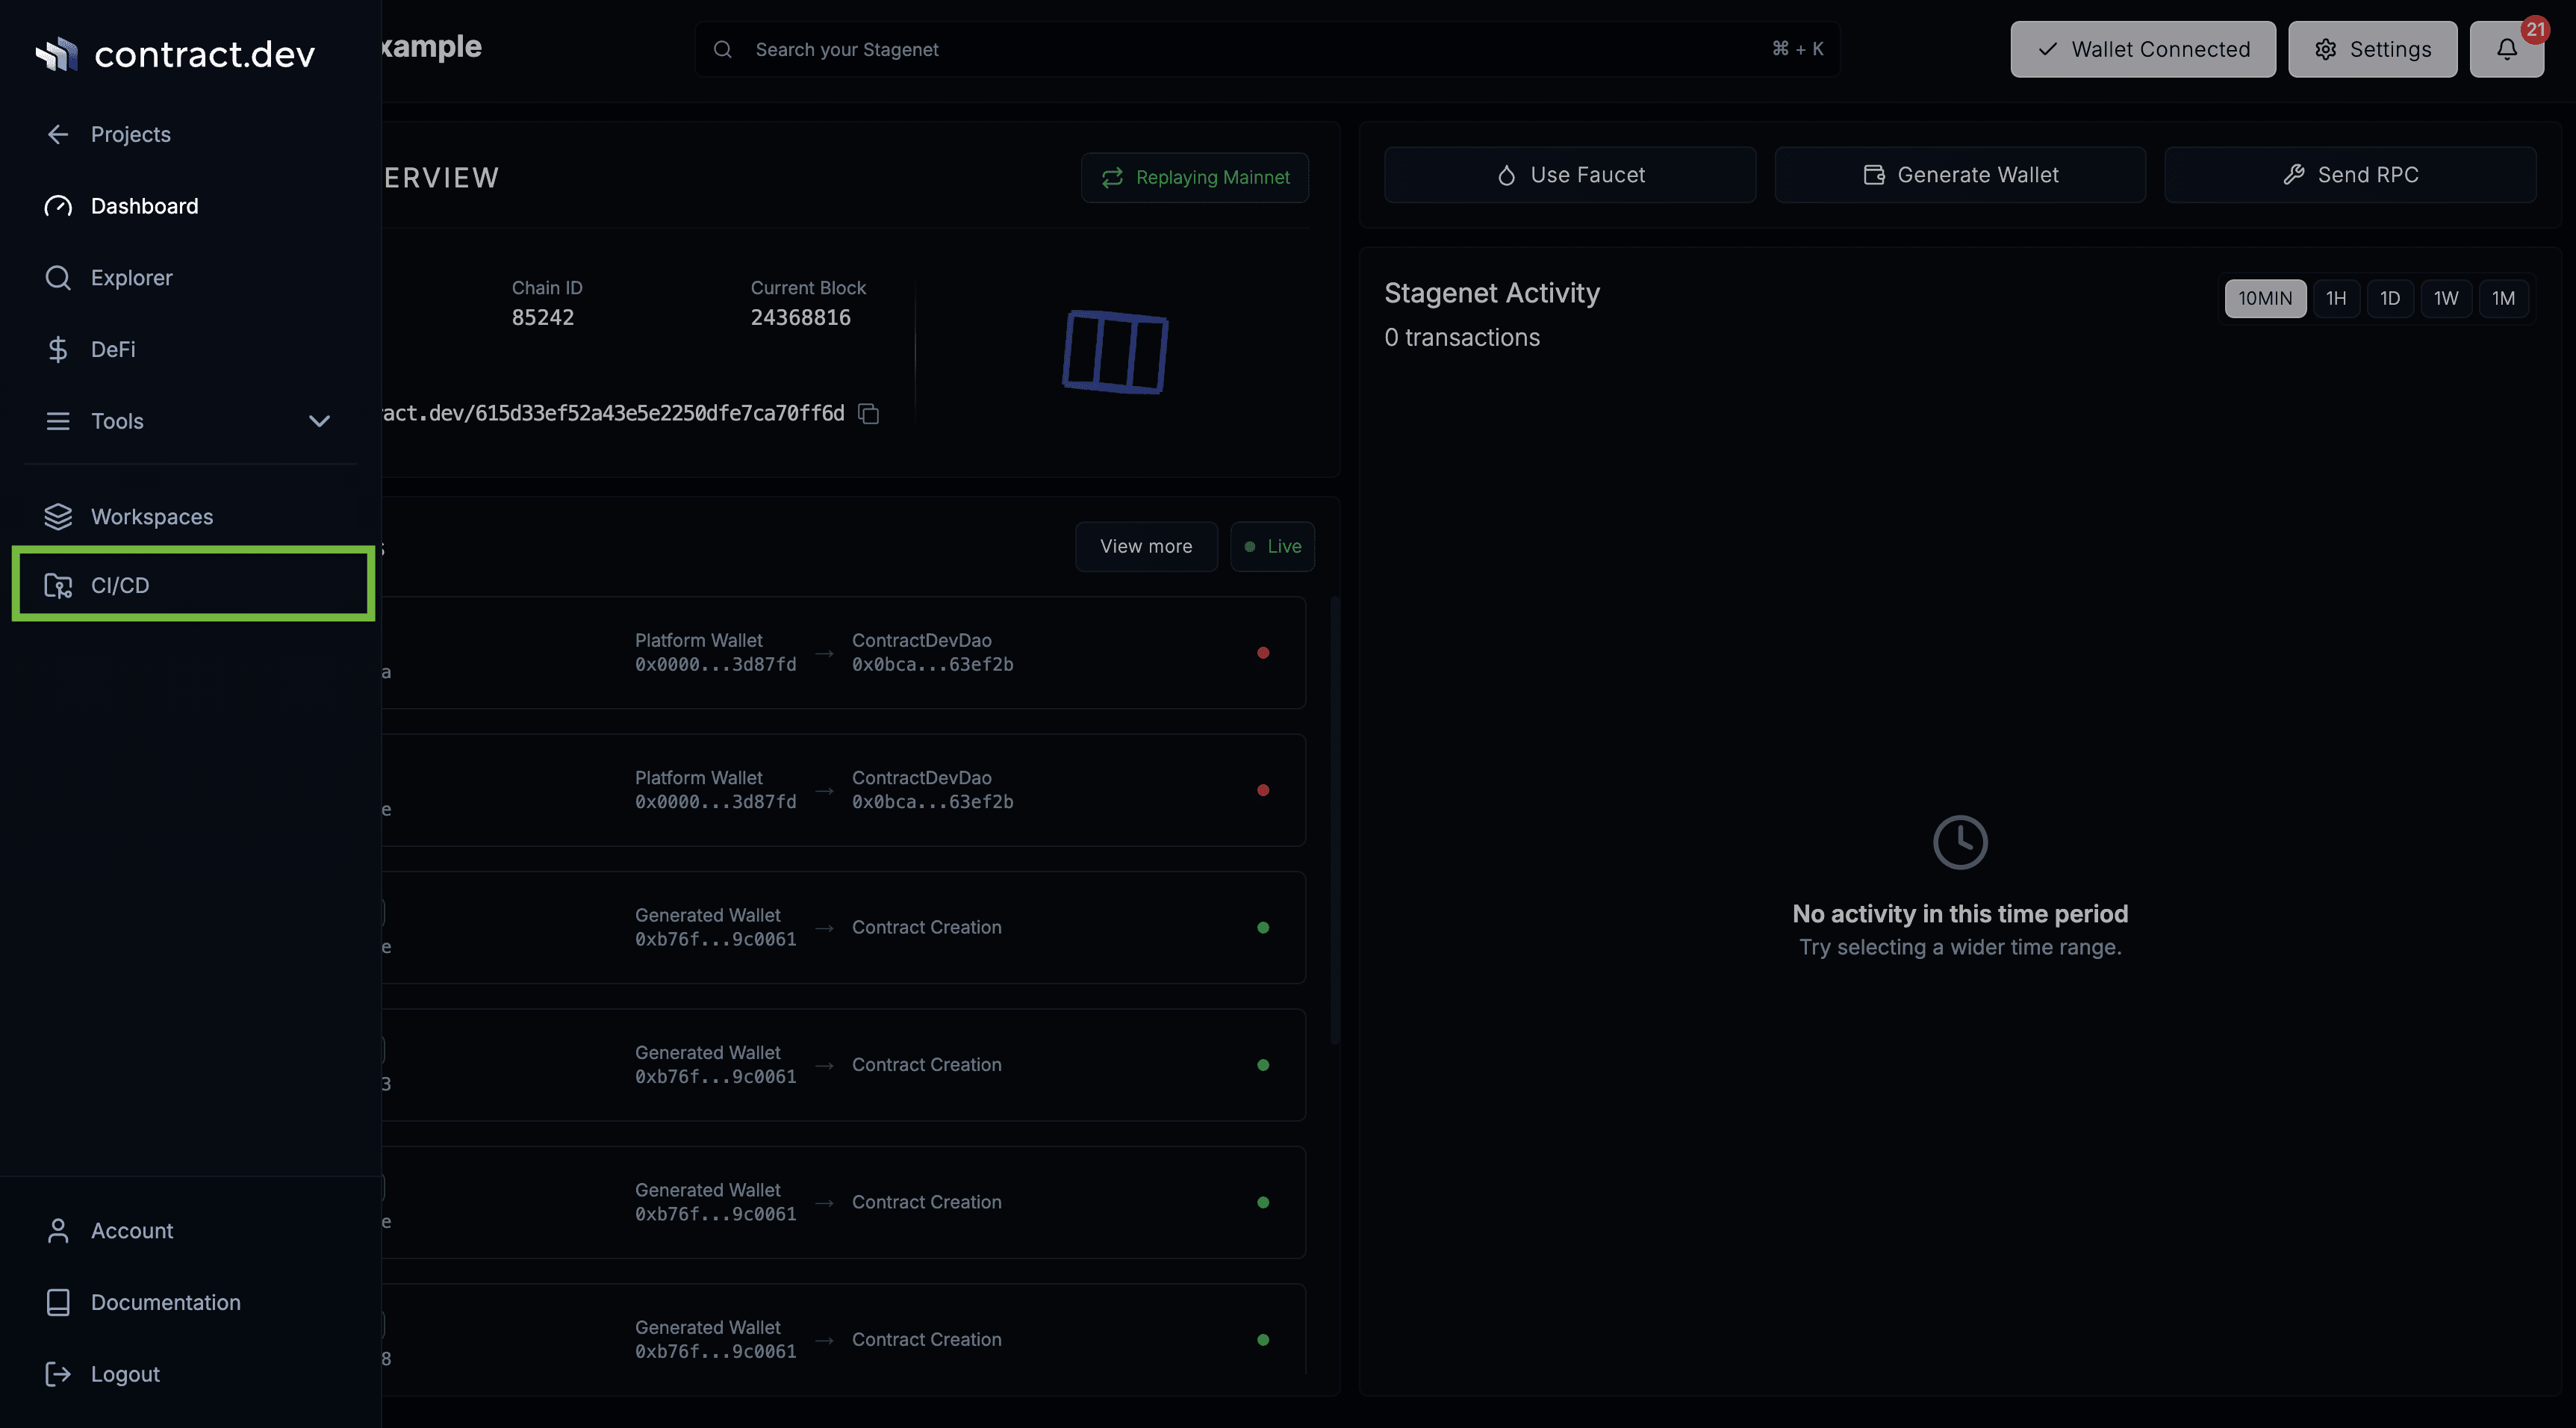
Next, connect the GitHub repository containing your Foundry project. This imports your contracts, creates a Contract Workspace for each one, and enables CI/CD.
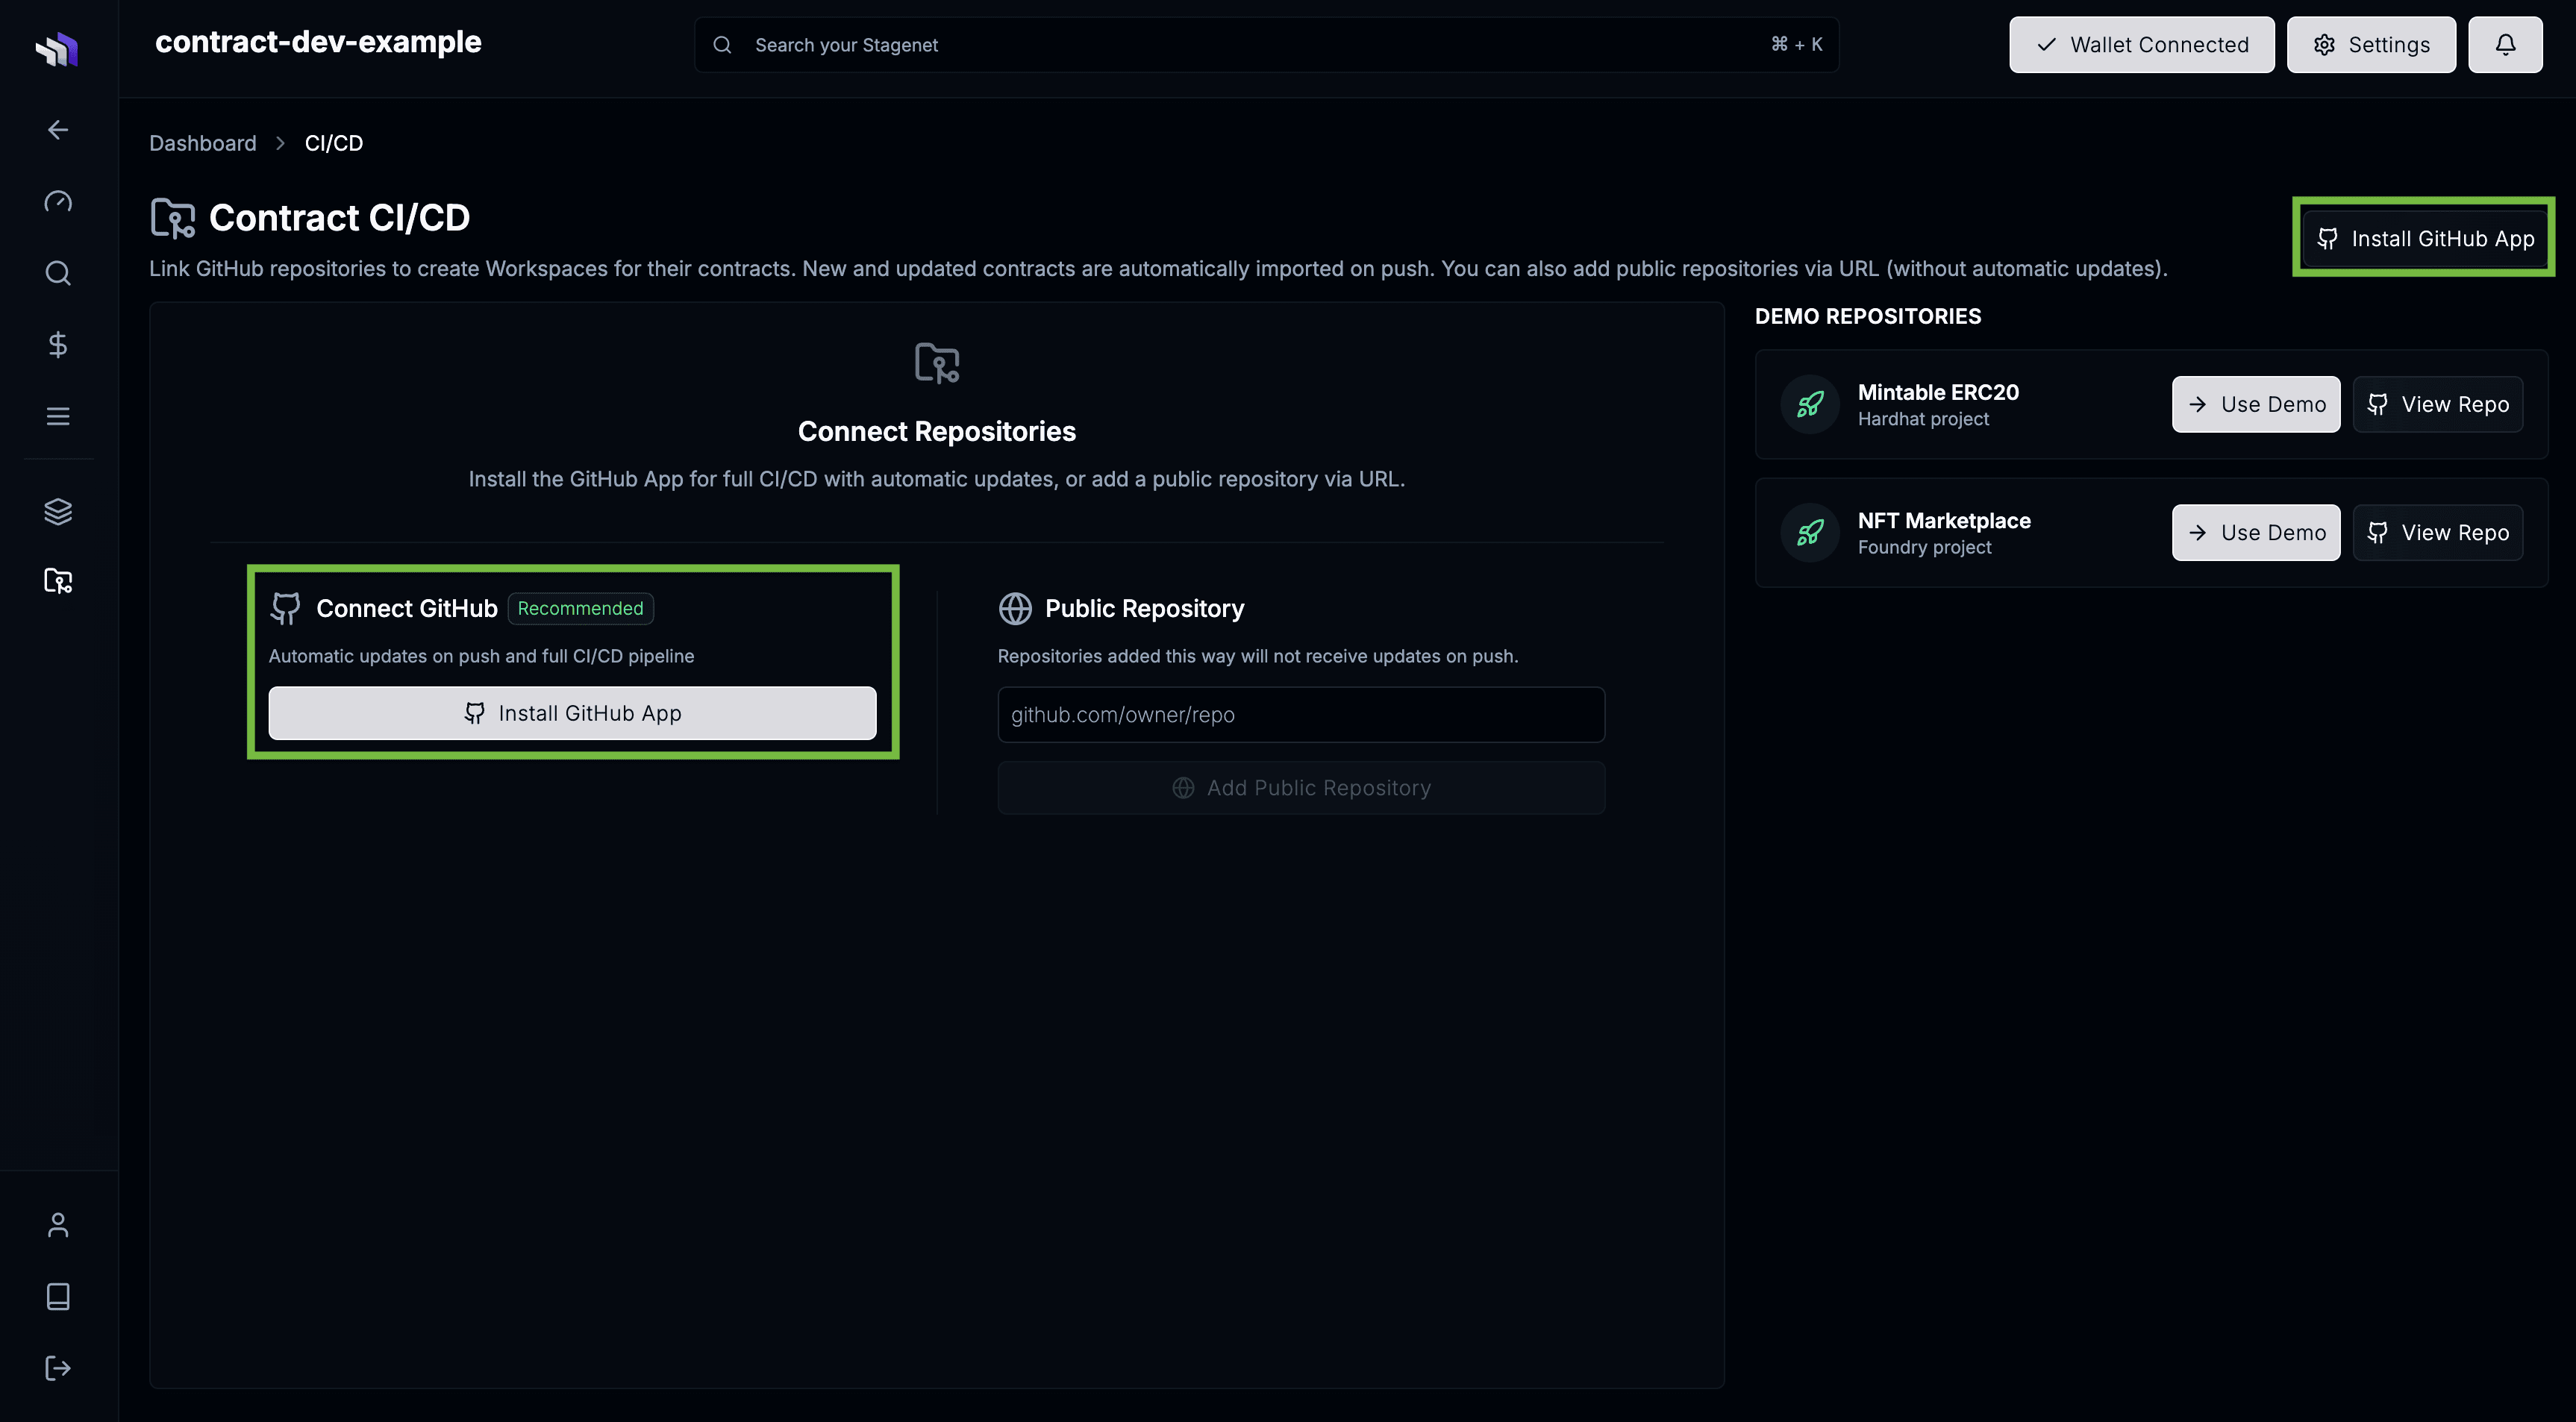
Open the CI/CD dashboard via the sidebar.
Then install the contract.dev GitHub App.
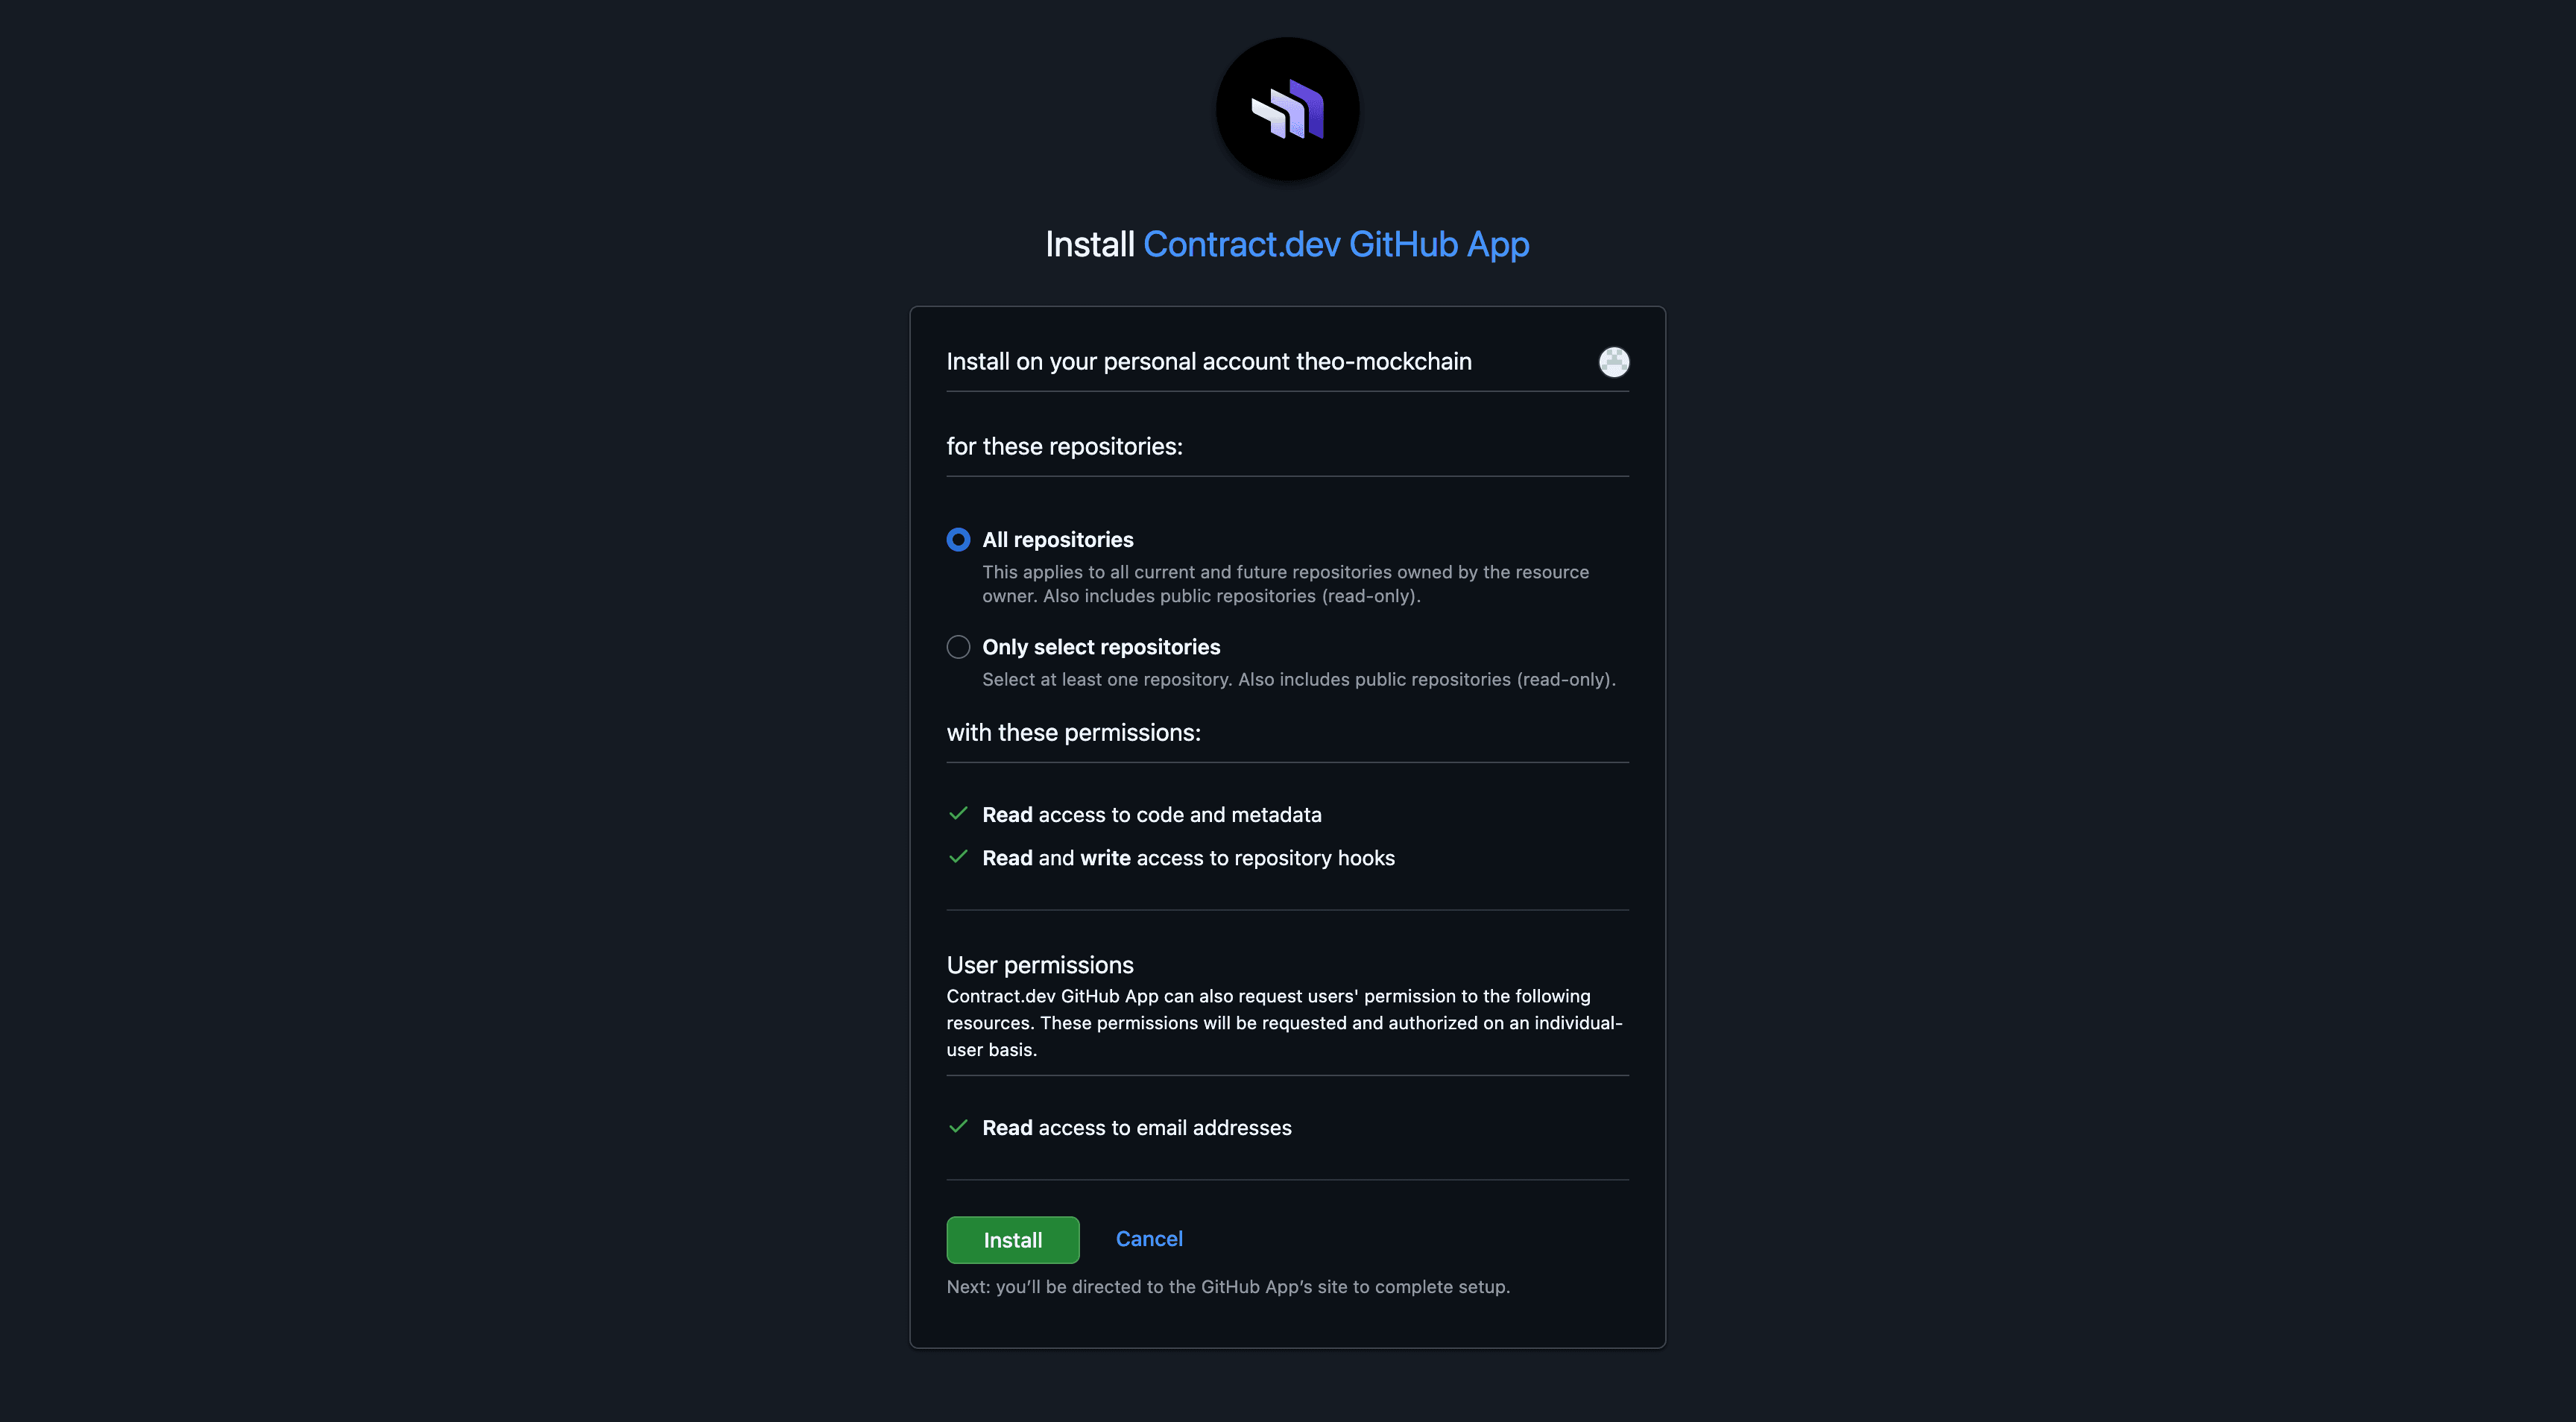
You’ll be redirected to GitHub to grant access. Approve the repository that contains your contracts.
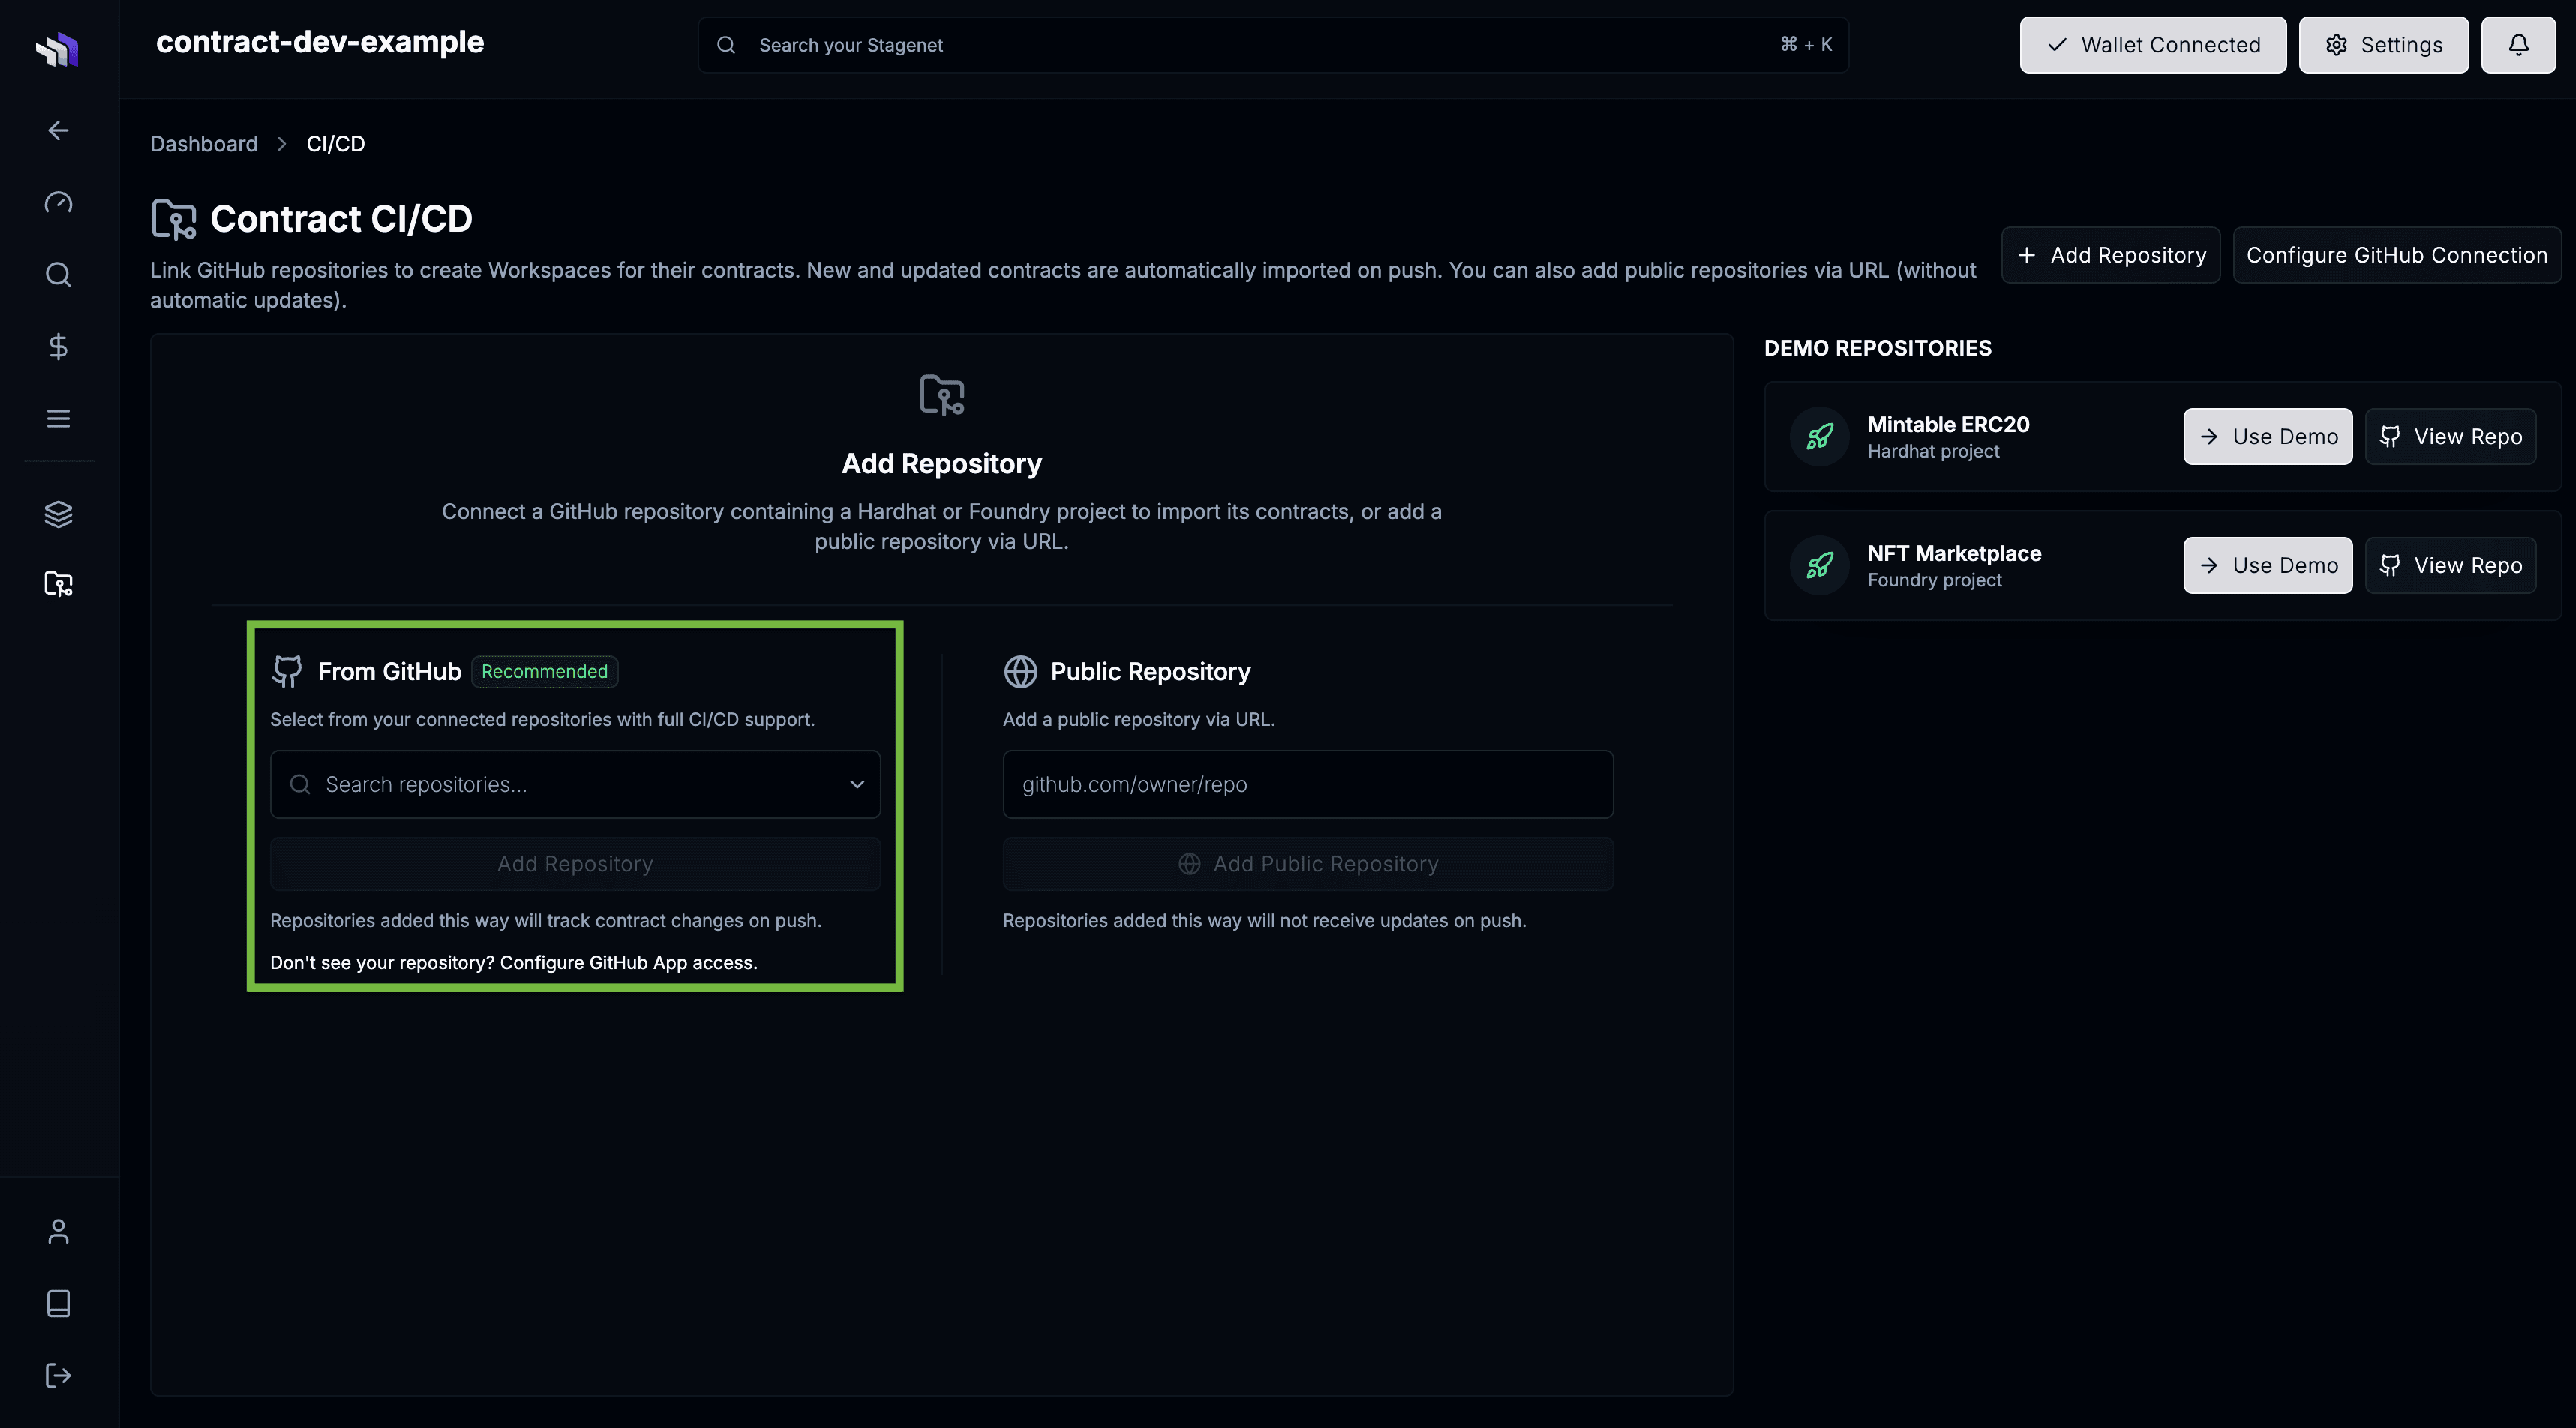
Then return to the CI/CD page, select your repository, and click Add Repository.
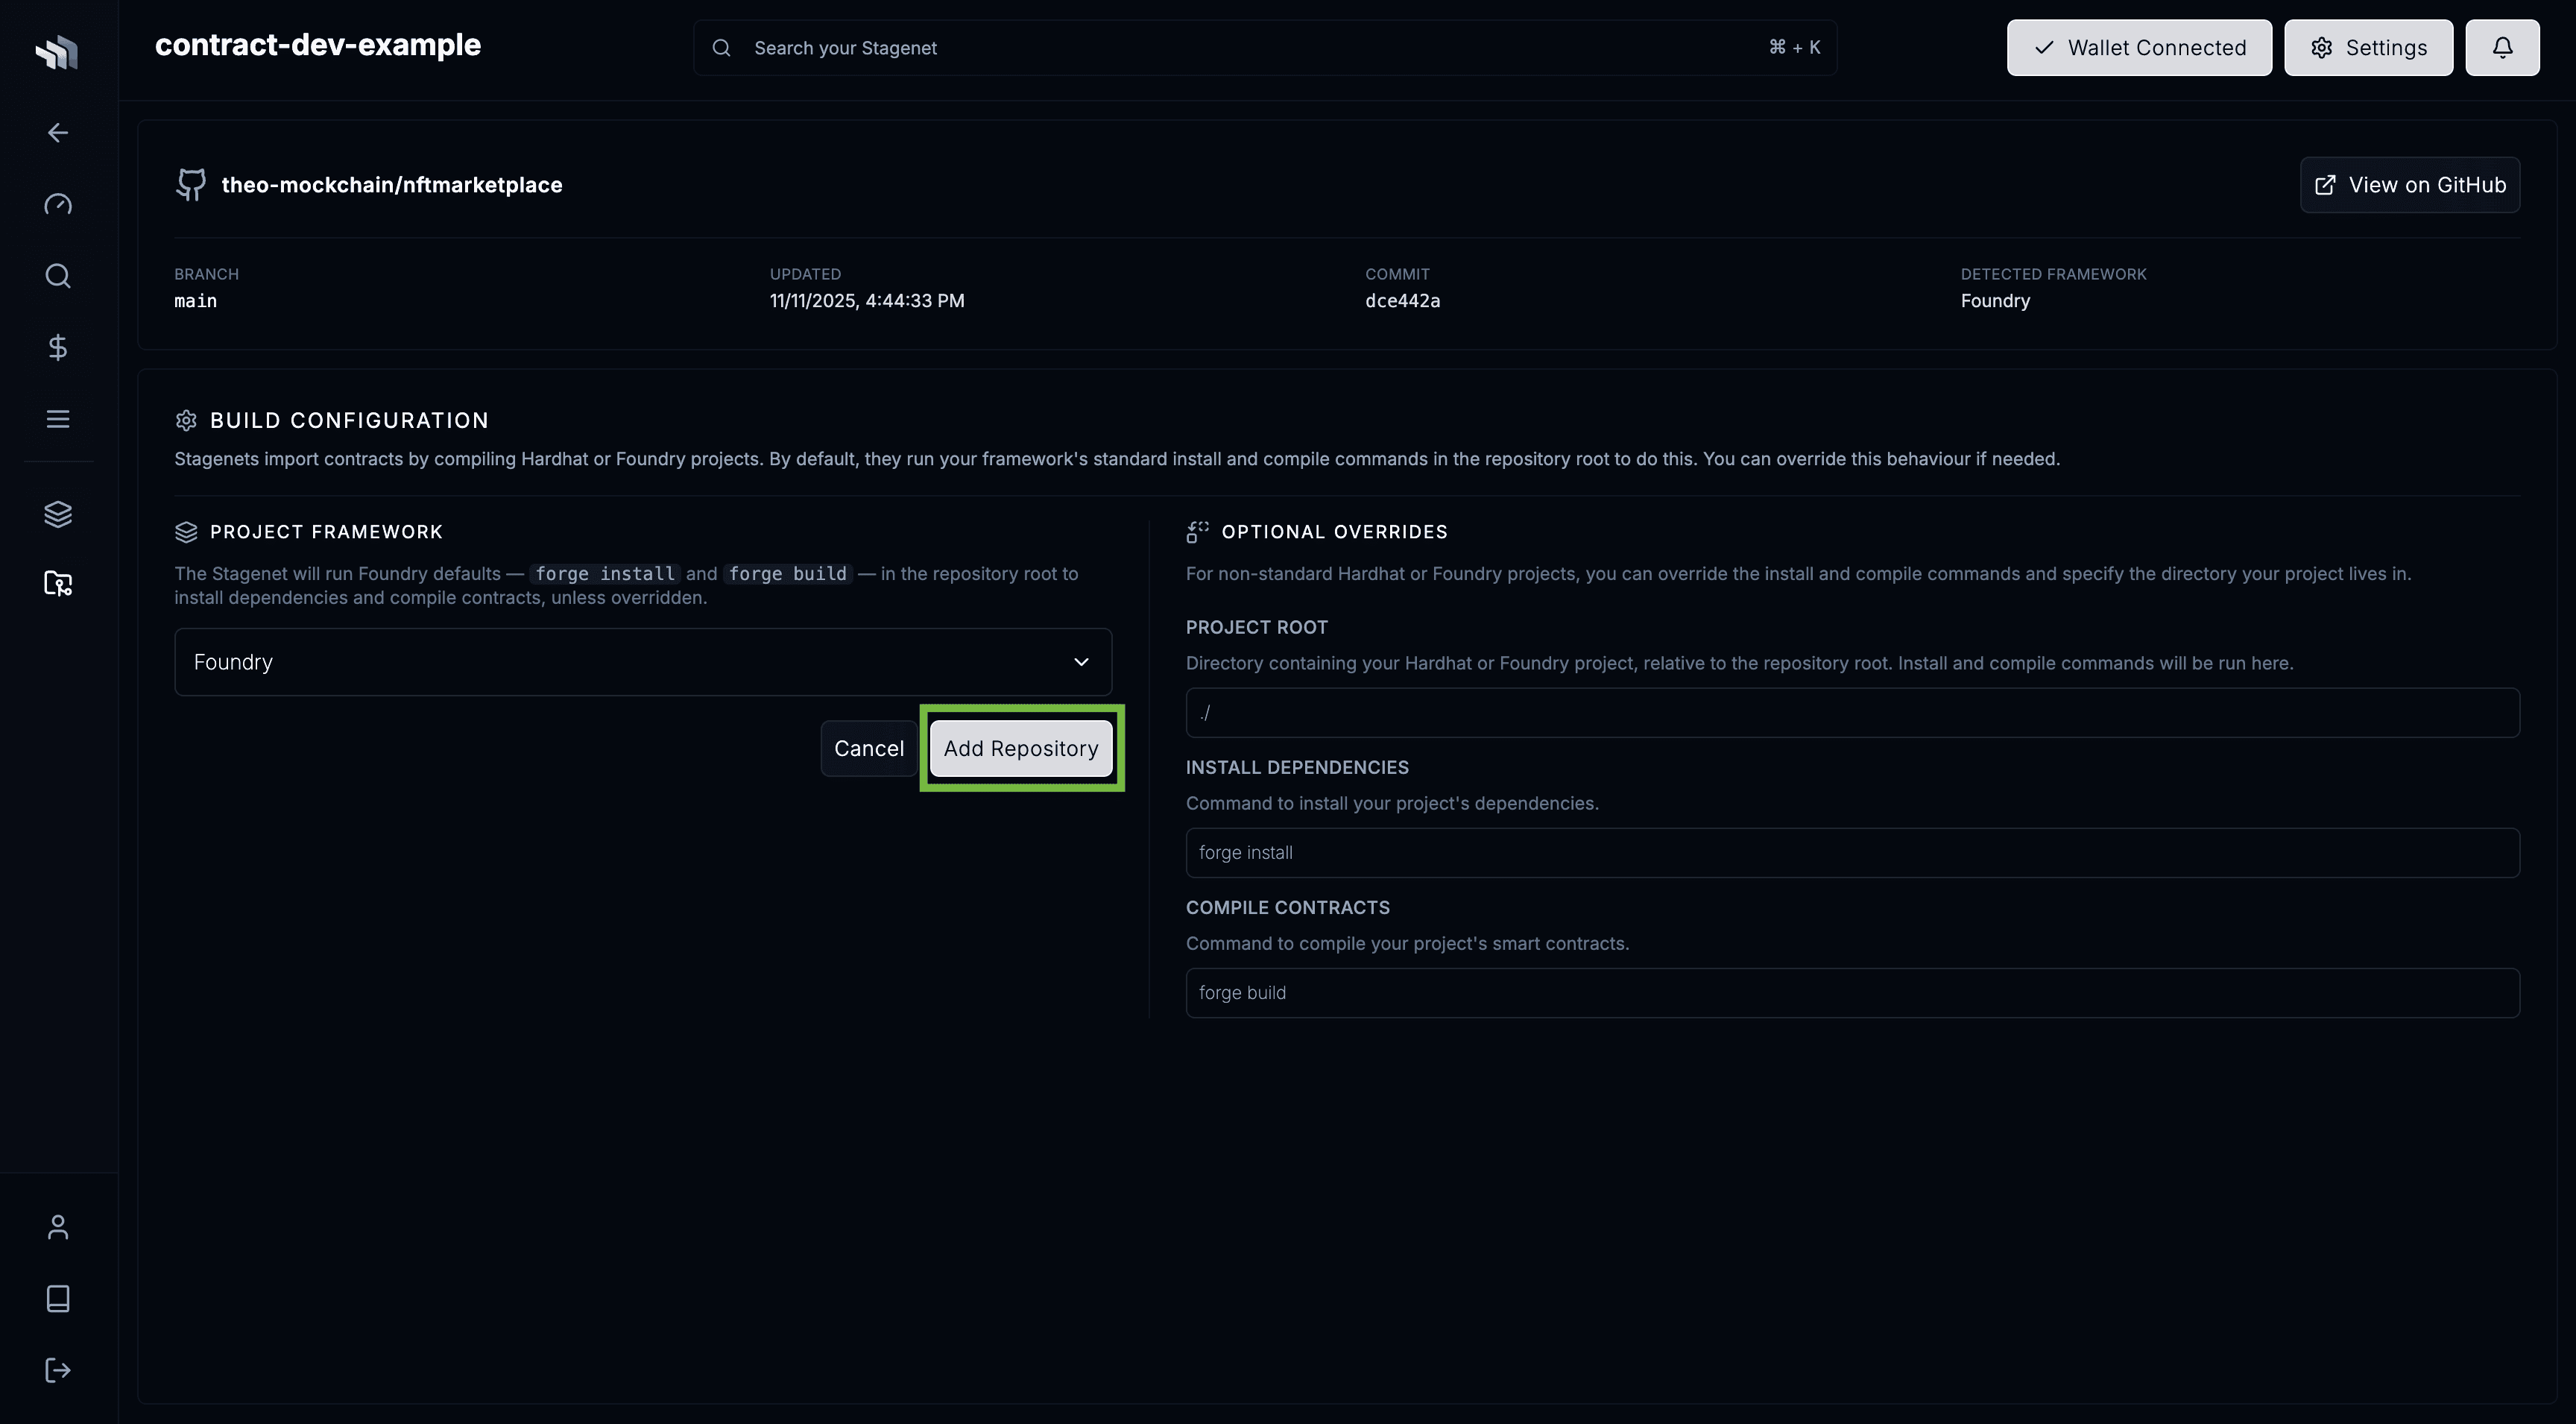
You’ll be taken to the repo’s Build Configuration page.
Foundry projects work out of the box (forge install to install dependencies, forge build to compile contracts).
If you use a custom setup, configure your own build steps here.
Click Add Repository to start the import.
You will then be taken to your repo’s dashboard, where you’ll see the initial compilation running.
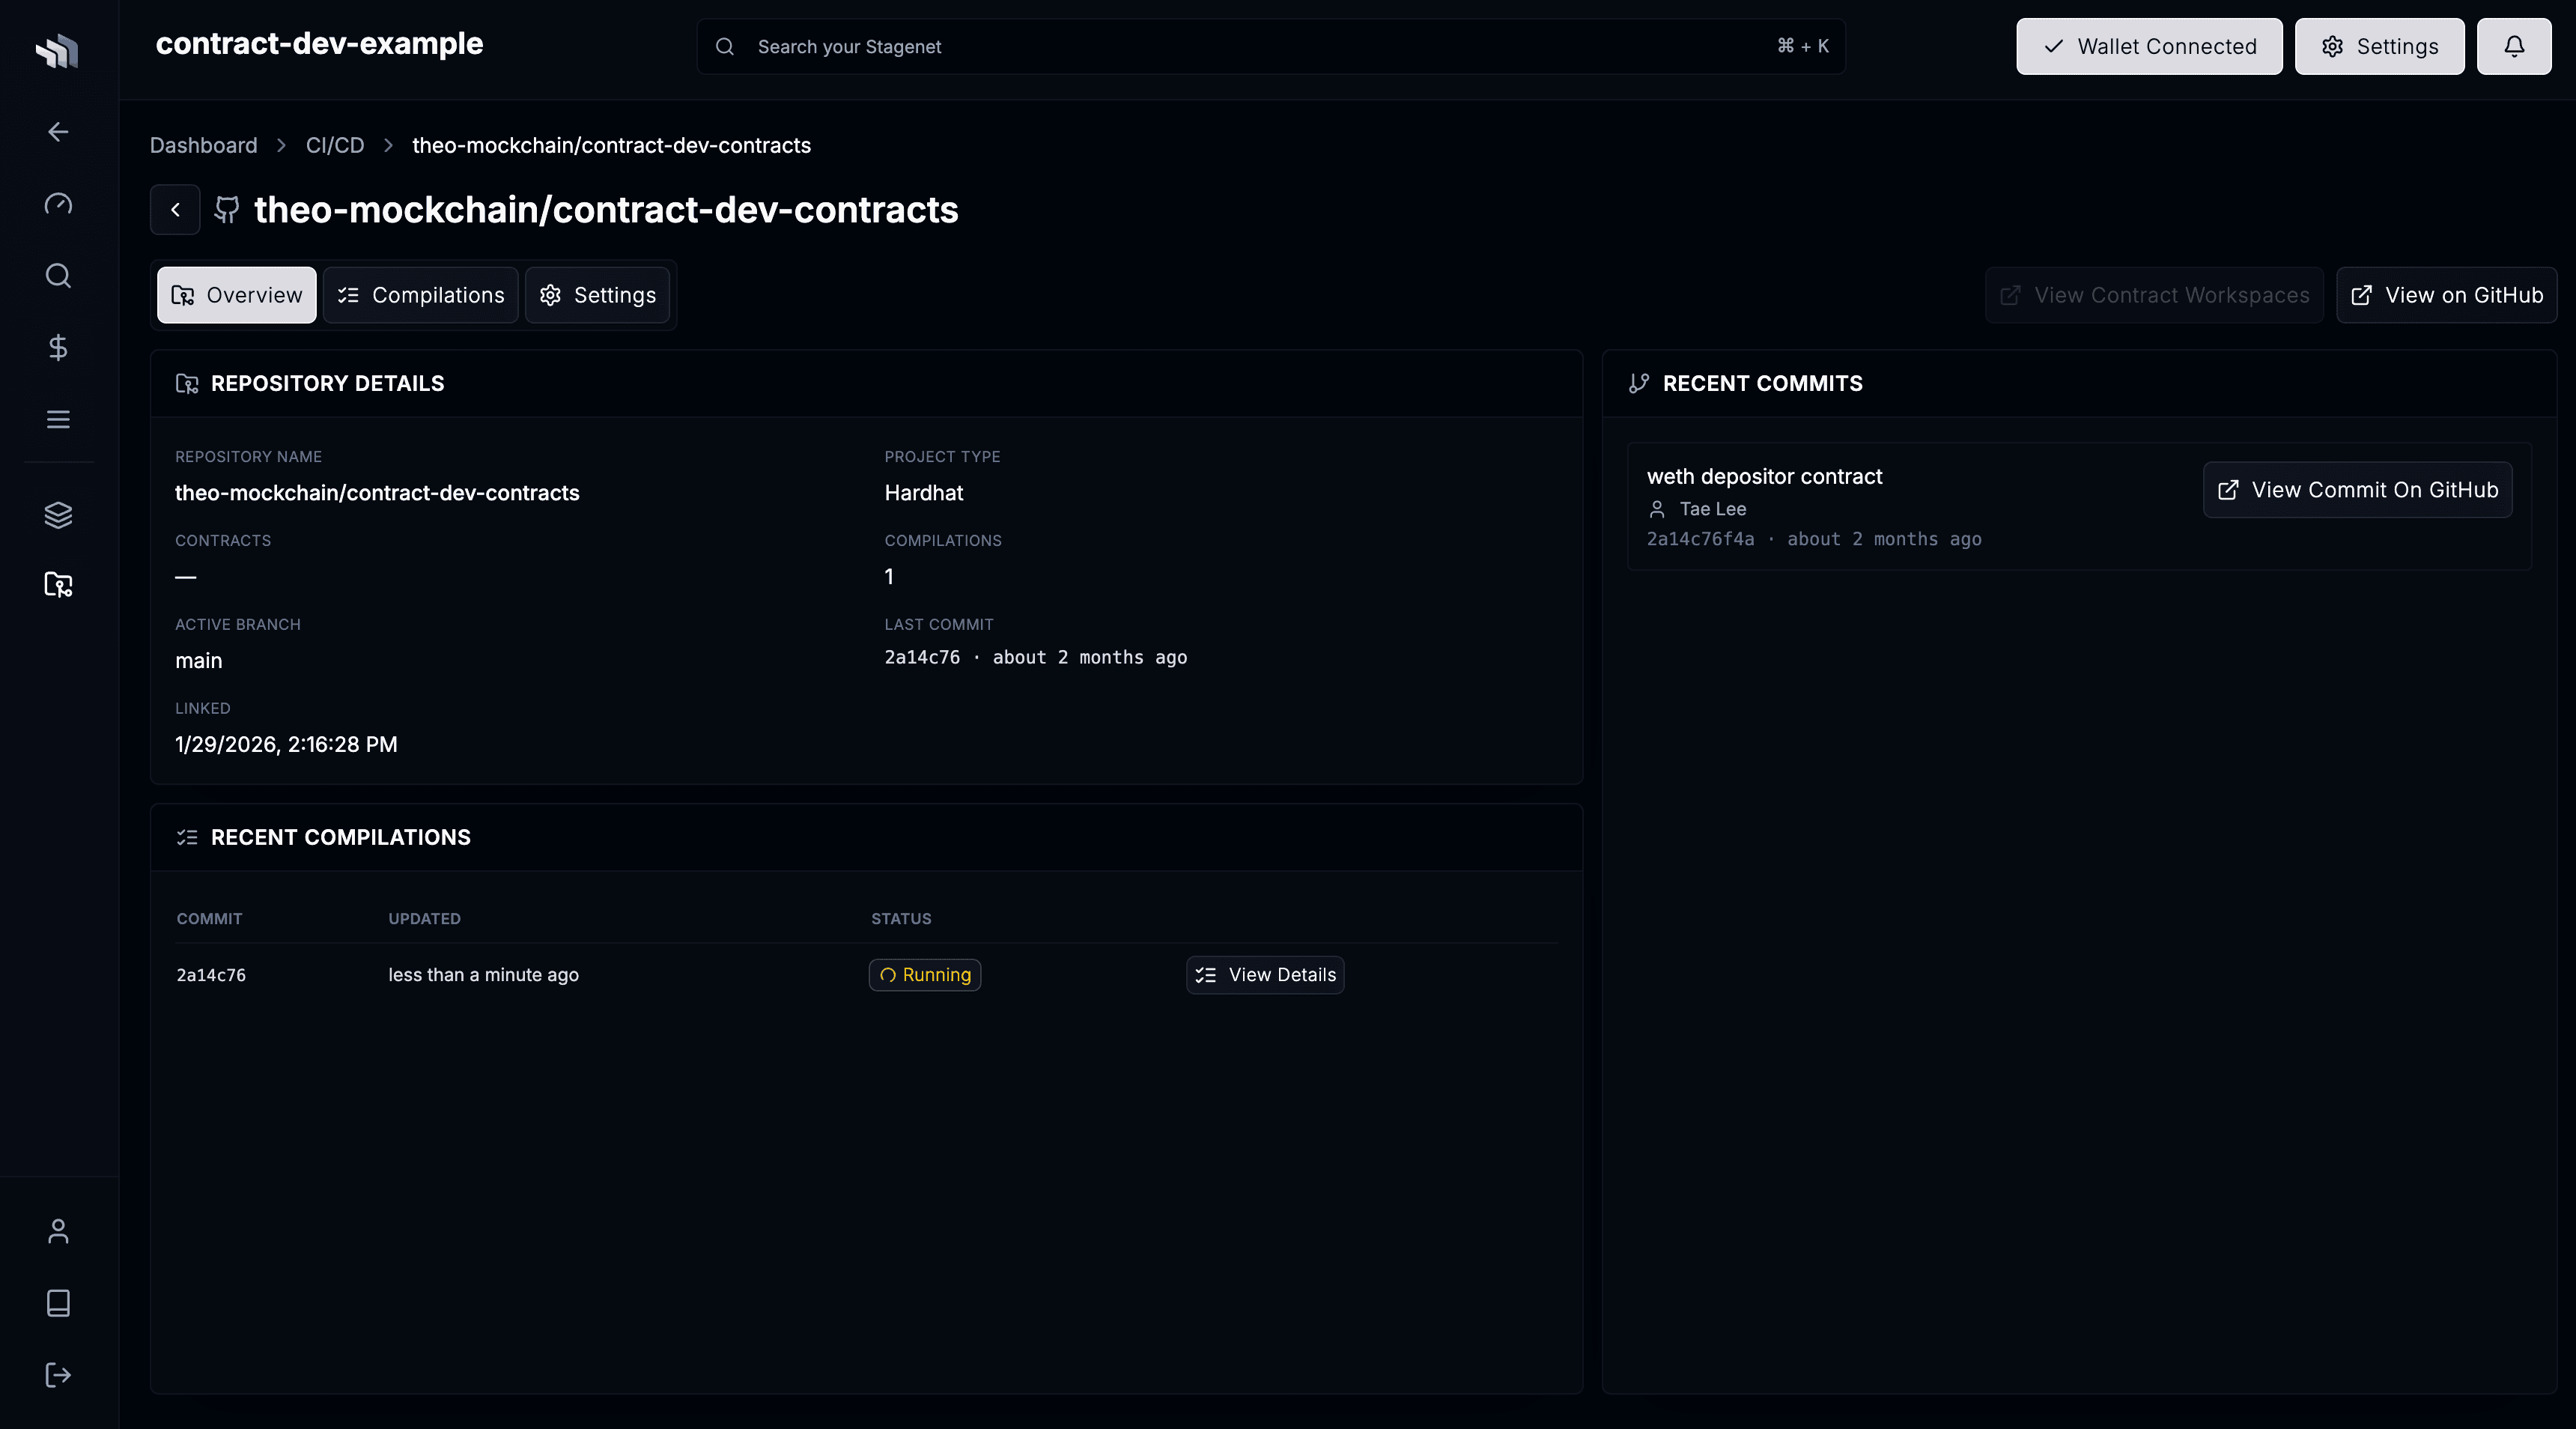
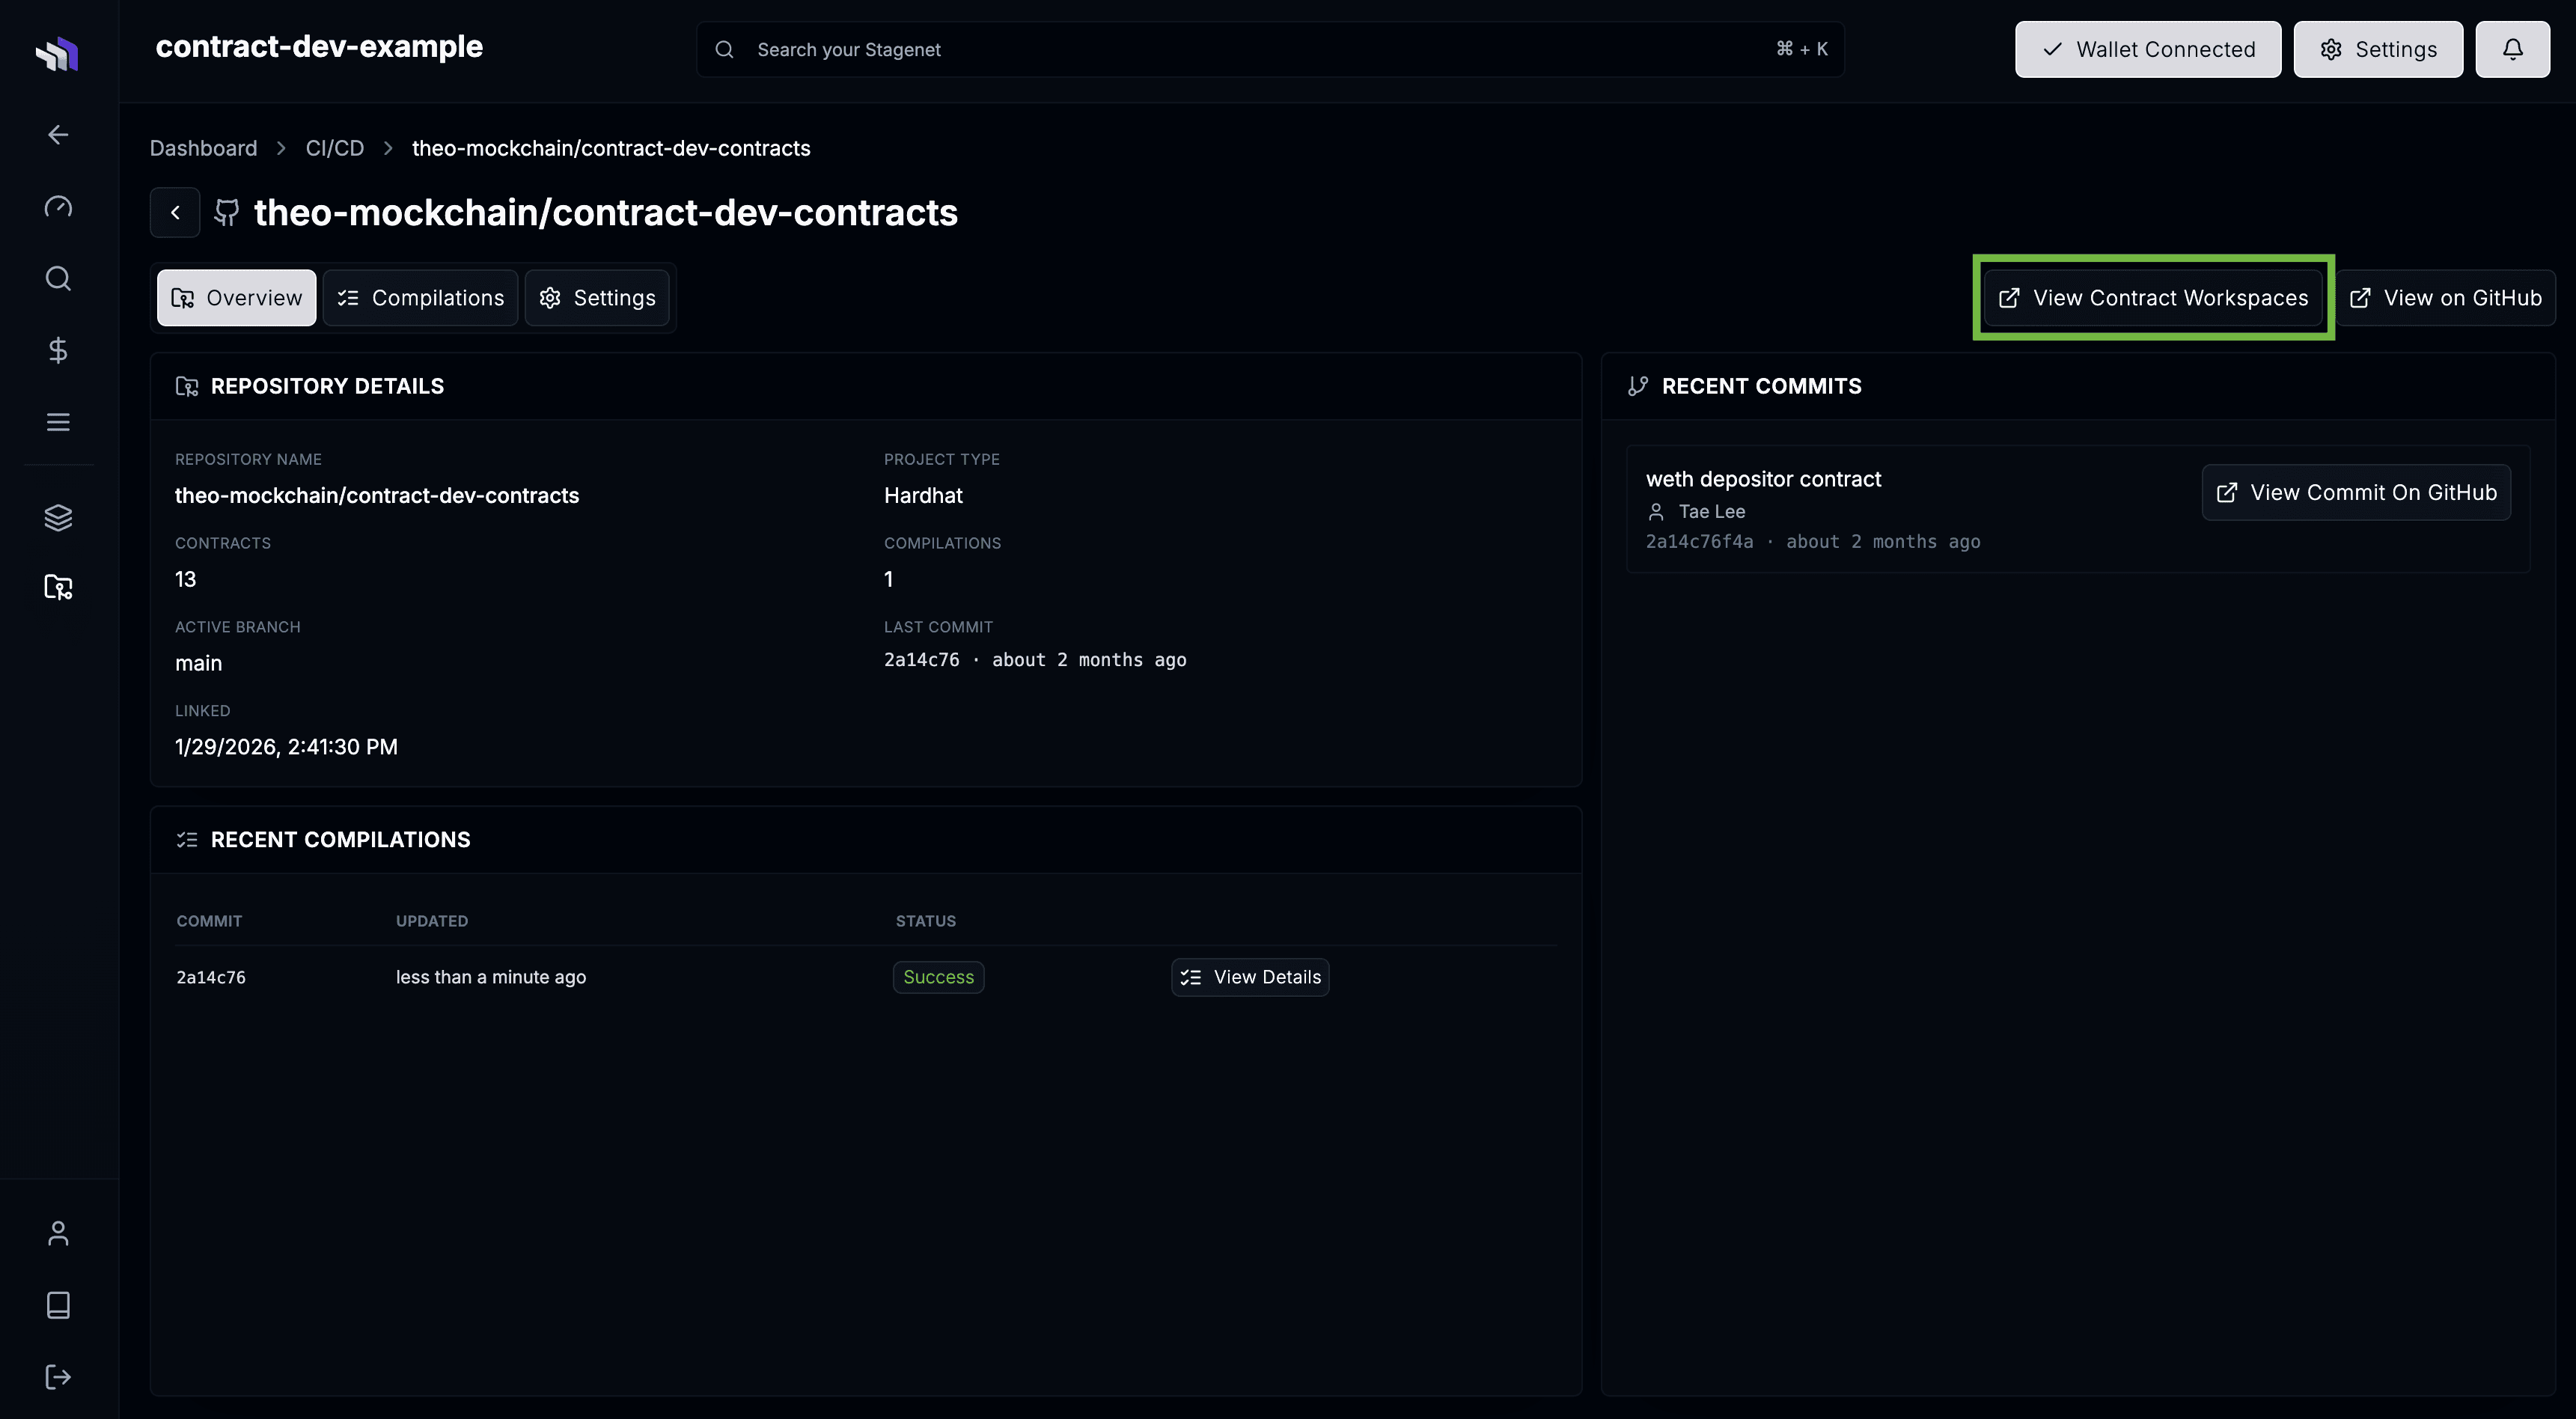
Once complete, your Contract Workspaces are generated. Click View Contract Workspaces to see them.
Activate Workspaces
Workspaces are created automatically, but they only become active once the corresponding contracts are deployed to your Stagenet.
You’ll see any undeployed Workspaces on the dashboard:
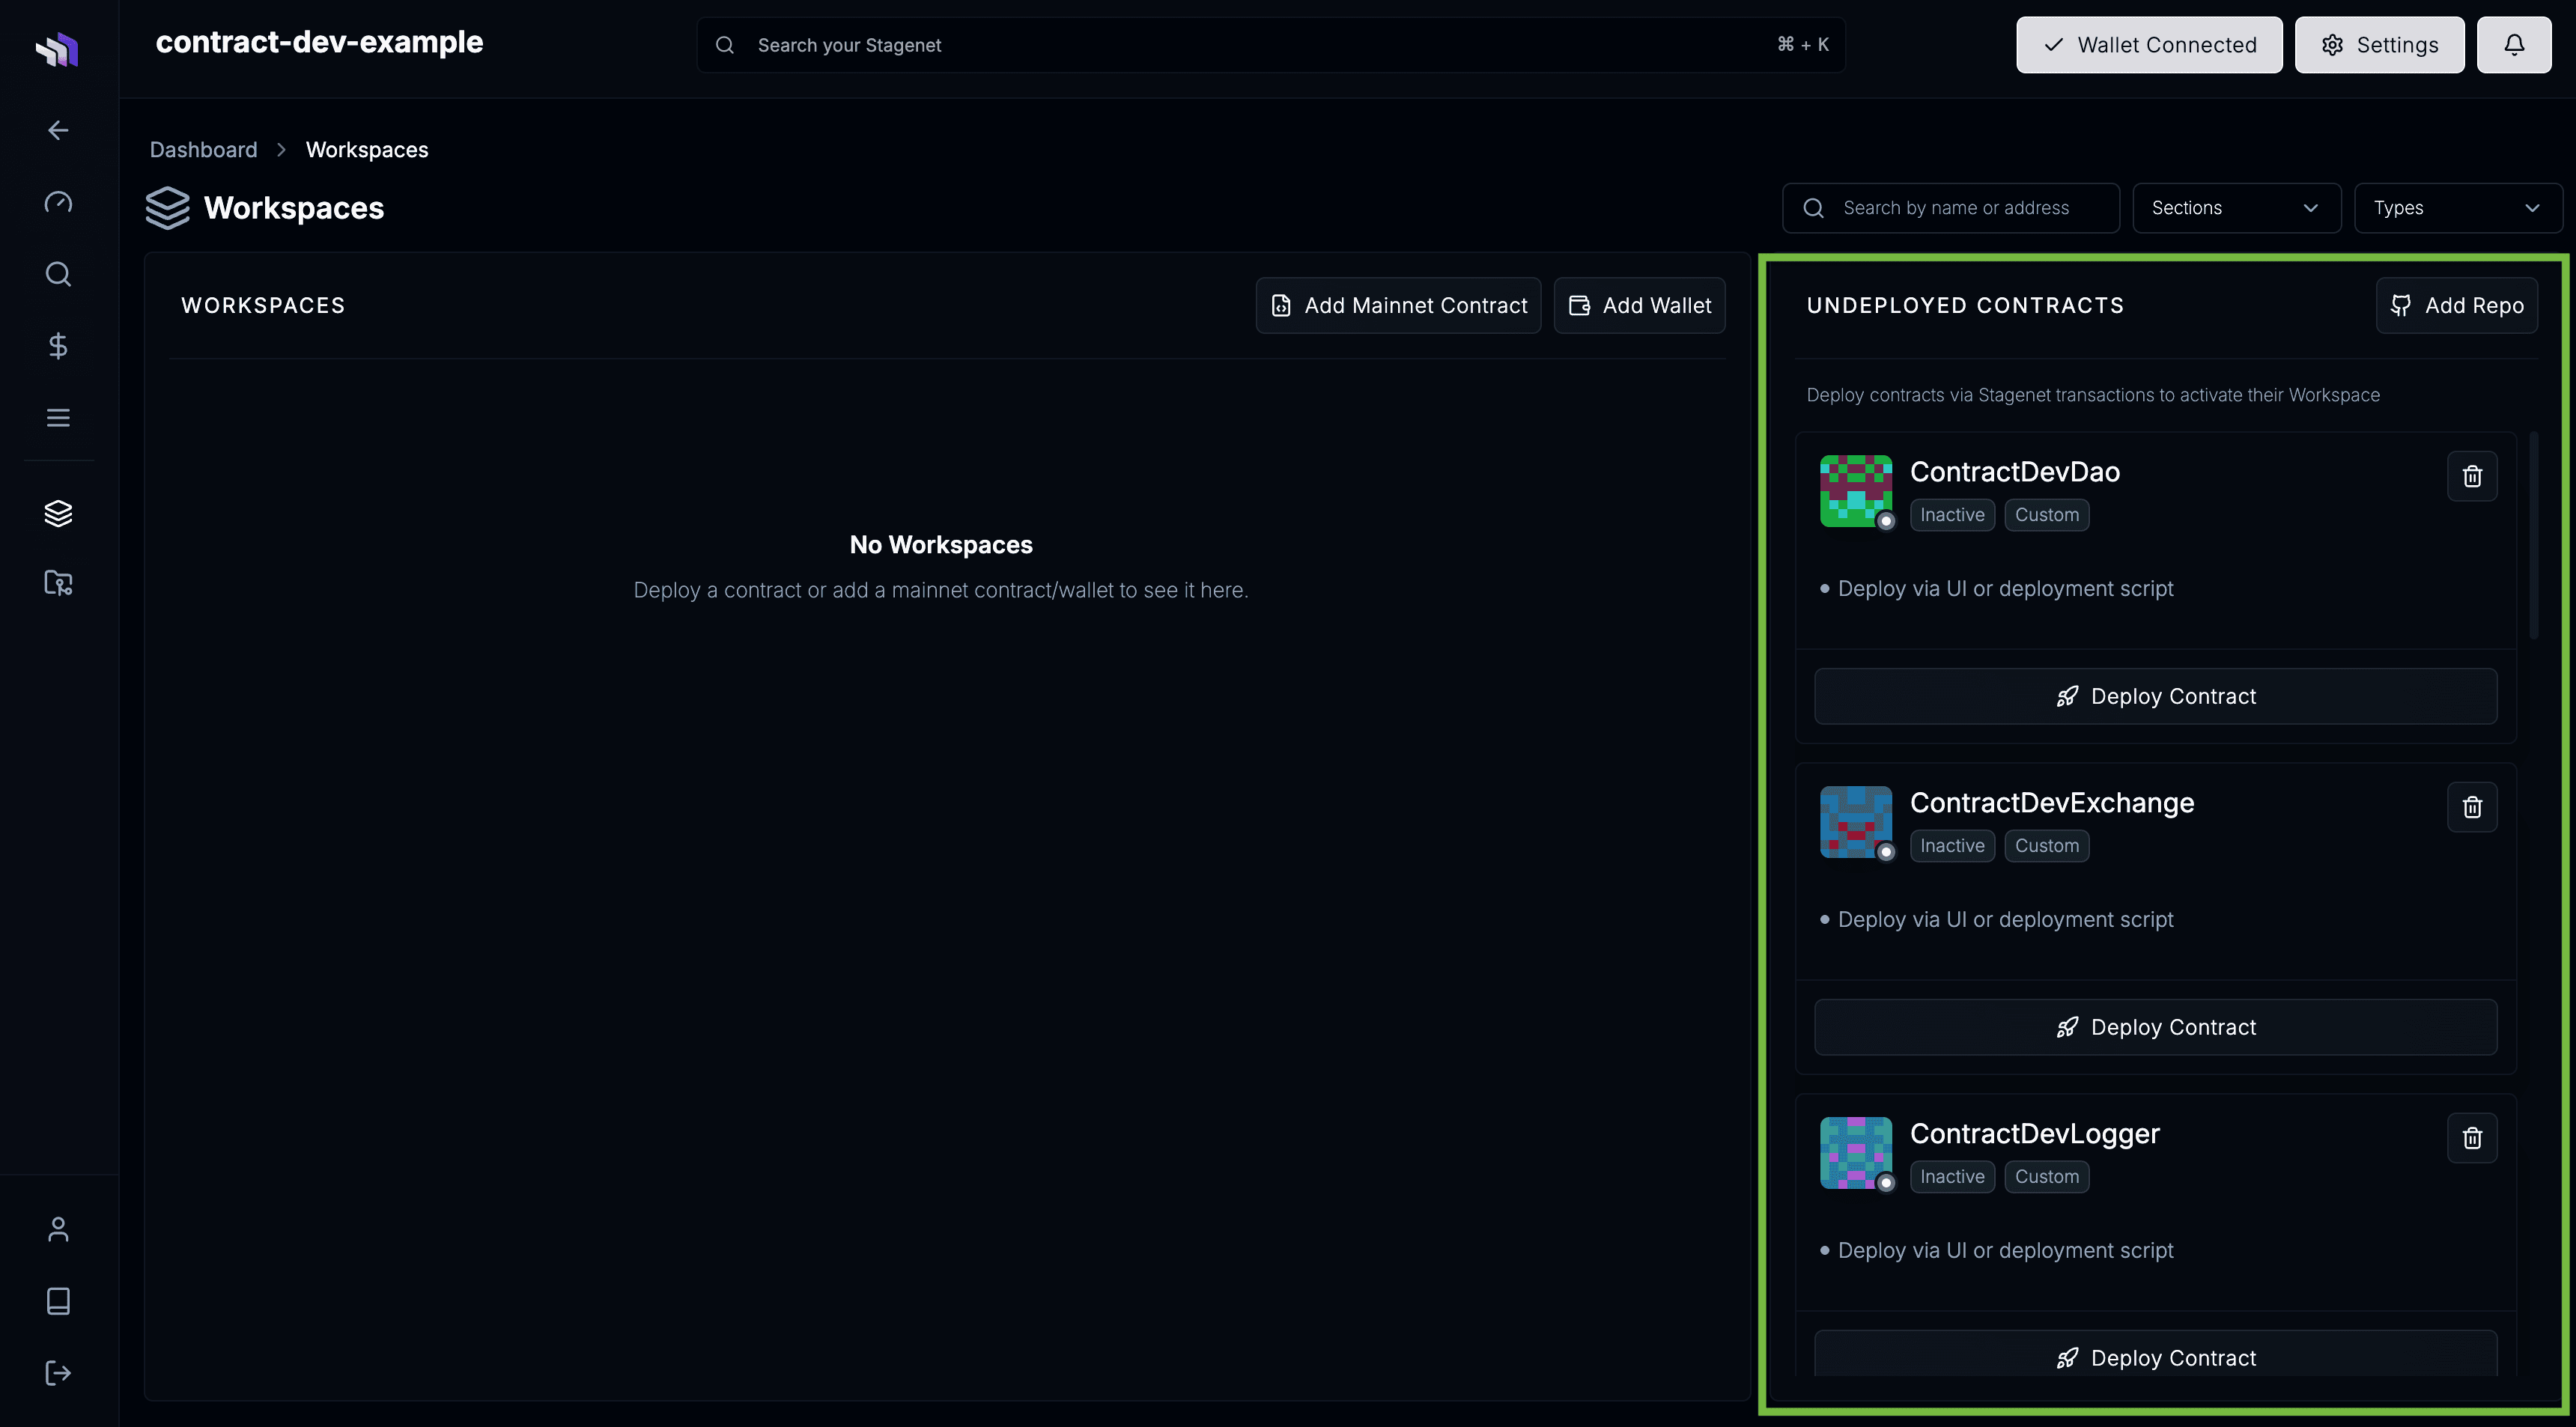
Activate your Workspaces by deploying your contracts onto your Stagenet.
Deploy your contracts using your standard Foundry scripts with the STAGENET_RPC_URL and STAGENET_PRIVATE_KEY in your .env:
# To load the RPC URL and the private key from your .env file
source .env

# Deploy your contracts onto your Stagenet
forge create src/MyContract.sol:MyContract --rpc-url $STAGENET_RPC_URL --private-key $STAGENET_PRIVATE_KEY --broadcast
forge script script/MyContractScript.s.sol:MyContractScript --rpc-url $STAGENET_RPC_URL --private-key $STAGENET_PRIVATE_KEY --broadcast
Once deployed, your Workspaces activate automatically.
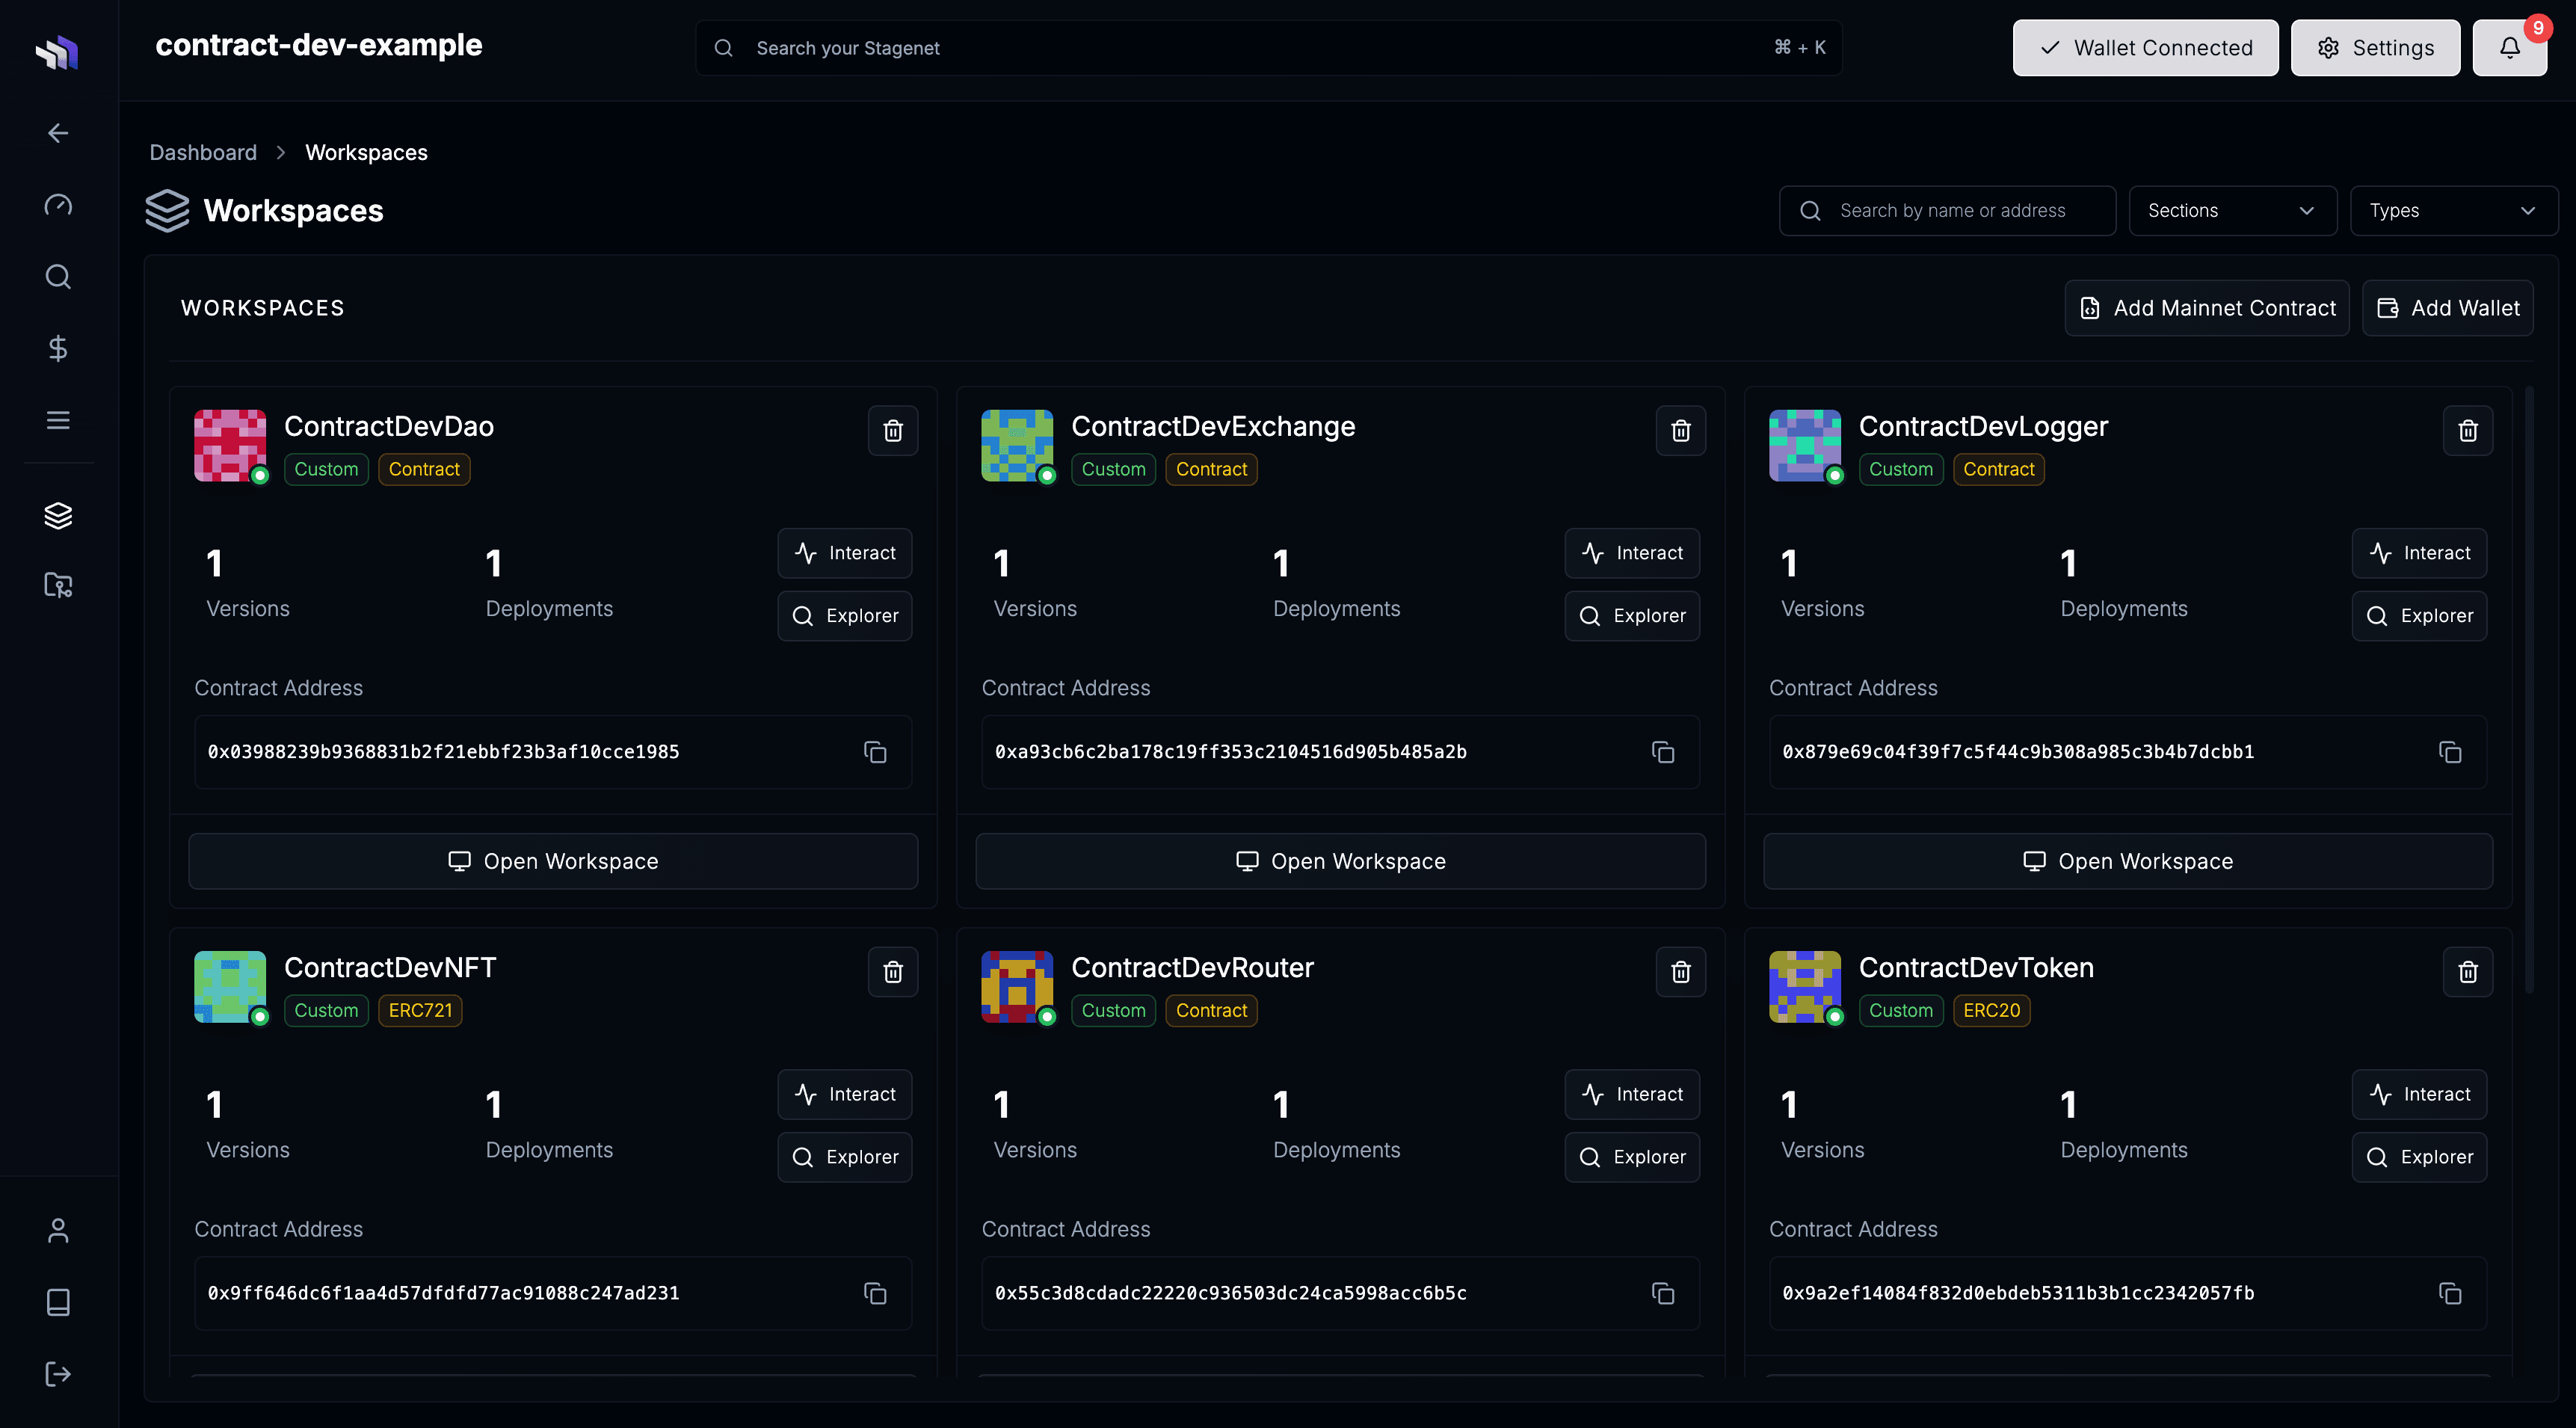
You can now inspect behaviour, debug interactions, and iterate on your contracts.
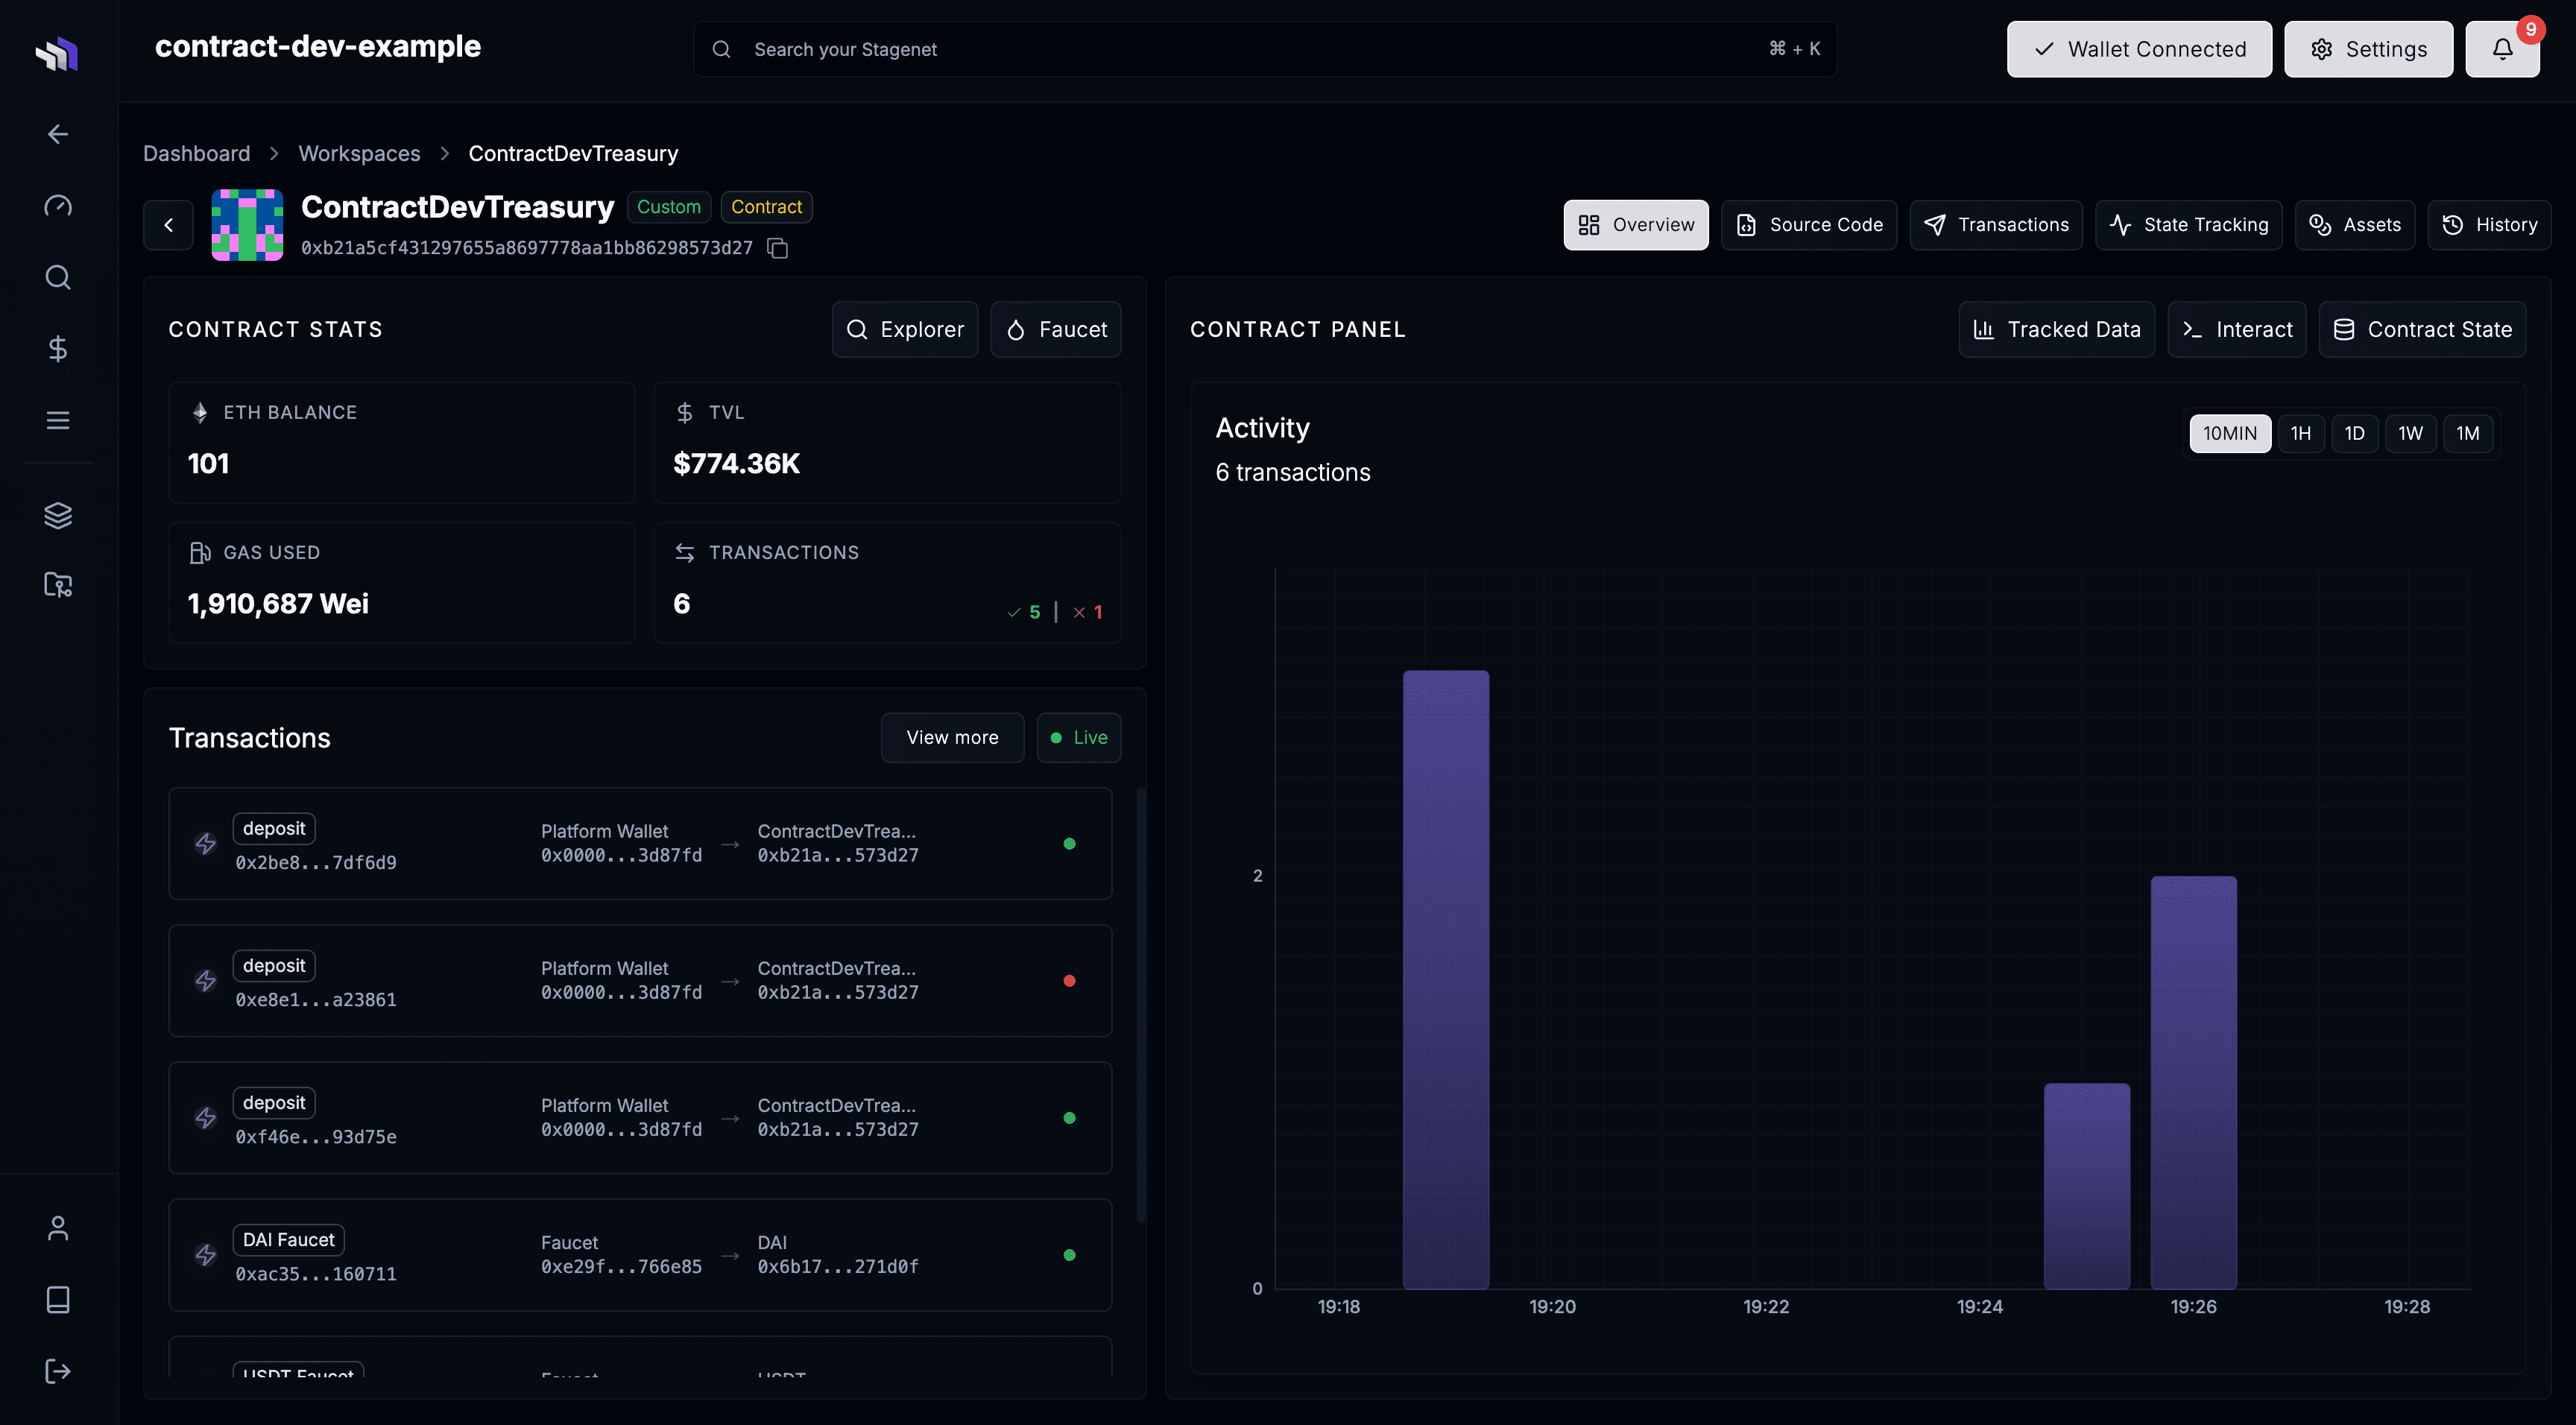
Workspaces have an Overview that gives key contract stats and activity.
A Data Tracking View that allows you to record and graph contract data.

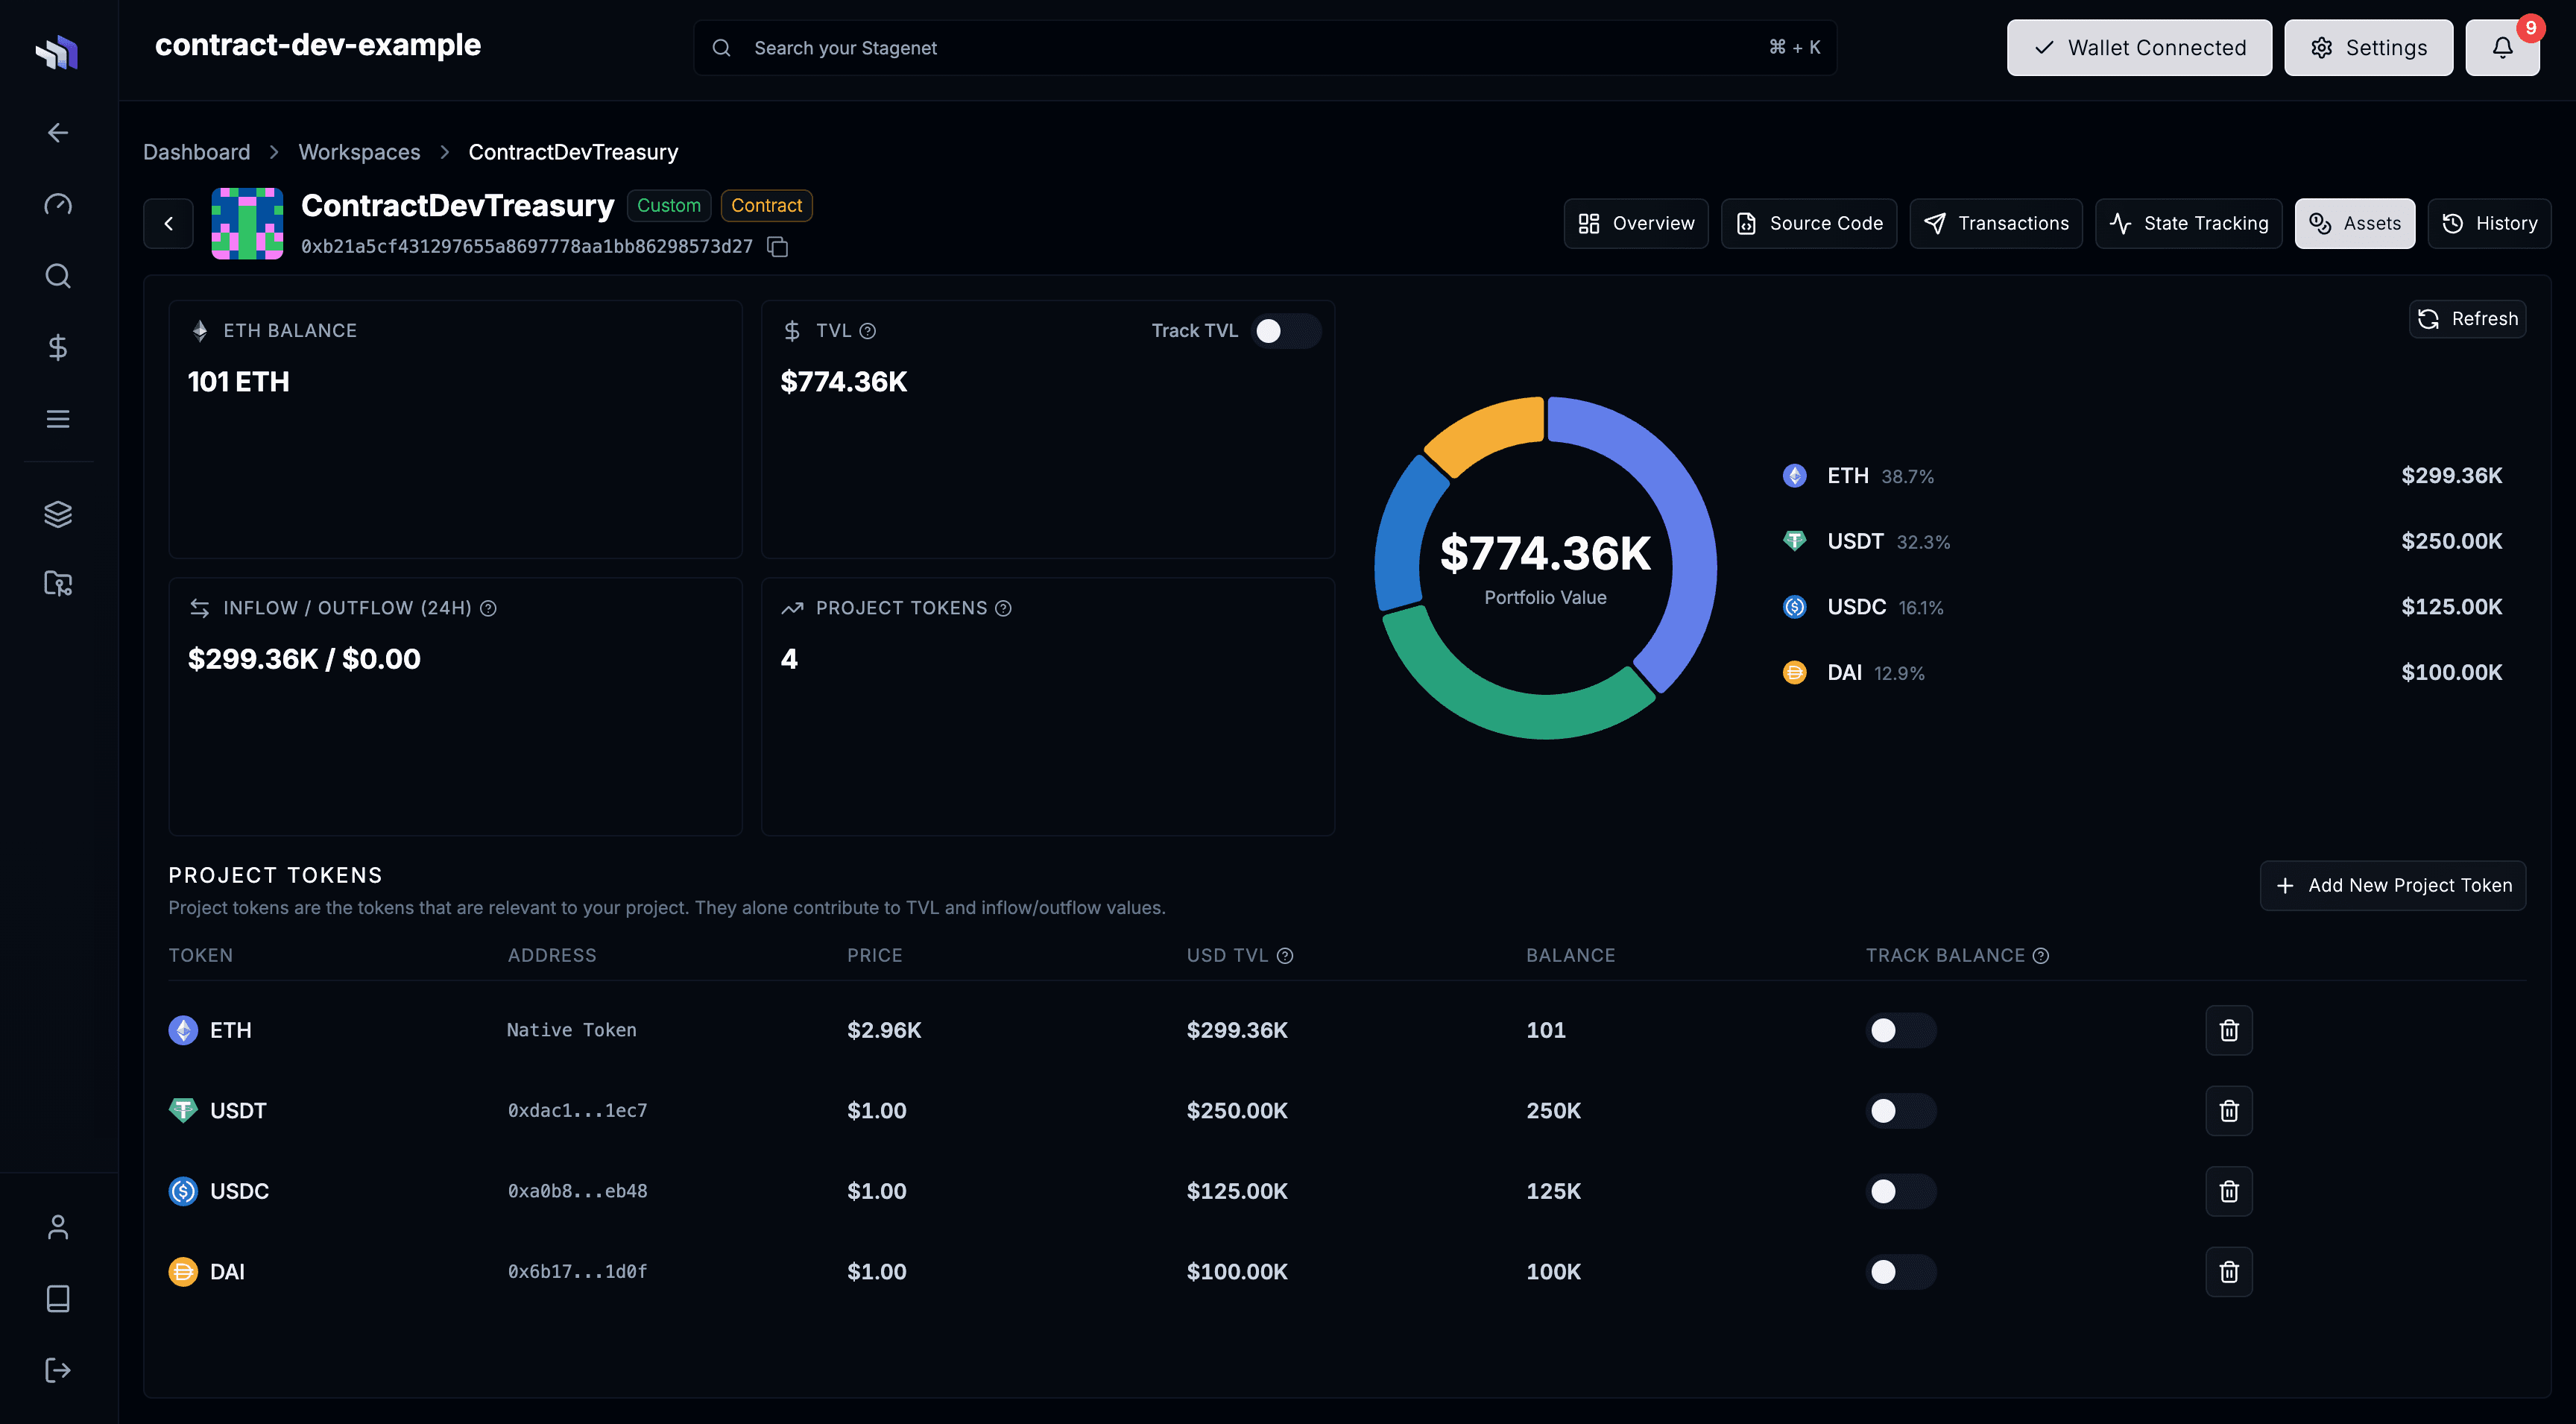
And an Assets View that gives info on token holdings and TVL.
CI/CD Enabled
Your Foundry project is now wired into CI/CD. Your Stagenet stays synced with your repository:
- Pushing new contracts creates new Workspaces
- Pushing updates to existing contracts automatically creates new Contract Versions
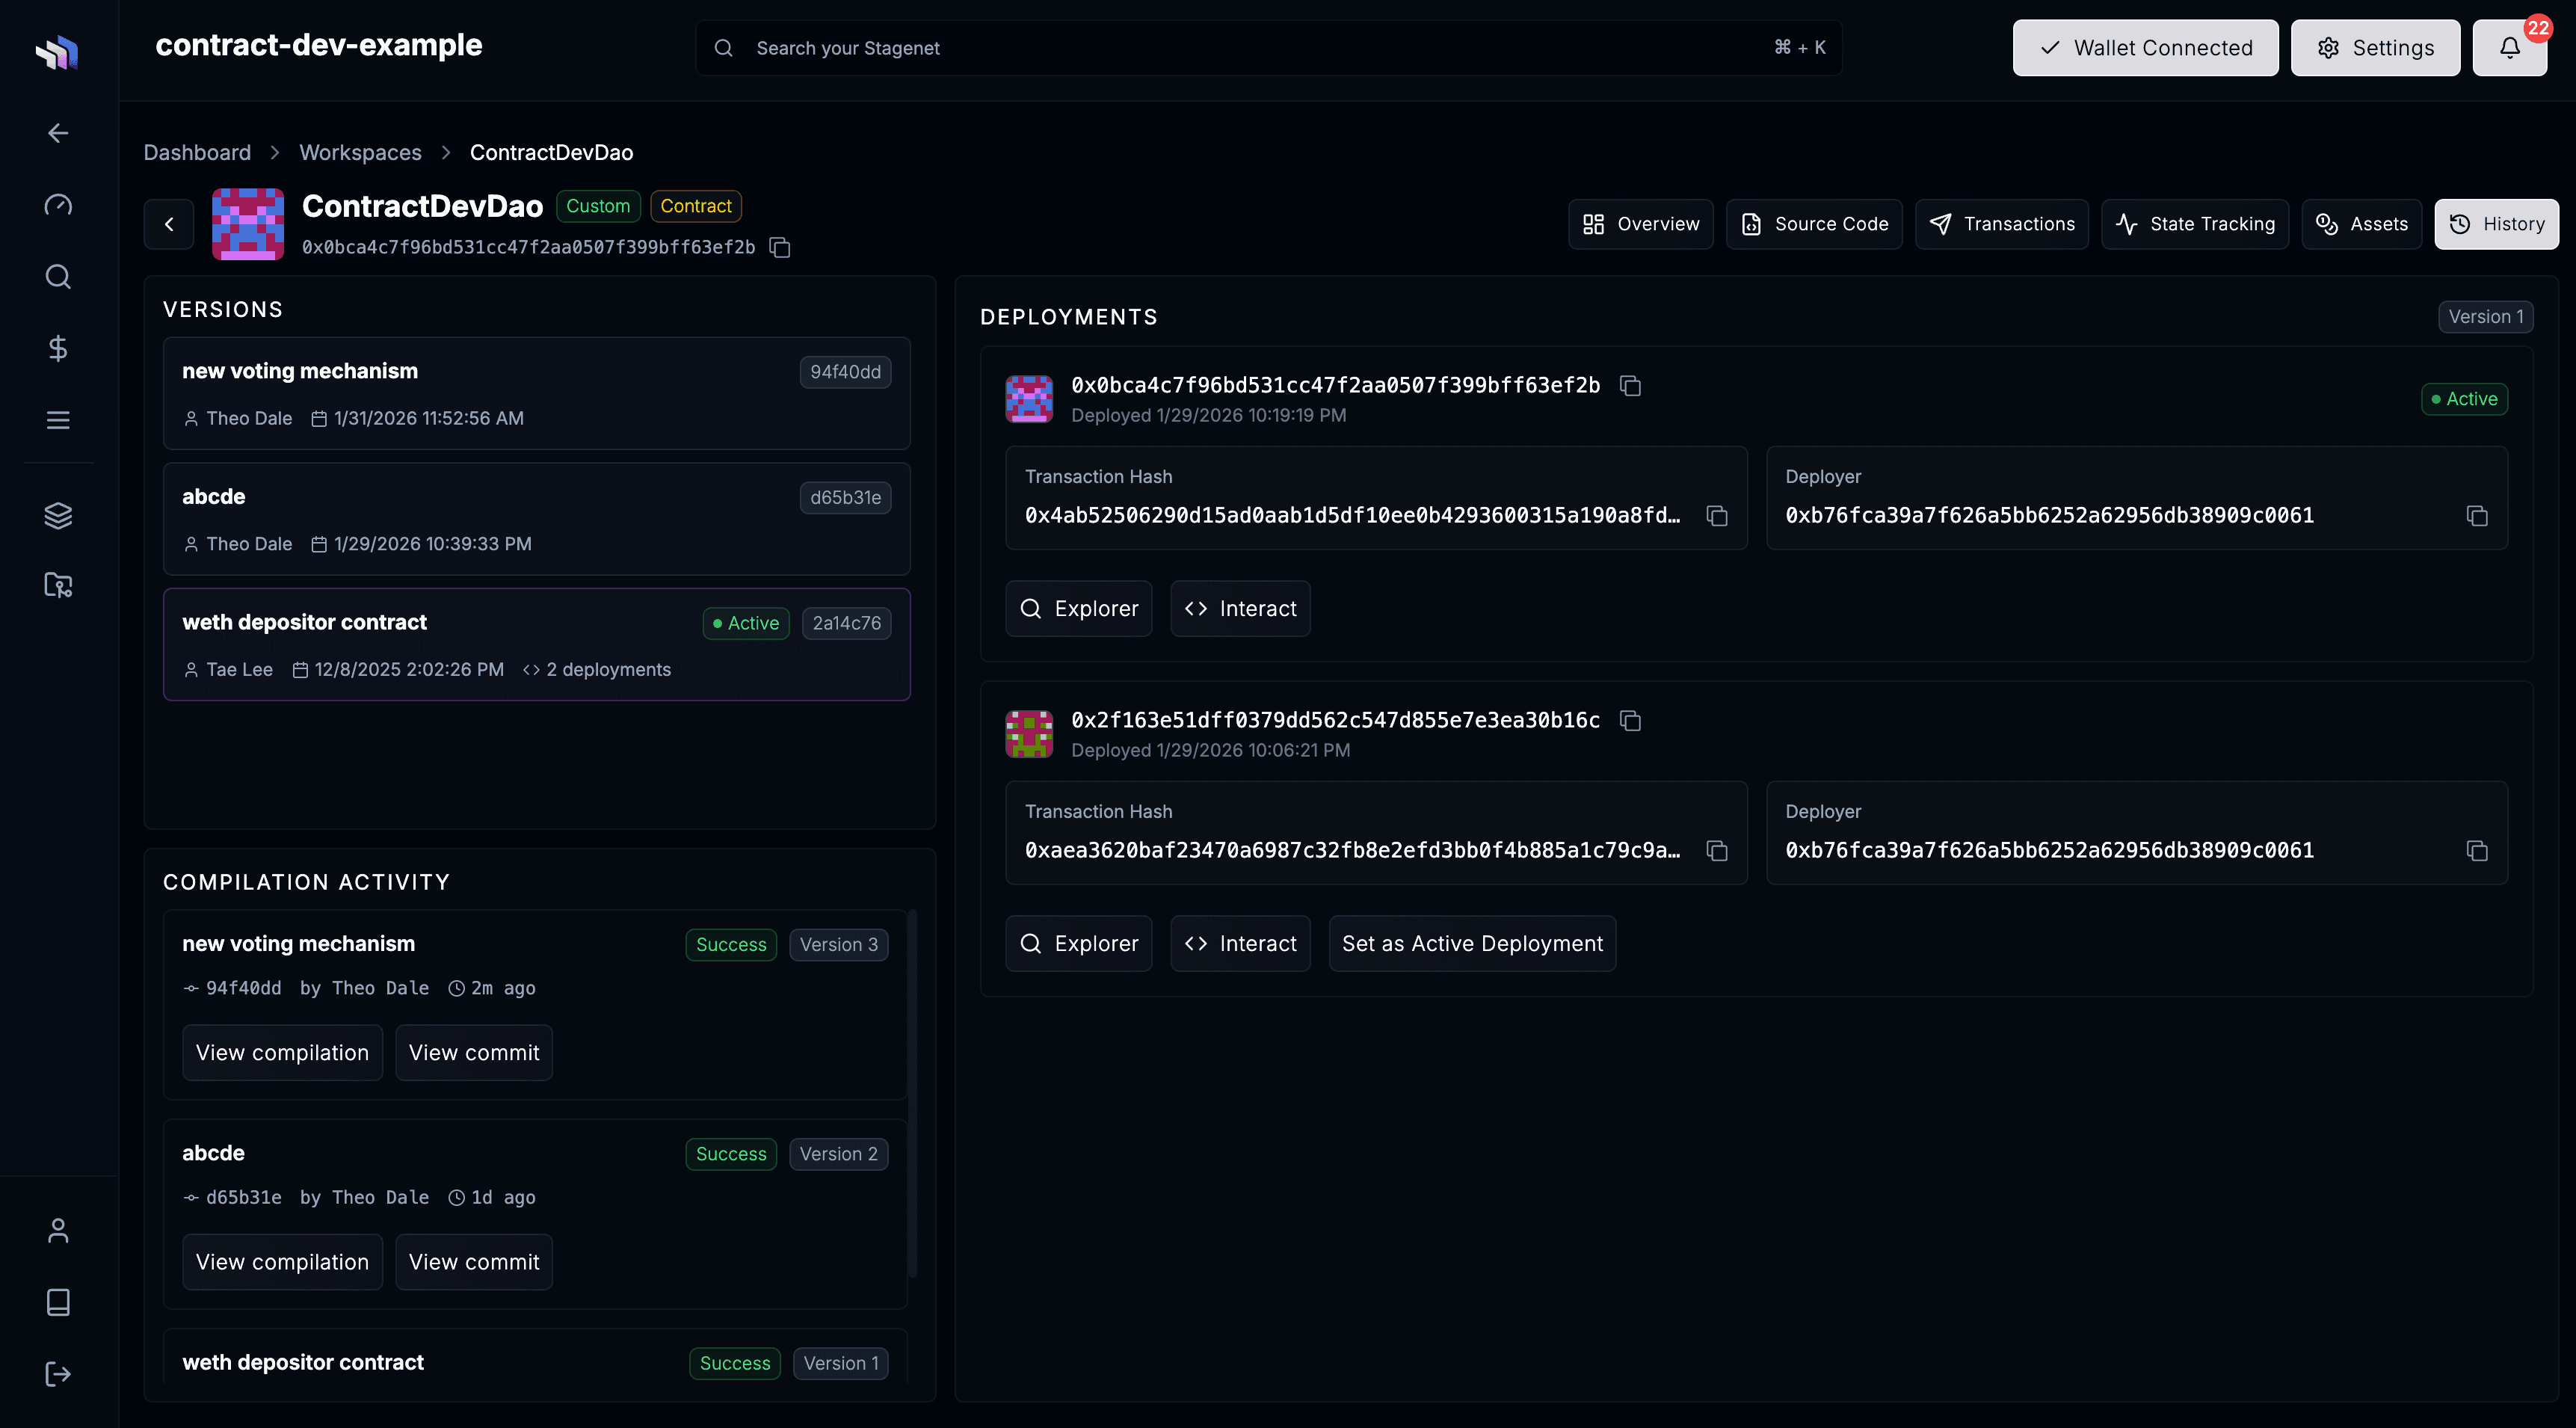
You can browse a Workspace’s Contract Versions in its History View.
Next Steps
Your Foundry project is now fully connected to your Stagenet. From here, simply push updates to GitHub — new versions and deployments will flow automatically.
Explore the rest of the contract.dev platform: